This tutorial will explain how we can blur the background of any image or put the focus on specific area of the image by blurring the rest part of the image in Adobe Photoshop with some simple steps. This tutorial work with all version of Photoshop Like (7.0, CC, CS).
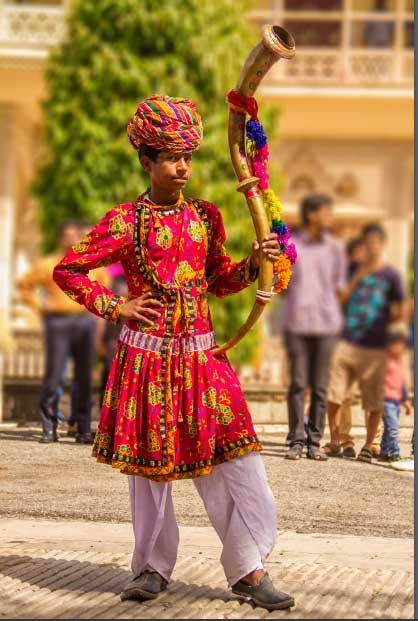
Step 1) First open Photo of which you want to blur the background
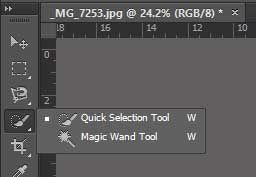
Step 2) Select the Quick Selection Tool from the Toolbar
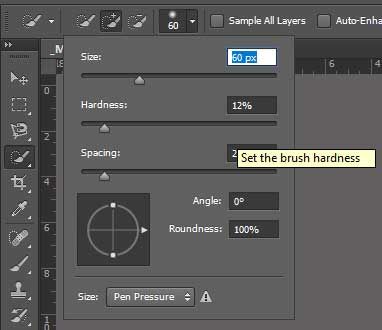
Step 3) Select the section of the image which you don’t want to Blur by adjusting the brush Size and Hardness of the selection tool
.jpg)
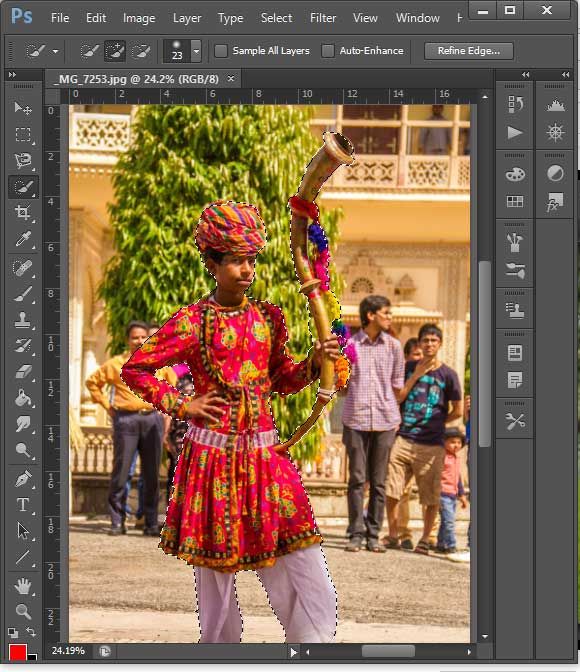
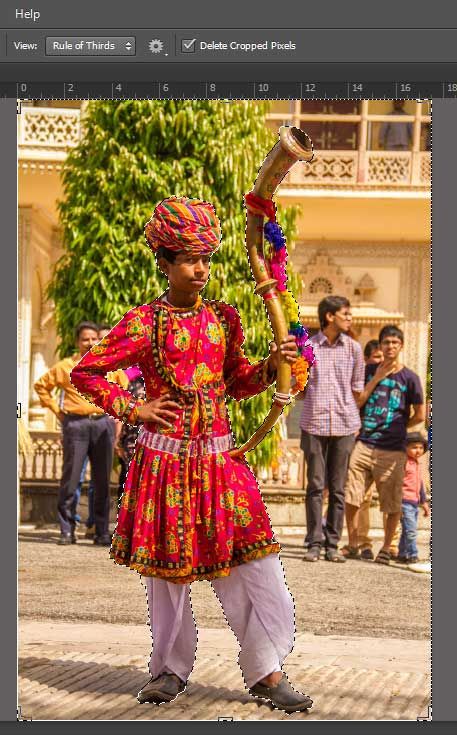
Step 4) Now we have selected the area in our image which we don't want to blur as shown in the image below.
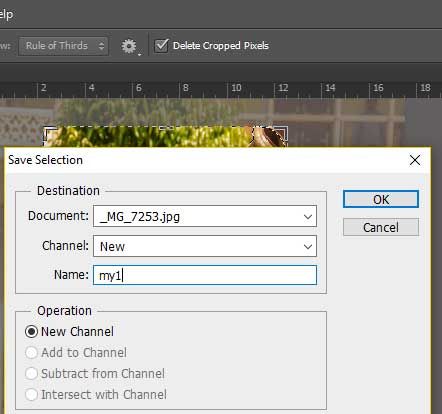
Step 5) Save Selection
Now we will save the selection for the future reference so that selection won't get lost.
Select >> Save Selection

Step 6) Invert the selection
Now we need to invert the selection because we want to blur the background therefore press (Ctrl + Shift + I). You will see the outer area got selected
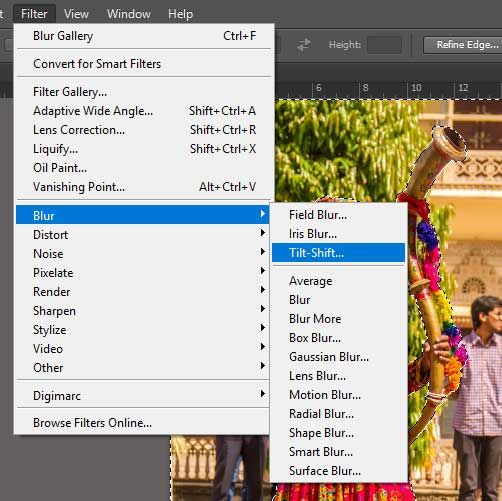
Step 7) Blur the Background Image
Filter >> Blur >> Tilt-Shift
Step 8) Now in the blur window you will see that the center area is not blurred so we will move the center of the blur to bottom of the image so that it will look real
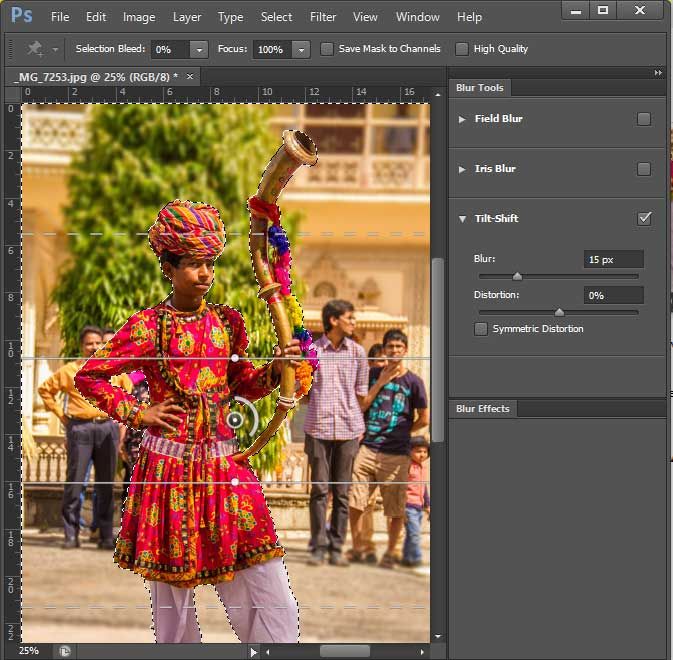
Step 9) You will see that the area where the foot touches the ground is not blurred and as we move upward the intensity of blur increases. This will give a real look that Photograph is taken from a High-end Lens.

Final Image