All set for an online office meeting? Or is it time for you to binge-watch your favorite Netflix series? As you are all set and connect to the internet, you suddenly see this message –
Windows has detected an IP address conflict
Wait, what happened? Your laptop and smartphone may be connected to the same network, but nothing works!
To know more about the error, let us first know what an IP address is.
What is an IP Address?
An IP address or Internet Protocol Address is an address that uniquely identifies your computer when connected to a network. This address allows the system to be connected to other devices on the networks. For example, 506.457.14.512 is an IP address. Devices connected to a network have different IP addresses.
What is the “Windows has detected an IP address conflict” issue?
If you are facing this error, this means that there are more than devices on the network that may be using the same IP address. As these addresses are supposed to be unique, when two devices share the same, the network can differentiate between them. This raises the error.
This may be due to an issue in your router or your PC configuration settings. You have to fix it before re-staring normal internet activity.
How to Resolve the IP Address Conflicts Error?
The basic step to fix this problem is to reboot your system. If the problem still persists, there are other steps such as restarting your router and refreshing the IP address. We will talk about the following possible solutions to this problem in the next section.
- Restart Your Router
- Restart your Network Adapter Connection
- Changing your Router’s IP Address
- Release and Renew your IP Address
- Remove your Static IP
- Disable IPV6
- Update your Network Driver
- Close the VZAccess Manager Properly
Solution 1: Restart your Router
The first step has to be restarting your router. As your router assigns IP addresses to the devices connected to the network, if it fails to do so, this error pops up. So, a simple reboot might do the trick.
Two ways to do this –
- Visit the administrator management page (often at 192.168.0.1, 192.168.1.1, or 192.168.11.1). The go-to the Management section and click Reboot
- Turn off the router, wait for a couple of minutes and turn it on. Wait again for a few minutes and connect it to a device
Note: It is recommended that you start with this solution. If things don’t work out, continue with the other steps as we have arranged below.
Solution 2: Restart your Network Adapter Connection
The network adapter in your system helps to connect it to a network. This can be a wireless adapter or a USB based adapter. When facing the IP address issue, you can disable and re-enable the adapter to fix the problem.
The steps below will help you –
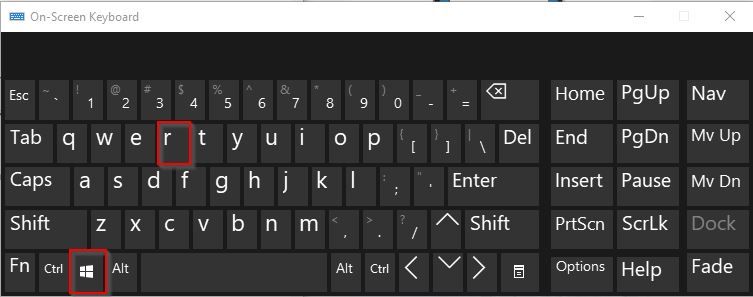
- Press Window+R on your keyboard to open the Run dialog box
-
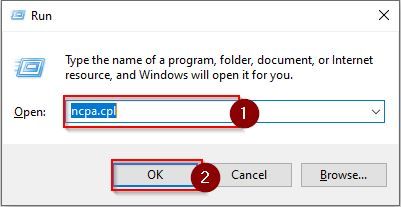
Next, type ncpa.cpl in the dialog box and press Enter or click OK.
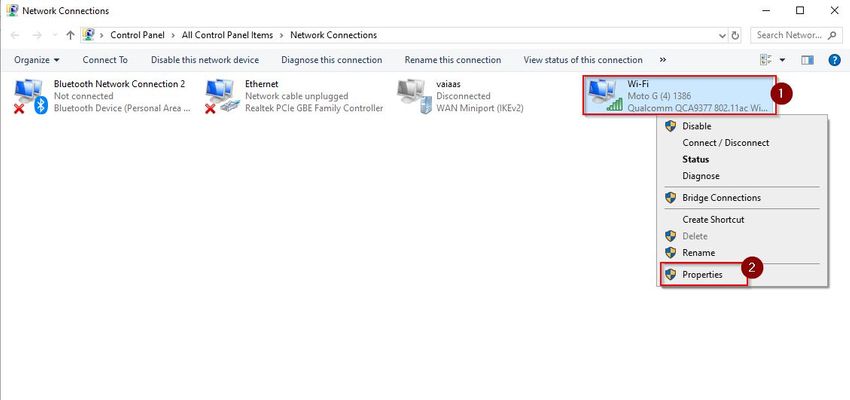
- Now right-click on your Network Connection and click Disable
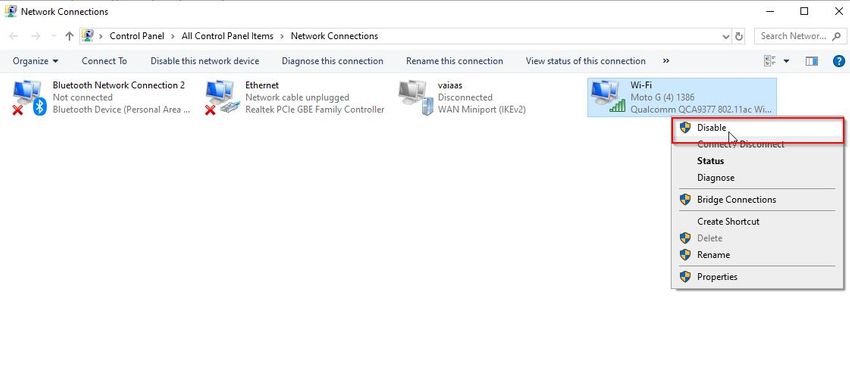
- Next again right-click on your Network Connection and click Enable

Now restart your computer and check if the IP conflict issue has been resolved.
Solution 3: Changing your Router’s IP Address
If your configuration settings aren’t correct, you might face the IP address conflict error. A good way to fix this by changing the IP address of your router.
For this, please follow the steps below –
- In your browser, type in the manufacturer’s default IP address. Then login using your username and password
- Next, go to the Basic setup tab
- Next, you need to change the last two digits of your IP address
- Now, click Apply and reboot your router
- Check if the error still exists
Solution 4: Release and Renew your IP Address
Releasing and renewing the IP address is a good way to solve connectivity issues. By doing so, you will be forcing your system to remove the current IP address and reassign a new one. But you need to have a local user account with administrative permissions to successfully do this.
Please follow the steps below –
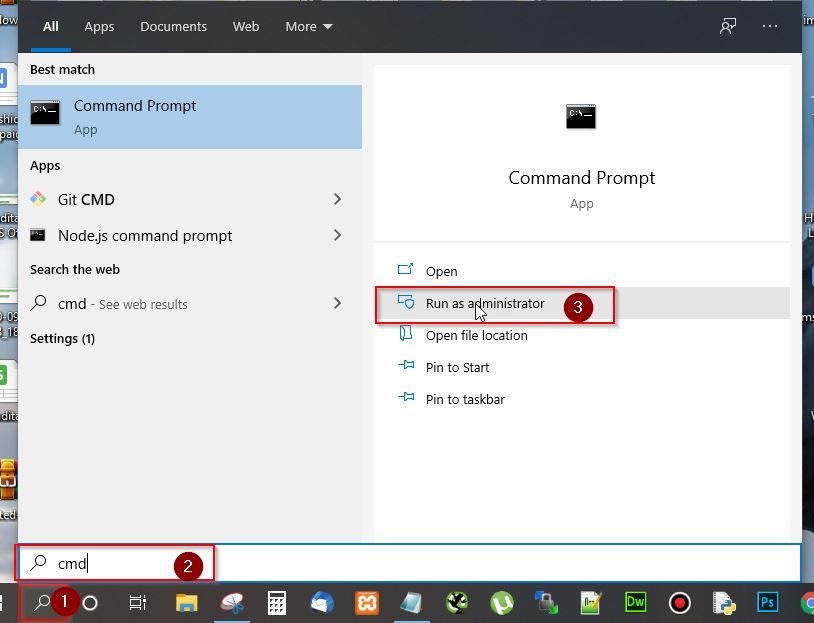
- Open the window search box, type CMD and click on Run as administrator
- Next in the command prompt type the following commands and make sure to press enter after each command
ipconfig/release

ipconfig/renew
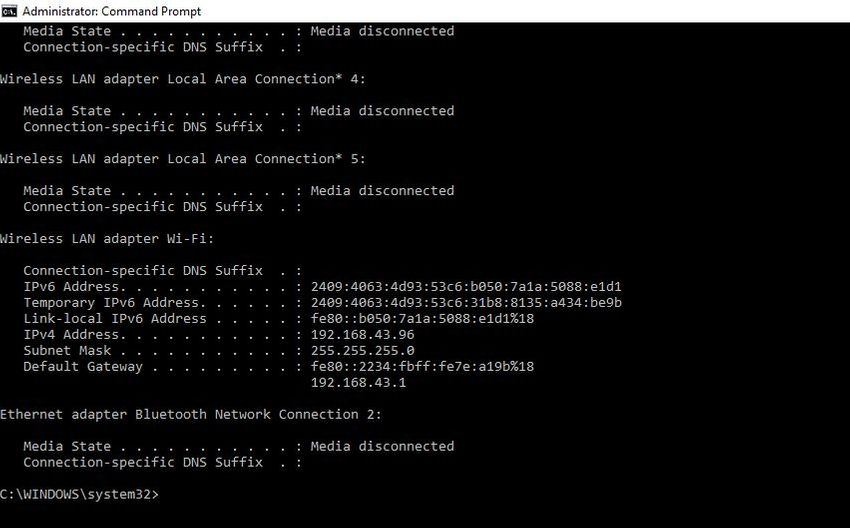
- Next, exit the CMD and check if the error hs been resolved.
Solution 5: Remove your Static IP
Some users prefer using a static IP address for their devices. This is an easy way for them to find a specific device on their network. A static IP address means that it was configured and entered manually by the user into the system.
However, if you set a static address, it is possible that another device has the same IP address, thus causing IP address conflict to occur. To fix the Windows has detected an IP address conflict message, you need to make sure that your device is using a dynamic IP address.
Please follow the steps below to remove your static id –
- Press Window+R on your keyboard to open Run dialog box.

- Next in Run Dialog box type ncpa.cpl and press Enter or click OK.

- Now right-click on your Network Connection and select Properties

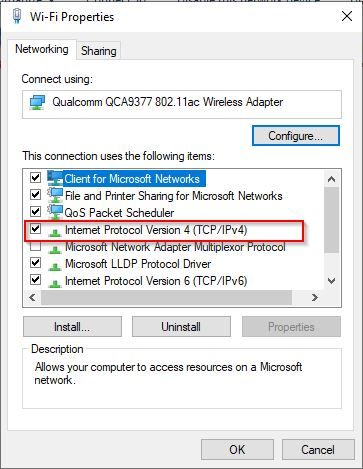
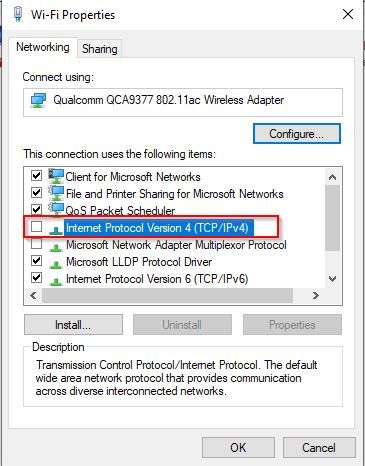
- Next double click on Internet Protocol Version 4(TCP/IPv4).
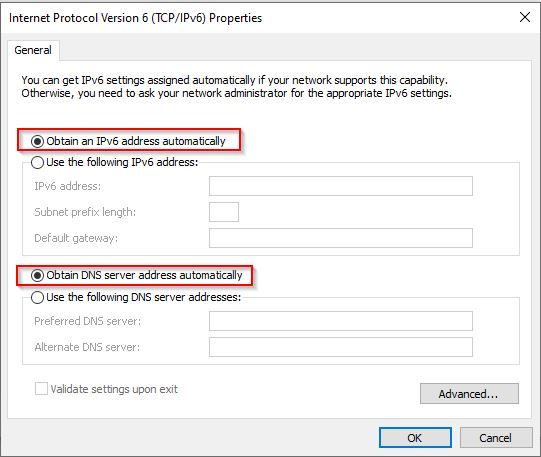
- Now tick/select Obtain an IP address automatically and Obtain DNS server address automatically. Then, click OK
Now reboot your computer and check if the problem still persists or not.
Solution 6: Disable IPV6
IP addresses are of 2 types – IPv4 and IPv6. As IPv6 is the latest technology, some devices are not yet compatible with it. So, this can lead to IP address conflicts. Thus, a clever way to deal with this is by disabling the IPv6.
Please follow the steps below –
- Press Window+R on your keyboard to open Run dialog box

- Next in the Run Dialog box type ncpa.cpl and press Enter or click OK

- Now right-click on your Network Connection and select Properties
- Next un-check the Internet Protocol Version 4(TCP/IPv4) to disable the IPV6 IP address
You can then restart your computer and check whether the issue still pops up.
Solution 7: Update your Network Driver
Another way to avoid "Windows has detected an IP address conflict" is by regularly updating the network card drivers.
There are various ways to update your network drivers –
- Manually Update via Official Vendor's Website
- Using In-built Device Manager Tool
- Using Third-Party Tool
Manually Update Your Network Driver
Please follow the steps below
- Go the official vendor's website of your network driver
- Search for the latest drive supported by your system
- Download it and install it on your computer
Note: To update your network driver manually you must know the exact model of your network card driver
Update Network Driver using In-built Device Manager Tool
Please follow the steps below –
- Press Windows + X on your keyboard
.jpg)
- Next click on Device Manager
.jpg)
- Now in the Device Manager menu, expand Network Adaptors and select your network device
.jpg)
- Right-click on your network device and select Update Driver
.jpg)
- Next, let the device manager automatically search for updated driver or latest software for your device online
.jpg)
- At last, install the updated driver on your system
Update Network Driver using a Third-Party App
Third-party applications such as Driver Easy or Driver Booster can be used for updating the network drivers. These are easy to download, user-friendly and are usually free.
Note: Before using these applications, make sure that they are safe. This is because many such applications may include spyware or malware which will get installed in your system. Research thoroughly about them and read reviews before using third-party apps.
Solution 8: Close the VZAccess Manager Properly
The VZAcess manager is popular software that is used for connecting to the internet using National Access and Mobile broadband, on your smartphone. But some users have complained that the IP address conflict message appears after disconnecting from VZAccess Manager.
This may occur if you do not disconnect from the software and close the app. So, after you have reconnected again, the error may pop up again.
To fix this, disconnect the VZAccess Manager and close the app properly. Then try reconnecting again. The error message is likely to leave you for good this time!
Conclusion
We hope that the methods described above will help you get rid of "Windows has detected an IP address conflict" error one and for all. If you are still facing problems, contact a network administrator or a tech expert. Let us know about it all in the comments section below.