It is always crucial that you keep a backup of your important and sensitive data including files, folders, pictures and documents. You always have to be on your toes when it comes to data, so that a system hack or a hard disk crash won’t hurt you. Google Drive and Dropbox are great options for saving your data.
But in case you want to save website code and database, Amazon S3 is one of the best storage solutions at present.
In this tutorial, we will learn how to keep a daily backup of code and database of your website to Amazon S3 Bucket.
What you will learn here –
- Creating a User in Identity and Access Management (IAM) and give full rights to S3 bucket
- Installing an AWS CLI
- Creating an S3 Bucket
- Creating a Backup file
- Adding a file in crontab
Create User in Identity and Access Management (IAM)
An AWS IAM allows you to access and use AWS resources securely. An AWS IAM user represents an entity that communicates with AWS.
Follow these steps for creating an AWS IAM User –
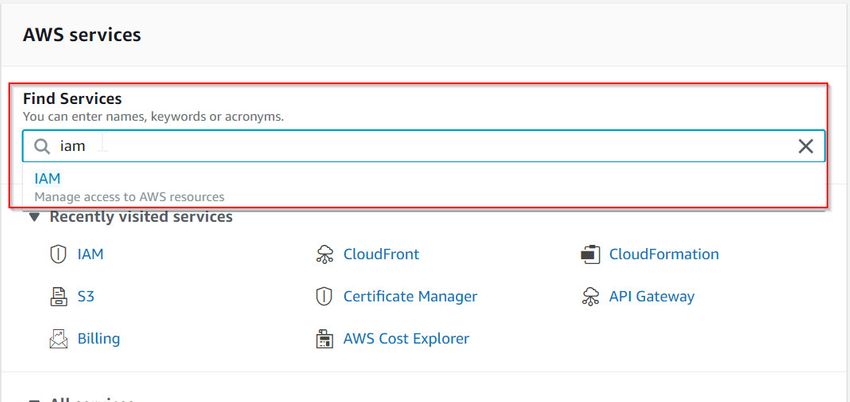
- Log in to the AWS console. This is Amazon’s web-based portal that is used for managing your account, discovering new services and building applications
- In Find Services, search for IAM
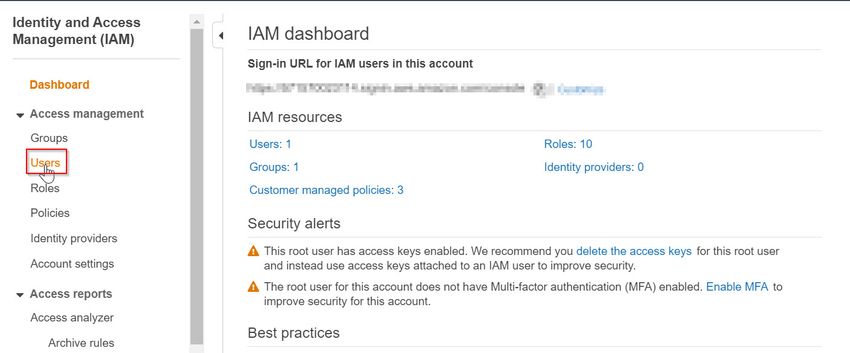
- On the left-hand side, under the Dashboard panel, click on Users
- Next, in the Add User screen, enter your preferred user name in the box provided
In the Select AWS Access Type section, tick the checkbox Programmatic Access. This allows you to perform actions on AWS resources
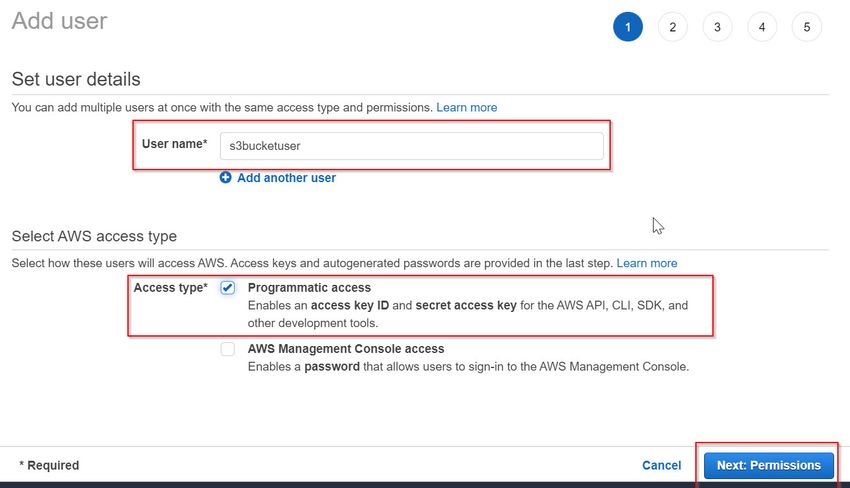
- Click on the Next: Permissions button
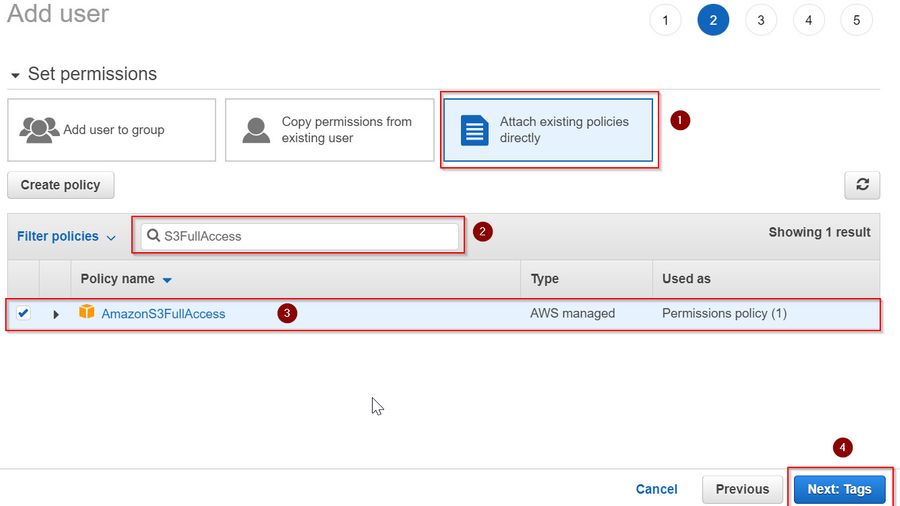
Under Set Permissions, click on Attach existing policies directly. This will show you the existing policies that you can attach to the user
.jpg)
- Then, search for the policy AmazonS3FullAccess in the search box. This allows you to read files from the S3 bucket and write it to another or the same bucket
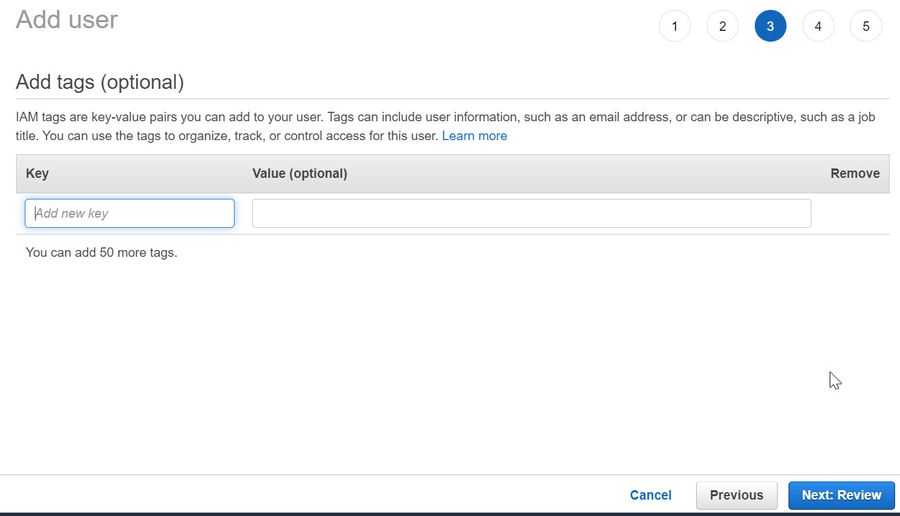
- Tick on the Policy name checkbox and hit Next: Tags
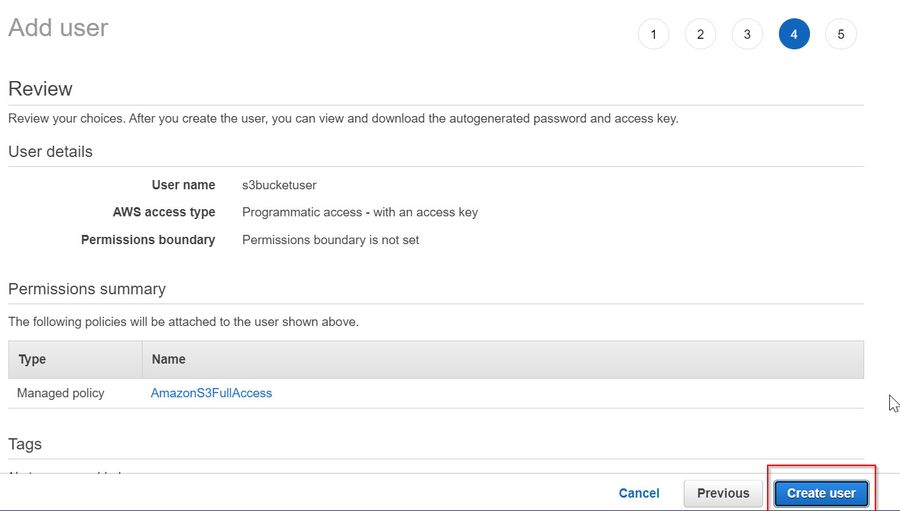
- Click on Next: Review. In the next Review screen, you will see all the user details which you have specified
- Click on Create User to create your user profile
- To see the secret access key, click on Show
.jpg)
- Click on Download.csv to download the CSV file and save it. This file contains the user access key ID and secret access key, which you will need to use the AWS API
Install AWS CLI
Now that we have successfully created an IAM user, we have to install the AWS CLI (Command Line interface). This tool lets you connect to the Amazon Web server and use/ configure AWS services.
Steps –
- Connect to the S3 server through Putty, a terminal emulation software
- To check if AWS CLI is installed on your system, just type - aws
- If the program 'aws' is currently not installed, you can install it by typing:
sudo apt install awscli

- $sudo apt install awscli. This will install AWS CLI on your system
- Now we need to configure it. Type the following code
$ aws configure
Output:
AWS Access Key ID [None]: XXXXXXXXXXXXXXXXX
AWS Secret Access Key [None]: SSSSSSSSSSSSSSSSSSSSSSSSSSSSSSSSSSSS
Default region name [None]: ap-south-1
Default output format [None]:
Explanation
Here, after executing the $aws configure command, you will be asked to fill in some details. These are your Access Key ID and Secret Access Key, which you saved in a downloaded csv file earlier.
Then you have to enter the default region name. You can Google “Amazon region code list” to find it. Insert it in the CLI. We are selecting ap-south-1 here for Asia Pacific (Mumbai).
You can leave the Default output format as it is.
AWS Region list
From this region list you can check your region code we are using India Mumbai
https://docs.aws.amazon.com/powershell/latest/userguide/pstools-installing-specifying-region.html
ap-south-1
$ aws configure
Output:
AWS Access Key ID [None]: XXXXXXXXXXXXXXXXX
AWS Secret Access Key [None]: SSSSSSSSSSSSSSSSSSSSSSSSSSSSSSSSSSSS
Default region name [None]: ap-south-1
Default output format [None]:
$aws --version
To check you can connect to the s3
$ aws s3 ls
All your S3 buckets will be listed using this code.
Create an S3 Bucket
After successfully installing the AWS CLI, it’s time to create our S3 bucket. An S3 (Simple Storage Service) bucket is an AWS resource that acts as a folder to store data and objects. We will store our website code and database information in this S3 bucket.
Steps –
- Login to your AWS Console. Then, Navigate to the S3 Bucket.
- Then, click on the Create bucket button as given below

- On the Create Bucket screen, add a bucket name and select Region
- Click on the Create, this will create your bucket


- Your bucket is created with No public access
As the installation process is completed, now you have to create a Linux script file which will take a backup of your code & database. It will be saved to your S3 Bucket
Follow the steps below –
- Login to your Server through Putty or SSH
- Now create a backup.sh file under /opt/backup/ location
- You can use another location also.
To create a backup folder under /opt/ folder, type this code –
$cd /opt/

$sudo mkdir backup
This will create a folder backup under /opt/ folder
- Now you have to create a backup script.
Suppose the website name is, “mysite.com”. And, the folder address is /home/mysite/htdocs/. The database name is mysite.
You might want to take the backup of /home/mysite/htdocs/ and all the code residing there.
So, to create a backup of the code and the database, follow the code given below –
$sudo vi backup.sh

#! /bin/bash

# Set the date format, filename and the directories where your backup files will be placed and which directory will be archived.

NOW=$(date +"%Y-%m-%d-%H%M")

BACKUPDIR="/opt/backup"

# mysite.com

# Create code backup

# Zip code folder

tar -cvzf $BACKUPDIR/mysite_code$NOW.tar.gz /home/mysite/htdocs

# Copy zip file to S3 Bucket

aws s3 cp $BACKUPDIR/mysite_code$NOW.tar.gz s3://mysites-web-db-backup/

# Delete zip file

rm $BACKUPDIR/mysite_code$NOW.tar.gz

# Create Databse backup

# Zip code folder

tar -cvzf $BACKUPDIR/mysite_code$NOW.tar.gz /home/mysite/htdocs

# Copy zip file to S3 Bucket

aws s3 cp $BACKUPDIR/mysite_code$NOW.tar.gz s3://mysites-web-db-backup/

# Delete zip file

rm $BACKUPDIR/mysite_code$NOW.tar.gz

# Create Databse Backup

mysqldump -uroot -ppassword mysitedb > $BACKUPDIR/mysite_db$NOW.sql

# Zip Mysql databse file

tar -cvzf $BACKUPDIR/mysite_db$NOW.tar.gz $BACKUPDIR/mysite_db$NOW.sql

# Copy mysite Databse backup to S3 Bucket

aws s3 cp $BACKUPDIR/mysite_db$NOW.tar.gz s3://mysites-web-db-backup/

# Delete databse zip file

rm $BACKUPDIR/mysite_db$NOW.tar.gz

# Delete Databse sql file

rm $BACKUPDIR/mysite_db$NOW.sql
Explanation
The aim of the script given above is to take the backup of the website code and database every day at a specific hour. So, at first, the date format is assigned to a variable called NOW. You’ll need this later. Then the backup location is assigned in a variable called BACKUPDIR.
Then, the tar –cvzf command is used to create a zip folder for your backup. Then, the contents of the file are copied into an S3 bucket using the aws s3 cp command. The original file is then deleted using the rm $BACKUPDIR/mysite_code$NOW.tar.gz command, as it is already copied into the bucket.
The mysqldump command is used to create a backup file for the database contents. A zip file is created and copied into an S3 bucket. The original database file is removed.
Now to execute this file, we need to give it execute rights. But its file format needs to be specified properly. Use this code –
$sudo vi backup.sh

:set ff=unix
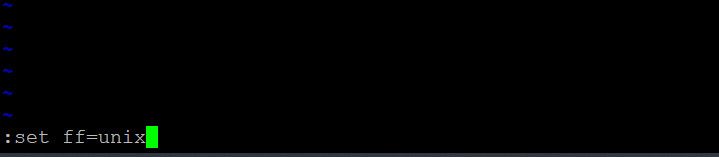
This opens the file in the vi editor. The code :set ff=unix saves it as an Unix file.
After that, type in this code –
$chmod u+x backup.sh
The $chmod is used for granting access. Here, u+x means the file can be executed by the user.
Adding file in crontab
As we want to perform the backup daily at a particular time, we will use the crontab command. The crontab –e command lets you create and edit your crontab file.
Each crontab entry has 6 fields, in this order –
minute(s) hour(s) day(s) month(s) weekday(s) command(s)
The code below runs this script every morning at 3 AM.
$sudo crontab -e

0 3 * * * /opt/backup/backup.sh
Conclusion
We hope this tutorial will come in handy when you want to store your precious website and database information. Even if you save this data to an external storage drive, using Amazon S3 is still a more secure way.