Is your PC stuck with the message “Getting Windows ready. Don’t turn off your computer” on the screen? Users of Windows 10 or 8 often face this issue while turning off, turning on or restarting their system. Some users get stuck with this problem for hours before their PC gets back to work.
Why does this happen?
The problem can arise for a number of reasons. The updates may be large, so they take more time to install. The update files may get corrupted, they may not have downloaded properly or may be incompatible with your system. There may also be a software bug causing the issue.
How to Fix this Problem?
The “Getting Windows ready” dialog box appears in Windows 10 when your OS version is updating itself. This means either the upgrades are being installed or are being downloaded. So, if you are stuck here, then the first thing to do is to disconnect the internet or switch off your router. Wait for a few minutes to see whether the problem goes away.
The problem may be irritating when you have work to do. Here are some methods to get you out of this trouble –
- Wait for Some Time
- Hard Reset Your Computer
- Perform Windows 10 Startup Repair
- Run System File Checker
- System Restore or System Image Recovery
- Re-install Your Window System
- Reset Your Computer
- Uninstall recently installed software in Safe mode
Method 1: Wait for Some Time
The first step is to wait until the process is over. As the upgrades are being downloaded and installed, it will take some time. So, wait until these tasks are over and your system will boot normally.
But if more than 2 hours have passed and you still face the dreaded Getting Windows ready screen, move on to the other steps.
Method 2: Hard Reset Your Computer
Hard resetting the system is forcefully shutting down the PC without damaging the data. It might help in getting out of this issue and if some of your files are corrupted.
Note: You have to do it at the right time. To determine this, look at the HDD activity lamp at the side of your laptop or on the PC CPU. If it is not blinking, it means that the upgrade process is over and you can turn off your system.
Follow the steps given here to perform a hard reset –
- Press the power button for 30 seconds to turn off the system
- Unplug all devices such as pendrive, headphones or external hard drive
- If you are using a laptop, unplug its battery
- Then, press the power button again and hold it for 30 seconds to drain the remaining charge
- After that, unplug the power cable
- Put the battery and the power cable again back to their respective places. But don’t plug in any peripheral devices such as a USB drive
- Reboot your PC to see whether the problem has been resolved
Method 3: Perform a Startup Repair
If you still can’t reboot your system, you can perform a Windows startup repair. For this, you have to enter the Windows Recovery Environment (WinRE). Use the Windows installation disc to do it. Then navigate to the Advanced option and click on Startup Repair.
But if you are presented by messages such as "startup repair couldn’t repair your PC" or "automatic repair couldn’t repair your PC", try another method.
Method 4: Run the System File Checker
The System File Checker (SFC) is a functionality in Windows that helps you find and fix corrupted system files. If a Windows Resource Protection file is missing or corrupted, your OS might not work properly and crash. This might cause problems in updating too.
Follow these steps to run the SFC –
- Insert the Windows CD and boot your system
- Choose language and location. Then, click on Next
- Click on “Repair your computer” to launch the Repair tool
- Next, in the Choose an option screen, click on Troubleshoot
- In the next window, click on Advanced option
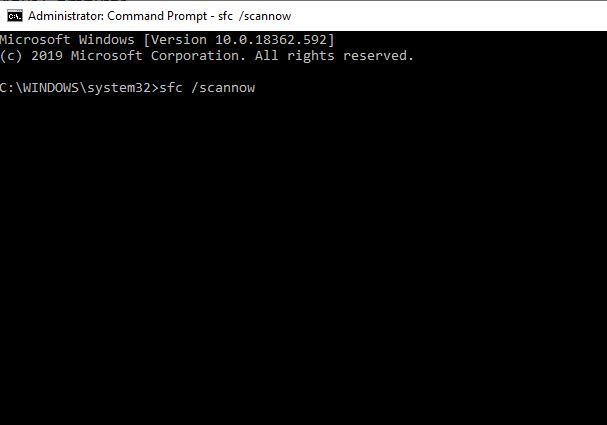
- Click on Command Prompt
- Type in the command “sfc /scannow”. Hit Enter
- After the process is over, close the command prompt
- Reboot your system and check for the error
Method 5: System Restore or System Image Recovery
You can use the System Restore option to restore your system to a previous version. For this, you will need a restore point or a restore image file that you might have created. This is how you can perform a system recovery when you are stuck –
- Go to Google search bar and type Microsoft Media Creation Tool. Click on the relevant result
.jpg)
- Download the Microsoft Media Creation Tool
.jpg)
- Install it and create a Windows installation media. This can be a CD or a USB drive
.jpg)
- Boot the system from that installation media
- Visit Choose an option > Troubleshoot > Advanced options > System Restore
- Follow the steps shown by the restore wizard
- You can choose System Image Recovery under the Advanced options if you have a restoration image
- You can restore the system using that image
Method 6: Re-install Your Windows
There are problems in life that cannot be fixed. The same may be the case for your PC! If all the methods described above haven’t worked, it’s time to change gears. You can perform a clean installation of your Windows OS to fix the issue for good.
Note: Before re-installing Windows, make sure all your data and files are backed up somewhere safe, such as an external hard drive.
Please follow the steps below to re-install your system –
- Go to Google search bar and type Microsoft Media Creation Tool. Click on the relevant result
.jpg)
- Next, click on the Download tool now option
.jpg)
- Create a Windows installation media using the tool (USB drive/ CD/ DVD)
.jpg)
- Next, boot your system from this media
- Set the time, language and keyboard method
- Click on Repair your computer
Then, just follow the instructions prompted on the screen in order to complete the process.
Method 7: Reset Your Computer
As a clean installation may be a tricky process, you can reset your system also to get unstuck.
Follow the steps given here –
- Insert the Windows 10 installation media and boot from it. You have to change the boot priority in your BIOS to achieve this
- Select the language and click on Next
- Go to Troubleshoot > Reset this PC > Remove everything
- Then, click on Only the drive where Windows is installed > Just remove my files
- Click on the Reset button to start the process
Method 8: Uninstall Recently Installed Software in Safe Mode
Last but not the least, if all the methods fail, you can just uninstall any software you have installed recently. Perform this in Safe Mode. Some antivirus software or CPU scanning software may always run in the background that may cause the “Getting Windows ready” issue.
Conclusion
If you keep on trying all of the methods described above, the ‘Getting Windows ready stuck’ error is bound to get out of way. But whatever you do, keeping a data backup and storing your important data securely is recommended. If you are still struggling with this issue, let us know in the comments section below.
FAQs
1. How to resolve the “Getting Windows ready” issue?
Perform these steps one by one –
- Disconnecting Internet Connection
- Wait for some time
- Hard Reset Your Computer
- Run System File Checker
- Perform Windows 10 Startup Repair
- System Restore or System Image Recovery
- Re-install Your Window System
- Reset Your Computer
- Uninstall recently installed software in Safe mode
2. How long do I have to wait if my system is stuck?
Initially, wait for 2 to 3 hours when the system gets stuck. If it doesn’t resolve, try the other troubleshooting options.
3. Why does Windows take so much time to get ready?
The process may take a long time as the OS is processing a lot of tasks at the same time. This can include downloading files, installing them, changing module and application settings. The time depends upon the number of programs already installed in your system.