What is OpenSSL?
OpenSSL is a single-system image clustering system that is open-source. It allows a group of computers to be viewed as a single colossal system, giving programs running on any one machine access to all of the cluster's resources. [It is the culmination of a long development process that began with the development of LOCUS in the early 1980s.
OpenSSL allows a group of separate computers (nodes) to be regarded as one massive system. Processes running on any node have full access to all node resources.
Functionalities can be automatically transferred from node to node to balance system utilization. Alternatively, the cluster might be set up so that each node has direct access to the file system.
Step 1 Download OpenSSL Binaries
Link to Download OpenSSL binaries files: https://sourceforge.net/projects/openssl/files/
In our article, we are downloading
https://sourceforge.net/projects/openssl/files/openssl-1.0.2j-fips-x86_64/
Step 2 Unpack OpenSSL Zip files
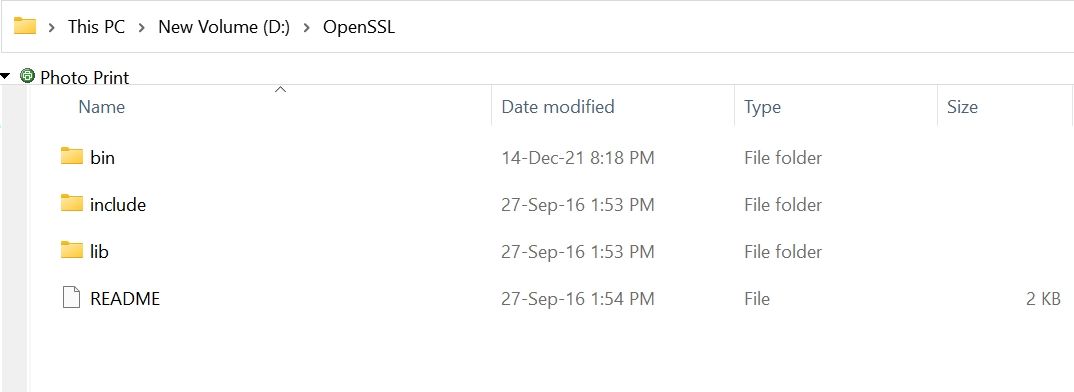
Unpack the content of (openssl-1.0.2j-fips-x86_64.zip) zip file into your desired location in our example we are using (D:\OpenSSL) folder
This comes with three folders (bin, include & lib) as shown in the image
Step 3: Set OpenSSL Path in Windows path
We have extracted OpenSSL files in directory D:\OpenSSL\bin
So our OpenSSL path is D:\OpenSSL\bin
Open explorer and right-mouse click on This PC icon as shown in the image
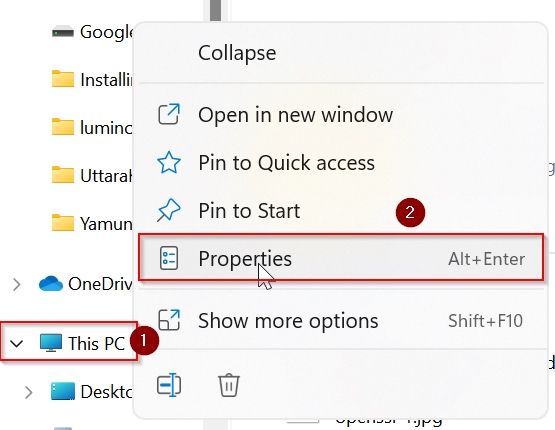
Under System About window click on the Advanced system settings button

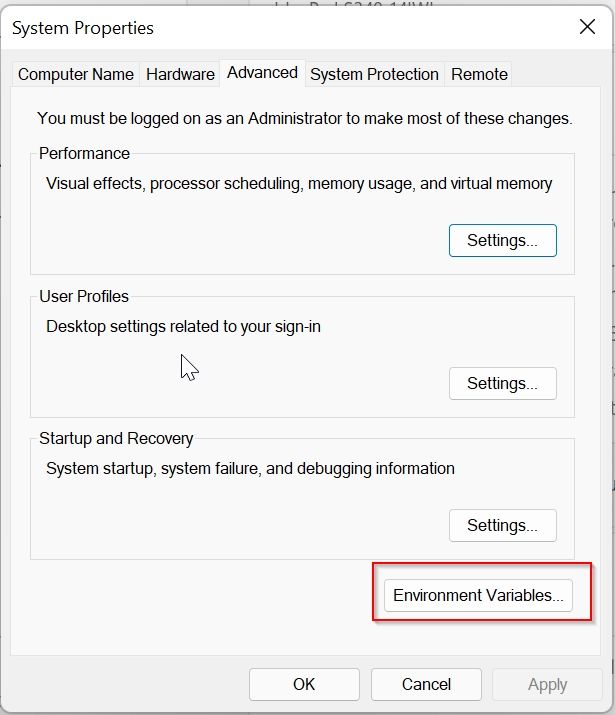
Under the System Property window click on the Environment Variables button
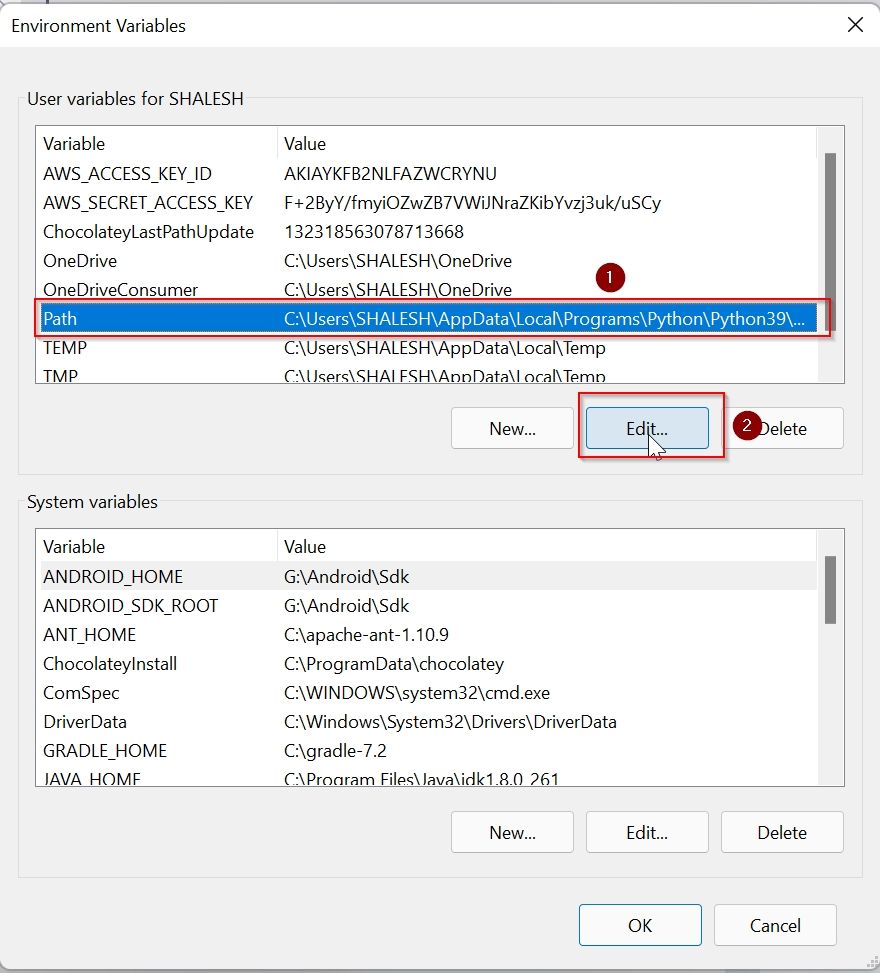
Under the Advanced Environment window select Path and then click on the Edit button
Under the Environment Variable window click on the New button
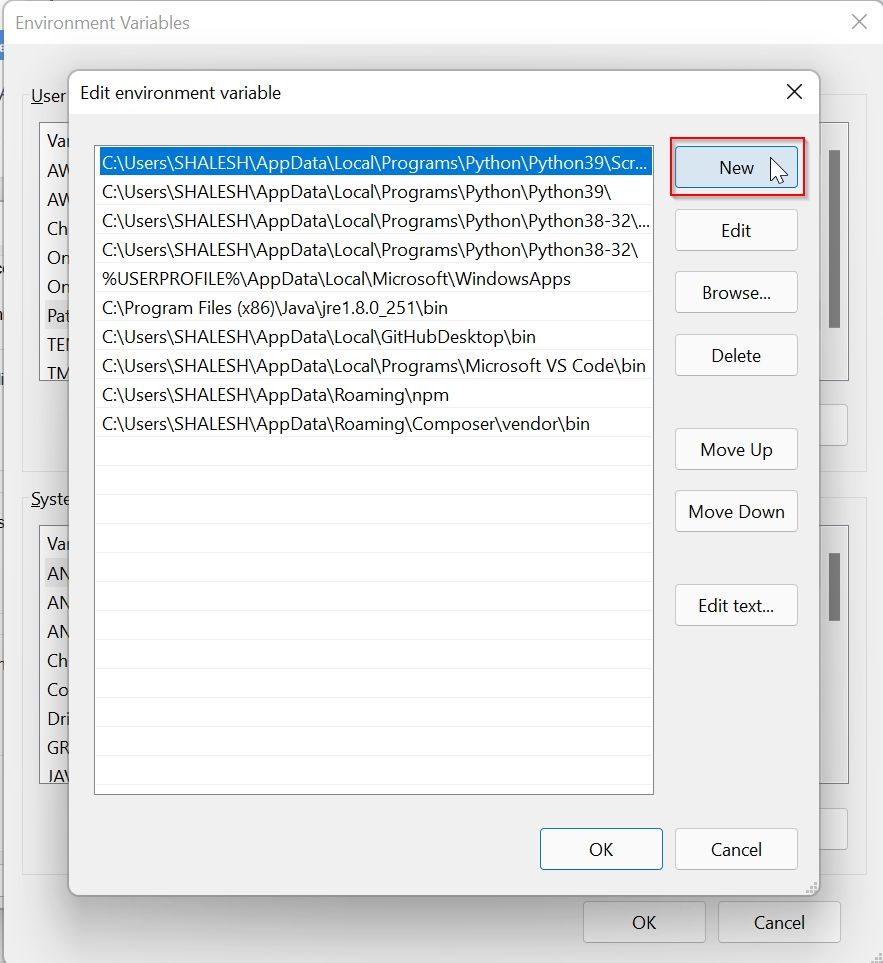
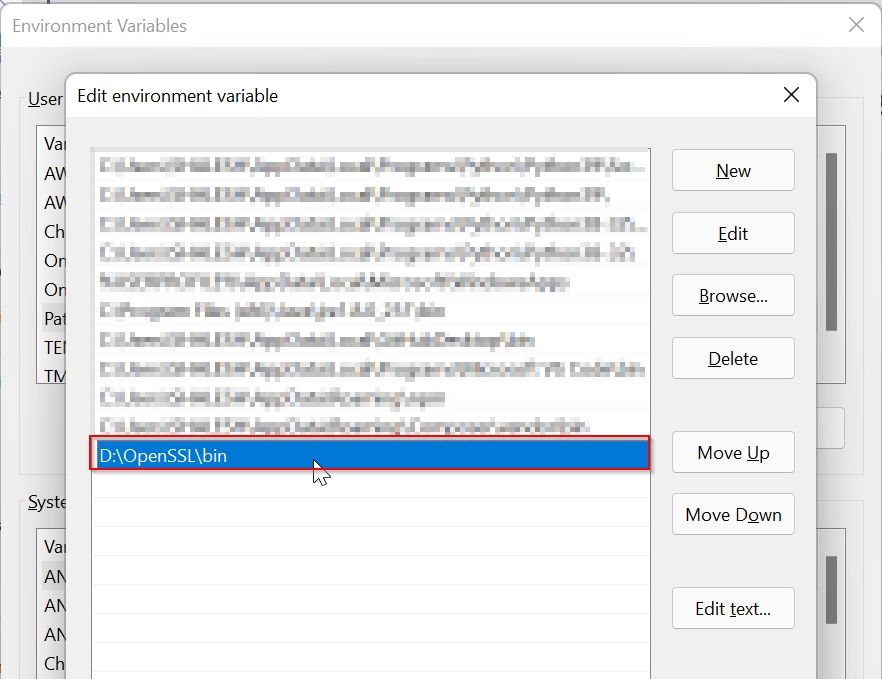
Paste the path of OpenSSL (D:\OpenSSL\bin) and click the OK button
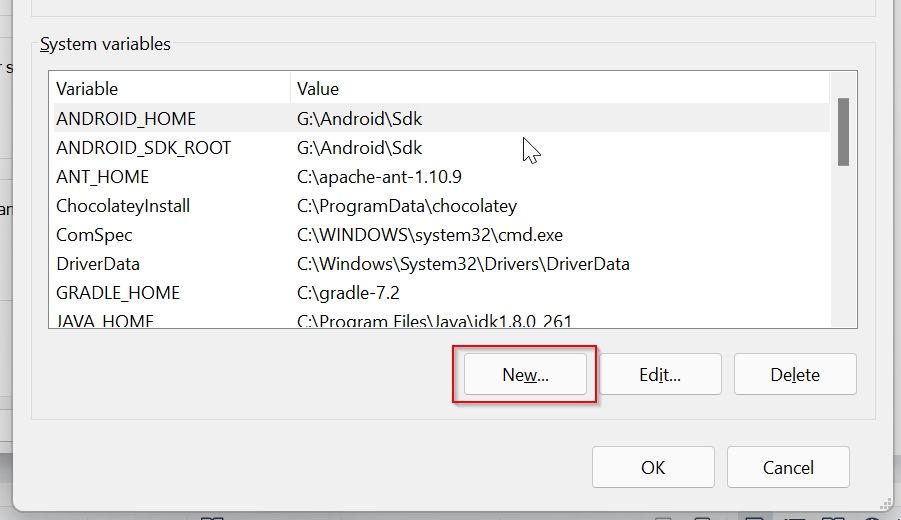
Step 4: Set System Variable for OPENSSL_CONF
Now to set system variable for OPENSSL_CONF
Click on the New button under the System Variable window
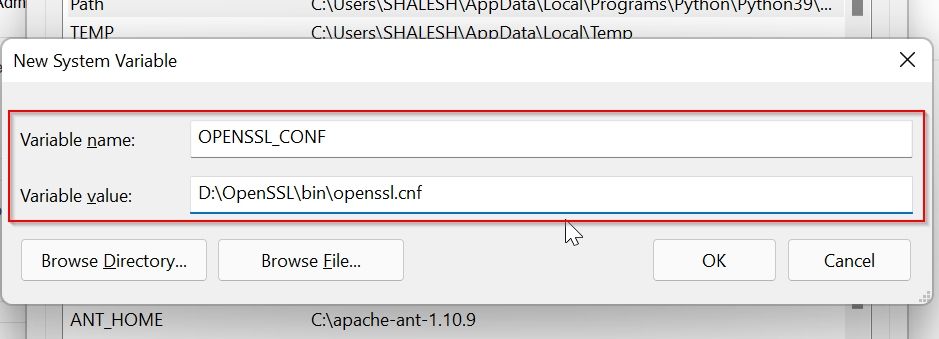
Now add system variable values as given, the path to your openssl.conf file location as shown below, and click on the OK button
Name: OPENSSL_CONF
Value: D:\OpenSSL\bin\openssl.cnf
Now you can see that the system variable is set

For window 10 and 11 you don’t have to restart your system to effect changes, else you need to restart the system
Step5: Test OpenSSL
To test OpenSSL installed properly open the terminal and check the OpenSSL version
cmd: openssl version
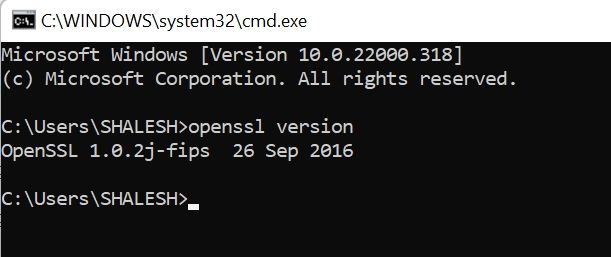
If it displays the OpenSSL version then OpenSSL is installed properly.
Important Commands for Open SSL
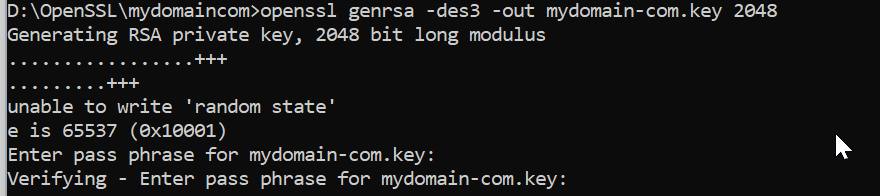
Creating a Private Key
Private Key is very important it is required for all operations in SSL, this Private key is required to create a CSR file.
openssl genrsa -des3 -out mydomain-com.key 2048
It will ask for the password, please keep the password in a safe place because it is required in many places.
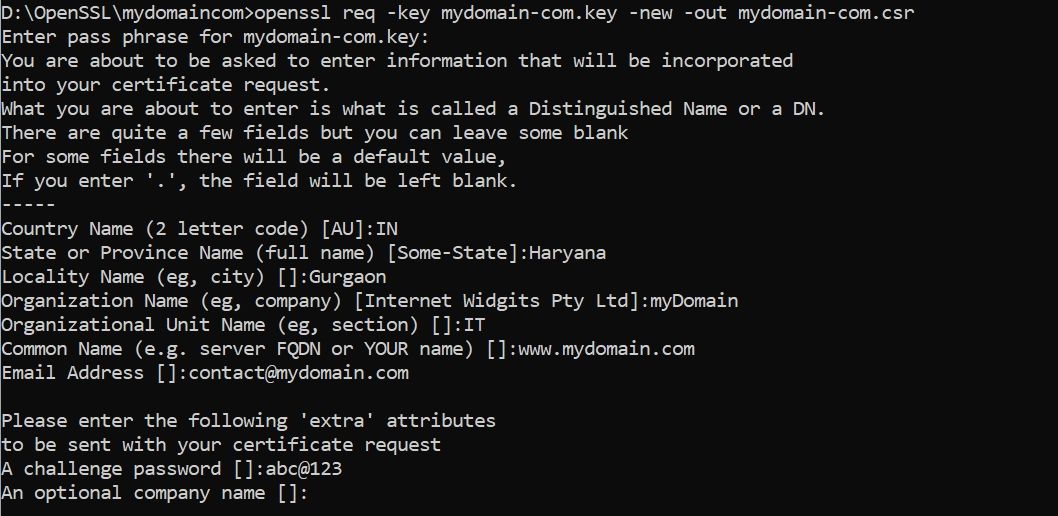
1. Create CSR Creating a Certificate Signing Request
CSR file is required to generate an SSL certificate.
This CSR file contains information about the certificate and private key
openssl req -key mydomain-com.key -new -out mydomain-com.csr
Information required by CSR:
Enter pass phrase for mydomain-com.key:
Country Name (2 letter code) [AU]:IN
State or Province Name (full name) [Some-State]:Haryana
Locality Name (eg, city) []:Gurgaon
Organization Name (eg, company) [Internet Widgits Pty Ltd]:myDomain
Organizational Unit Name (eg, section) []:IT
Common Name (e.g. server FQDN or YOUR name) []:www.mydomain.com
Email Address []:contact@mydomain.com
Please enter the following 'extra' attributes
to be sent with your certificate request
A challenge password []:
An optional company name []:
Important: Common Name is the Fully Qualified Domain Name for which you want an SSL certificate.
This CSR file is used by different SSL certificate companies to generate SSL Certificate
Generate Private key and CSR with Single command.
openssl req -newkey rsa:2048 -keyout mydomain-com.key -out mydomain-com.csr
Creating a Self-Signed Certificate
A self-Signed Certificate is an SSL certificate is generated by using your own private key, it is not used for commercial purposes because it shows a warning that says the certificate is not trusted.
So self-signed certificate can be used for development and testing purposes.
openssl x509 -signkey mydomain-com.key -in mydomain-com.csr -req -days 365 -out mydomain-com.crt

Convert CRT file to PFX file
The .pfx file is required to install an SSL certificate in the windows system, this file contains Private Key and SSL certificate.
openssl pkcs12 -export -out mydomain-com.pfx -inkey mydomain-com.key -in mydomain-com.crt
Generate SHA265 Key from .crt file
openssl x509 -in mydomain.crt -pubkey -noout | openssl pkey -pubin -outform der | openssl dgst -sha256 -binary | openssl enc -base64
Output:
XXXXXXxxXXXXXXXXXXXXXXXxXXXXxXXXX121XX=
Generate PF12 file .crt file
openssl pkcs12 -export -out yourdomain.com.p12 -inkey yourdomain.com.key -in yourdomain.crt -certfile CACert.crt
yourdomain.com.key: is the key file, it get generated when we create .CSR file
CACert.crt : root certificate, it comes with SSL certificate bundel file.
yourdomain.crt: is the main certificate file