Graphics has been a significant part of the computer for many decades now. Everything we use in the computer and almost every application we use utilizes graphics. Python is also a programming language that allows creating graphics-related programs. One of the most significant libraries that Python uses for developing graphics-related programs is PyOpenGL.
It uses the concept of OpenGL to that supports multiple platforms such as Linux, Windows, and macOS. In this article, you will learn about using OpenGL libraries like PyOpenGL to implement graphics within a Python program.
What is OpenGL?
OpenGL stands for Open Graphics Library, which is a cross-platform graphics programming library. It is supported by a wide range of programming languages, and its application programming interface (API) helps in rendering 2D and 3D vector graphics. This graphics library directly interacts with the graphical processing unit (GPU) for rendering vector graphics and hardware-accelerated graphics. OpenGL is much simpler than other graphics libraries. Without further ado, let us now start implementing the library from a basic example.
Installing OpenGL Library
To install OpenGL for the first time within your Python program, you have to use the pip (package)
Command to install PyOpenGL library:
pip install PyOpenGL PyOpenGL_accelerate
pip install pyopengl
pip install pygame
As this command installs the PyOpenGL library for you, you will receive a message:
Successfully installed PyOpenGL-3.1.0 PyOpenGL-accelerate-3.1.0
Let us now write a program to check whether the OpenGL components are working fine or not
import OpenGL.GL
import OpenGL.GLUT
import OpenGL.GLU
print("Imports successful!")
How PyOpenGL works?
PyOpenGL acts as a binding library for the Python program. It binds its values to the GLUT library and allows it to run on multiple operating systems like Windows, Linux, and Mac OS X. It interacts with the Graphical Processing Unit (GPU) to render vector images that provide us with a clear image or figure.
Elements of PyOpenGL and its functions:
The very first thing, we need to do is to create a window with the following properties.
- Height: 900px , Width: 700px
- Background Color: RGB (255, 0, 0), where 255 means the colors against the letter exist, and 0 means the colors against the letter does not exist.
- Window Position: (200, 100)
- Objects Color: RGB (0.2, 0.5, 0.4)
- Title: 'Provides the title of the code'
Creating two points with the given coordinates as parameters.
- P1 (100,100)
- P2 (300, 200)
- Point Size: 10px, where px stands for pixels
- Starting point; (100, 100)
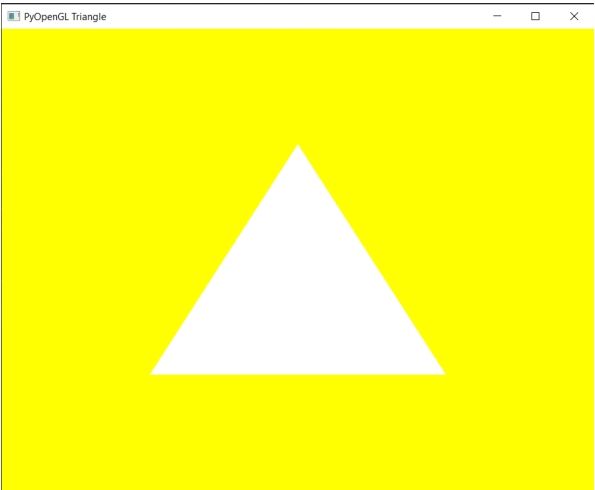
Use PyOpenGlut to Draw a Triangle:
Program:
import numpy as np
from OpenGL.GL import *
import glfw

glfw.init()
# creating a window size having 900 as width and 700 as height
window = glfw.create_window(900, 700, "PyOpenGL Triangle", None,None)
glfw.set_window_pos(window, 500, 300)
glfw.make_context_current(window)

vertices = [-0.5, -0.5,0.0,
             0.5, -0.5,0.0,
             0.0, 0.5,0.0]

v = np.array(vertices, dtype = np.float32)

# this will draw a colorless triangle
glEnableClientState(GL_VERTEX_ARRAY)
glVertexPointer(3, GL_FLOAT,0,v)

# this will set a color for your background
glClearColor(255, 180, 0, 0)

while not glfw.window_should_close(window):
    glfw.poll_events()
    glClear(GL_COLOR_BUFFER_BIT)
    glDrawArrays(GL_TRIANGLES,0,3)
    glfw.swap_buffers(window)

glfw.terminate()
Output:
Explanation:
First, you will have to import three different libraries using the import keyword. These are glfw, NumPy, and OpenGL.GL. The * symbol in the importing statement defines everything. Another critical thing you will notice that we have imported NumPy library.
This is because we have to work, we NumPy in PyOpenGL as PyopenGL cannot work with simple Python lists. The way every painter requires a canvas to draw any sketch, your Python program also requires to create a window in which you will portray a 2D or 3D graphics. You will have to use the glfw.init() for initialization. Without initialization, programmers won’t be able to access its functions.
Next comes the glfw.create_window() function. It helps in creating a window. It will take multiple arguments (width, height, and the name of the window) as input and return the output accordingly. glfw.set_window_pos() helps in setting the specific position of your window in your output spream (screen). This method will accept 3 arguments.
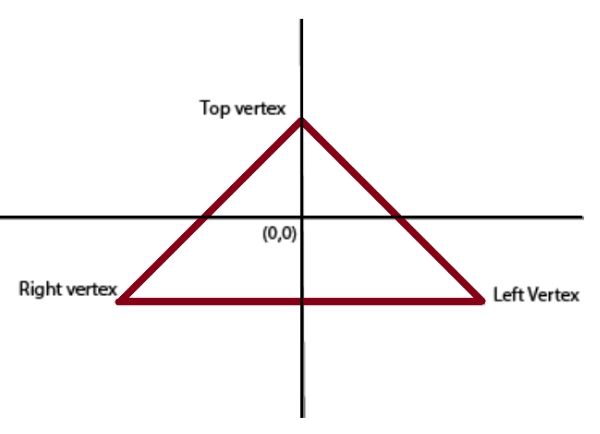
These are x-axis, y-axis, and window name. The function glfw.make_context_current() will accept the window augment relating to the current context. The vertices value will have the three points as a list representing the x (left vertex), y (right vertex), and z (top vertex) location on a plane.
Next, you have to use the glEnableClientState() function to enable client-side competences. Then, the function glClearColor(0,0,0,0) will help in setting the background color taking in R (red), G (green), B (blue), A (alpha) as the 4 different argument. Finally, you will have to create a loop that will execute until the window creation gets terminated. Here, we have done this using the while(). Inside the loop, we will use the glfw.poll_events() method that will check for the events triggered to the windows system.
The next function glClear() will be responsible for cleaning the screen every time the loop executes. This will assure that there is nothing on the screen prior to the rendering of graphics by this Python program. Lastly, the glDrawArrays() function will put the vectorized graphics in consecutive pixels. Also, it is important to terminate the loop and the creation of vector graphics using the glfw.terminate().
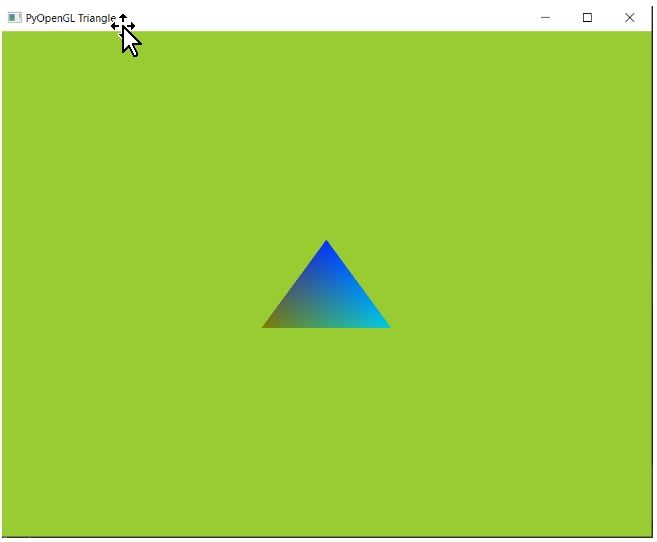
Creating an animated Triangle with Color gradient:
Program:
import numpy as np
from OpenGL.GL import *
import glfw

glfw.init()
window = glfw.create_window(900, 700, "PyOpenGL Triangle", None,None)
glfw.set_window_pos(window, 600, 300)
glfw.make_context_current(window)

vertices = [-0.2, -0.2, 0.0,
             0.2, -0.2,0.0,
             0.0, 0.2, 0.0]

# list the color code here
colors = [0.5, 0.5, 0,
          0, 0.8, 0.9,
          0, 0.2, 1.0 ]

v = np.array (vertices, dtype = np.float32)
c = np.array (colors, dtype = np.float32)
# this will create a color-less triangle
glEnableClientState(GL_VERTEX_ARRAY)
glVertexPointer(3, GL_FLOAT, 0, v)
glEnableClientState(GL_COLOR_ARRAY)
glColorPointer(3, GL_FLOAT, 0, c)
# Now we will pour color for the animation's background
glClearColor(0.6, 0.8, 0.2,0.2)

while not glfw.window_should_close(window):
# this while loop will keep iterating all the functions below until the window is not closed
    glfw.poll_events()
    glClear(GL_COLOR_BUFFER_BIT)
# creating rotation animated motion
    glRotatef(0.1, 1, 0 ,0)
    glDrawArrays(GL_TRIANGLES, 0, 3)
    glfw.swap_buffers(window)
glfw.terminate()
Output:
Explanation:
In this program also, we have taken the same approach. But this time we have changed the vertex size. The vertices value will have the three points as a list representing the x (left vertex), y (right vertex), and z (top vertex) location on a plane. 0.2, -0.2, 0.0, 0.2, -0.2,0.0, 0.0, 0.2, 0.0.
Then we have a list of color code that we have to convert to a NumPy array using these 2 lines v = np.array (vertices, dtype = np.float32), c = np.array (colors, dtype = np.float32). Next, we have enabled the client-side with the help of the glEnableClientState() function.
Then we will use a while loop. Inside the loop, we will use the glfw.poll_events() method that will check for the events triggered to the windows system. The next function glClear() will be responsible for cleaning the screen every time the loop executes.
This will assure that there is nothing on the screen prior to the rendering of graphics by this Python program. Within that while loop, we have to use the extra function glrotatef() to perform the animation of rotation. Lastly, the glDrawArrays() function will put the vectorized graphics in consecutive pixels.
Using PyOpenGL along with pygame module:
Programmers can use PyOpenGL as an interoperable library with a large number of other GUI (external) libraries of Python. In this section, you will use the pygame module that will help us make an animated cube with the help of PyOpenGL library.
Program:
from OpenGL.GL import *
from OpenGL.GLU import *
import pygame
from pygame.locals import *

verti = (
    (1, -1, -1),
    (1, 1, -1),
    (-1, 1, -1),
    (-1, -1, -1),
    (1, -1, 1),
    (1, 1, 1),
    (-1, -1, 1),
    (-1, 1, 1)
    )

edgez = (
    (0,1),
    (0,3),
    (0,4),
    (2,1),
    (2,3),
    (2,7),
    (6,3),
    (6,4),
    (6,7),
    (5,1),
    (5,4),
    (5,7)
    )
def Cube():
    glBegin(GL_LINES)
    for edge in edgez:
        for vertex in edge:
            glVertex3fv(verti[vertex])
    glEnd()

def main():
    pygame.init()
    display = (900, 700)
    pygame.display.set_mode(display, DOUBLEBUF | OPENGL)
    gluPerspective(35, (display[0] / display[1]), 0.1, 50.0)
    glTranslatef(0.0, 0.0, -5)
    while True:
        for event in pygame.event.get():
            if event.type == pygame.QUIT:
                pygame.quit()
                quit()

        glRotatef(3, 1, 1, 1)
        glClear(GL_COLOR_BUFFER_BIT | GL_DEPTH_BUFFER_BIT)
        Cube()
        pygame.display.flip()
        pygame.time.wait(15)

main()
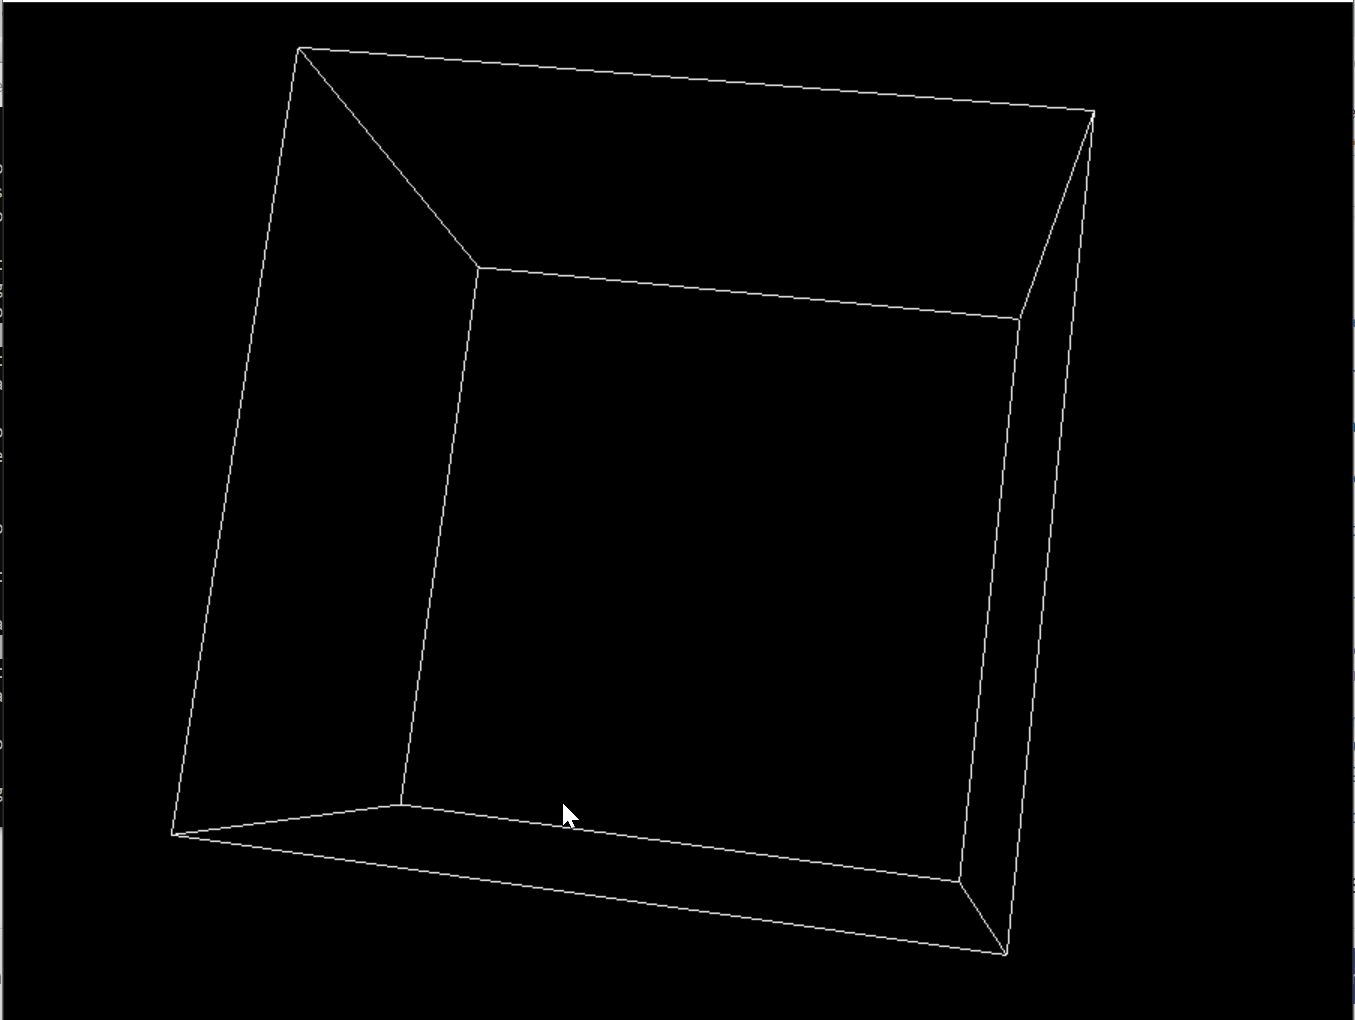
Output:
Explanation:
First, we have imported OpenGL.GL and OpenGL.GLU followed by the pygame library. Since this is a three dimensional cube, we have to set the 8 different sides of it. For this, we have assigned all the 8 vertices in a list and named that list as "verti". Once we define the vertices, the "edgez" variable is going to store the edge drawn between those each of the vertices.
We start with 0, since that is how Python and other programming languages understand or represent edges. Then we make a function Cube(). Inside it, we have to call the glBegin(GL_LINES) function.
It will notify OpenGL that we have will be now throwing some code at it. Then the GL_LINES will instruct the OpenGL as to how the code will be handled for line representation. It means we can treat this code as line-drawing code. This will take nested loop to create and connect the vertices with edges.
Now, we will define the main() function. Here we first initializes the pygame with the init() method. Then, we have to set the display area (here, 900 x 700). Then, we will use the pygame.display.set_mode() method. The parameters used inside are actually constants.
They help to identify PyGame that we are interoperating its OpenGL code. The DOUBLEBUF, which stands for double buffer, defines a type of buffering where there are two buffers that are getting applied with monitor’s refresh rates. Then, we have the pipe ("|") operator that separates both constants. gluPerspective(), as the name suggests, is a function that determines the perspective.
The glTranslatef() helps in multiplying the current matrix by a translation matrix. Now, we will utilize the pygame module to perform the event until we quit using the quit(). Next we have the glRotatef(). The glRotatef() function will multiply the current matrix to make it a rotation matrix and hence the rotation animation will take place. It accepts the angle, x, y and z as the parameters.
Lastly, we have the glClear(), which is like any other clearing function for clearing the buffer and depth of the screen. Here we have to specify the constants that will tell the OpenGL to clear the buffer and depth of the screen. Then, we will call the pygame.display.flip() function that will updates our display. Finally, we will use the pygame.time.wait() to provide a short waiting of the display and finally call the main() to make the entire program run.
Conclusion:
Hope, you have understood how we can work with OpenGL from a Python program. This article guided you to make shapes as well as animated 2D and 3D transformations that will help you understand the different functions that the PyOpenGL supports under its library.