Time delays in coding indicate delaying the code execution for a particular time interval. One of the most typical practical applications of time delay is when users wait for some other process to execute, and they can work with the output of the previous execution.
While working with multi-threaded systems, users might use multiple threads where one thread might want to wait for the other to finish the execution, to continue with the result of the previous execution.
There are several applications of time delay in Python, and we will study everything about the sleep() function in this article.
Before jumping into how the sleep() function works in Python, first, users must know why programmers use the time delay in the code. Time delay can reduce many challenges faced by the Python interpreter and the server on which users will work.
Multiple requests at the same time can occur in DoS Attack. Time delay gives a breathtaking space to delay the execution of each request, which will not overwhelm the server resources. This article will highlight code snippets and explanations, discussing how the Python sleep() function works.
How to add a Time delay?
The following points will make you understand how to use the time delay in Python code:
- Users use the sleep() function from the time module to suspend the program for a specific time interval. It is an in-built module in Python, and users do not need to install the time function externally.
- In simple terms, time delay implies users adding delay in the code during the execution of the Python program. Users must add the delay between two statements or any part of the program code according to their requirements.
Method 1: Using the time.sleep() function
To use the time.sleep() function, users first need to import the time module and add the time delay to suspend the execution of the program between specific intervals. Users can add the function between particular statements before which they want the delay and pass the parameter as an integer or float value.
Syntax
time.sleep(value)
Example 1:
Code Snippet:
# Here, we import the time module
import time
# It will run the loop from 0 to 4
for i in range(0,10):
    print(i)
# It will add a two seconds time delay
time.sleep(3)
Output:
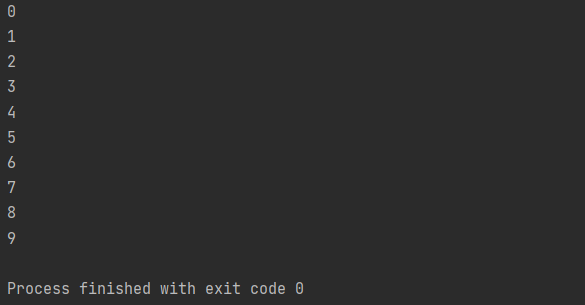
Explanation:
In the above example, we have used the for loop to print ten numbers from zero to nine. Then the time.sleep() will delay printing each number in the output console by three seconds.
Example 2: Using the sleep() to print a pattern by taking end-user input to add a time delay
# Here, we import the time module
import time
# Here, we use a function to print the pattern
def pattern(a):
    for x in range(0, a):
        for y in range(0, x + 1):
            print('*', end=' ')
            time.sleep(1.0)
        print(' ')
if __name__ == '__main__':
    num = input("Enter the number of patterns:")
    print(num)
    num = 5
    print("We print the pattern:")
    pattern(num)
Output:
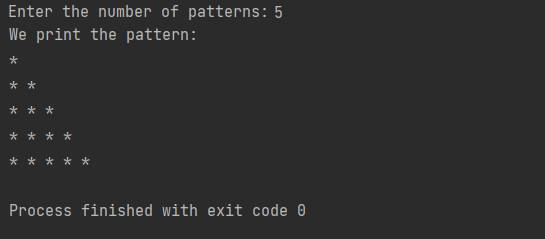
Explanation:
As we can see, we have printed a pattern made of stars after getting input from the end users.
Example 3: Delay program using time.sleep()
Code Snippet:
import datetime
import time
print(datetime.datetime.now().time())
time.sleep(3)
print(datetime.datetime.now().time())
Output:

Explanation:
In the output console, we can see a delay of three seconds between the two print statements. Users can use any time delay and pass any non-whole numbers as well.
Method 2: Add Python sleep() function with multithreading
Programmers often need to use multiple threads and add the Python sleep() call to those threads for the time delay. While programmers run a migration script against a database with thousands of records in production, they will not like to have any downtime in their program.
But they would also not want to halt longer than necessary to execute each migration. The solution comes with using multiple threads and the sleep() function. A thread indicates an individual flow of execution. Using multiple threads, programmers can do concurrency in Python.
They can run multiple threads concurrently to increase their program's throughput.
Adding multi threads can help programmers prevent any downshift where they can specify a specific time interval for each thread, and then it will sleep. The two ways are as follows:
- Using time.sleep()
- Using Event.wait() of the threading module
Example: Using time.sleep()
Code Snippet:
import logging
import threading
import time

def worker_thread(arg):
    while not arg["stop"]:
        logging.debug("Checked in the worker_thread thread ")
        time.sleep(3)

def main():
    logging.basicConfig(
        level=logging.DEBUG,
        format="%(relativeCreated)6d %(threadName)s %(message)s"
    )
    info = {"stop": False}
    thread = threading.Thread(target=worker_thread, args=(info,))
    thread_two = threading.Thread(target=worker_thread, args=(info,))
    thread.start()
    thread_two.start()

    while True:
        try:
            logging.debug("Checked in from the main thread")
            time.sleep(0.75)
        except KeyboardInterrupt:
            info["stop"] = True
            logging.debug('Stopping')
            break
    thread.join()
    thread_two.join()

if __name__ == "__main__":
    main()
Output:
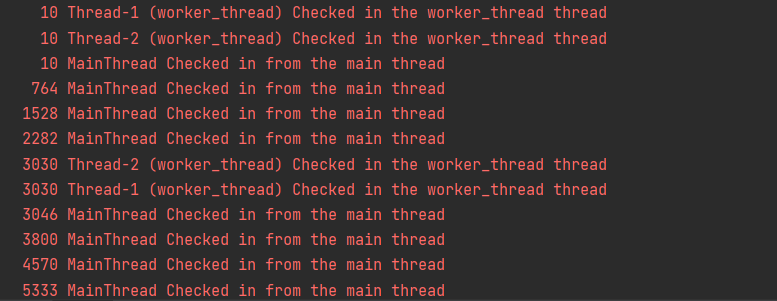
Explanation:
Here, we used Python's threading module and created two threads. Users can also create a logging object, logging the threadName to stdout using this threading module. Then, we started both threads and used a for loop to log from the main thread one after another.
As users execute each thread and then sleep, the time.sleep() function logs the output and prints it in the output console.
Method 3: Use the Python sleep() with Async IO
Python provides an Asyncio library that helps users dedicate themselves to writing concurrent code. Users can call the sleep() function asynchronously using this module.
They can use the async/await syntax, which they might have used in other programming languages. In programming, the term Asynchronous indicates parallel programming allowing users to execute more than one task concurrently.
When the Python interpreter completes executing one task, it will inform the main thread. The process will continue until the last task. This Python feature has gained increasing demand ever since.
Example 1:
Code Snippet:
import asyncio
async def main():
    print('This is')
    await asyncio.sleep(3)
    print('Python')
asyncio.run(main())
Output:

Explanation:
Here, we ran the main() function and used a time delay of three seconds between two print() calls.
Example 2: Using the Coroutine and Task of the asyncio library
Code Snippet:
import asyncio
import time
async def demo(sleep, text):
    await asyncio.sleep(sleep)
    print(text)
async def main():
    print(f"Started: {time.strftime('%X')}")
    await demo(1, '1st')
    await demo(2, '2nd')
    await demo(3, '3rd')
    print(f"Ended: {time.strftime('%X')}")
asyncio.run(main())
Output:
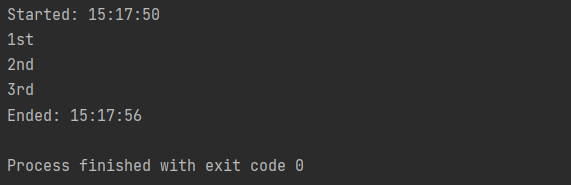
Explanation:
In the above example, we have created a worker named demo() that takes time delay in seconds to apply the delay and print out the text. Then, we used Python's await keyword to pause the demo() for execution.
We need the await keyword because the Python interpreter marks the demo() as an async function, so they cannot call it like they call a typical function.
Method 4: Using sleep() Call With GUIs
Command-line applications are not the only option where users can use the Python sleep() function. They can use the function when they work with Graphical User Interface (GUI). Working with such an interface will occasionally need to add delays.
Users can use two methods Sleeping in Tkinter and Sleeping in wxPython, but we will use Tkinter with sleep() function:
Example: Sleeping in Tkinter
One of the widely used Python libraries is tkinter. Users using a pre-installed version of Python on Linux or Mac must add or install it. Without installing the library, the interpreter will return an ImportError.
Code Snippet:
import tkinter
class demo:
    def __init__(self, demo_parent):
        self.root = demo_parent
        self.root.geometry("500x500")
        self.frame = tkinter.Frame(demo_parent)
        self.frame.pack()
        self.root.after(5000, self.delayed)
    def delayed(self):
        print('It will add the time delay')
if __name__ == "__main__":
    a = tkinter.Tk()
    b = demo(a)
    a.mainloop()
Output:
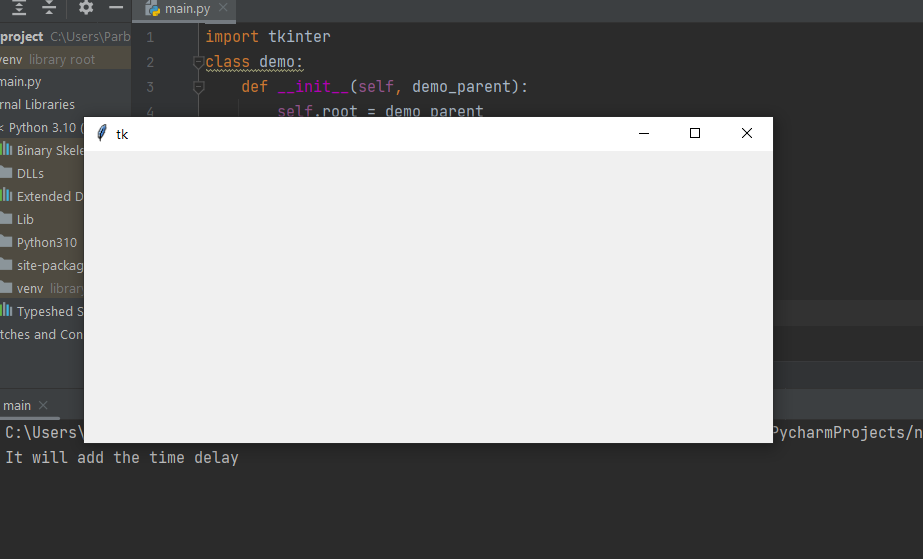
Explanation:
In the above code snippet, we created an application having 500 pixels wide by 500 pixels tall. The application has no widgets on it. Then, we called self.root.after() where self.root is a reference to the Tk() object. We have passed two arguments in the after(), these are:
- Defining the number of milliseconds to sleep
- Calling method after the interpreter executes the sleep function
After this, the application will print the statement "It will add the time delay" stdout after 3 seconds. This Python functionality will improve the end-user experience making the application appear to load quickly.
Conclusion
We hope Python programmers have gained ideas on how to add time delay in Python programs. Adding delays can prevent the Python applications and prevent them from using the system resources. It makes the overall user experience better.
Also, the article has shown how to use the sleep() with Graphical User Interface and add delay time in the Python application.