You must have seen QR codes used in different payment apps, businesses, and checked the item details, or even opened an URL by scanning that QR code. All these have become possible with the easy generating and integrating of QR codes. For Python programmers generating QR codes or integrating them into their application has become a significant feature. In this article, you will learn about QR code generation and how to use it to develop an event-driven application.
But before developing applications, let us first understand what QR code is and which part of the QR code defines what. Also, we will then try to code one small program generating the QR code and then a color QR code to get things clear.
What is a QR code?
A QR (quick response) code is a box-shaped matrix form of a 2-dimensional barcode (also called checkerboard-type barcode) that contains some meaningful data or linkage. It is frequently employed on mobile apps and websites nowadays. As compared to the traditional barcodes, these data can store more information. Such code renders a certain box-type pattern across it for recording meaningful data or a large set of information in a black and white pattern.
Such a code remains distributed on a 2D plane. It can hold numbers, English alphabets, Japanese letters, Chinese characters, special symbols (Unicode and ASCII), binary information, and other information within that square image. The corresponding appearance of dots (square dots or other shapes) represents binary "1", and the absence of these dots or white/blank spaces represents binary "0". A QR code leverages a permutation and a combination technique to determine the meaning of the matrix two-dimensional bar code.
There are two different types of QR code generally used in different applications. Among these, the most popular is the later one.
- Micro QR code
- General QR code
The above figure represents the different sections of a QR code. Let us take a look at each of them one by one:
- Data Area: This is the section where all the QR associated information remains stored.
- Position detection pattern: A position detection pattern helps in marking the size of the overall QR code rectangle. It comprises three positioning patterns that are used to identify and select the place and direction of an overall QR code rectangle.
- Quiet Zone: The white space surrounding the entire QR rectangle is the quiet zone. It has to be left blank. Therefore, there cannot be any patterns (information) or markings, to assure that the QR gets recognized.
- Timing Patterns: They help in positioning. In case the QR code size goes is too big; this timing pattern binds position detection patterns. Otherwise, during a scan, they might get easily distorted and the information will get missed. Timing pattern helps in preventing distortion during scanning.
Python Modules:
In this article, you will learn about three different modules used for QR codes.
- Using the qrcode module
- Using the myqr module
- Using the pyqrcode module
Method 1: Using the qrcode module:
This is the very basic and simple module that programmers can use to generate QR code that uses PIL (Python Image Library for generating the QR image). For using this, programmers have to install it using pip install command and then import it within the program.
Program:
import qrcode
imag = qrcode.make('Gaurav')
type(imag)
imag.save("some_fileName.png")
Explanation:
First we have to import the qrcode module. Then we have to call the qrcode.make() method where we will pass the string as a parameter. This string will help generate the QR code using the method. We will store the entire QR creation in the imag object. Then we will type the imag object and use theimag.save() to five this image a filename.
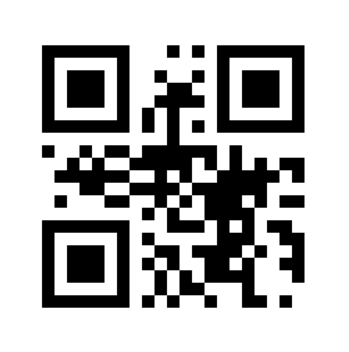
Output:
Method 2: Using the MyQR module:
This is another module that helps in creating simple QR code. It uses the myqr.run() method that leverages multiple options to perform within it. You might have seen QR codes having slight amount of image or logo blended together with the QR code itself to generate a new QR pattern. This module helps in blending that.
Program:
from MyQR import myqr
import os
strg = "This is Gaurav’s QR"
version, level, qr_name = myqr.run(strg,
version = 1,
level = 'H',
picture = 'E:\Pythonlogo.png',
colorized = False,
contrast = 1.0,
brightness = 1.0,
save_name = 'qr3.png',
save_dir = os.getcwd()
)
Explanation:
First, we will import myqr from MyQR module. It is a popular module as it has lots of options given within one of its method as parameters. Then we have to import the os module to perform the getcwd() i.e. to fetch the current working directory. Then we will create a string variable strg and pass a set of strings that will allow us to create a QR code. Then we will create three other objects version, level, qr_name that will get assigned with different values as returned by the myqr.run() method.
This method accepts string as its first parameter followed by version, level, picture path (if we want to blend any image into the generated QR code), colorized if you want to generate a color QR code, set a brightness and contrast value, and save the overall QR image with a name in the current working directory. This myqr.run() method will ultimately generate the QR code as per the given ingredients.
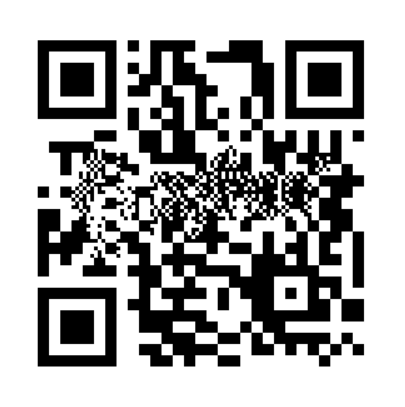
Output:
Blended this image with the QR:
Method 3: Using the Pyqrcode Module:
Another significant module that is popularly used in the creating random and string-based QR code is the pyqrcode module. Developers can use it to build simple QR APIs or as a part of complex applications.
Program:
import pyqrcode
url = pyqrcode.create("https://stechies.com/")
print(url.terminal(quiet_zone = 1))
Explanation:
First, we will import the pyqrcode module. It is one of the most popular modules. Then we will create a string and pass it within the pyqrcode.create() as string parameter. We will have to store that complete QR creation into an object (here url). Finally, we will use the print() function followed by the terminate() method to display it.
Output:
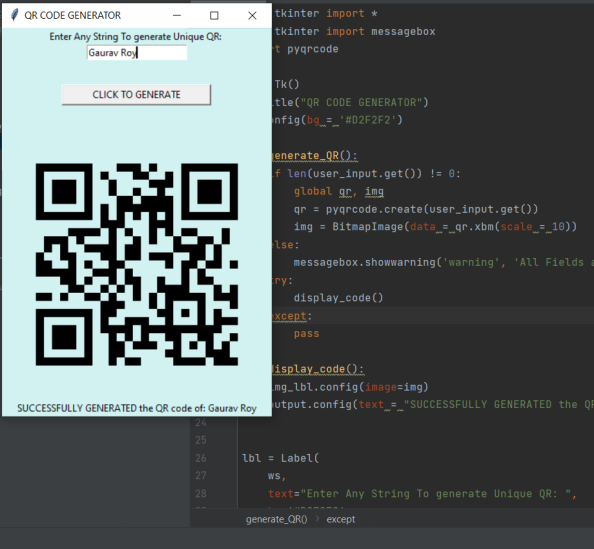
Tkinter-based QR Project:
from tkinter import *
from tkinter import messagebox
import pyqrcode

ws = Tk()
ws.title("QR CODE GENERATOR")
ws.config(bg = '#D2F2F2')

def generate_QR():
    if len(user_input.get()) != 0:
        global qr, img
        qr = pyqrcode.create(user_input.get())
        img = BitmapImage(data = qr.xbm(scale = 10))
    else:
        messagebox.showwarning('warning', 'All Fields are Required!')
    try:
        display_code()
    except:
        pass

def display_code():
    img_lbl.config(image = img)
    output.config(text = "SUCCESSFULLY GENERATED the QR code of: " + user_input.get())


lbl = Label(
    ws,
    text = "Enter Any String To generate Unique QR: ",
    bg = '#D2F2F2'
)
lbl.pack()

user_input = StringVar()
entry = Entry(
    ws,
    textvariable = user_input
)
entry.pack(padx=20)

button = Button(
    ws,
    text = "CLICK TO GENERATE",
    width = 25,
    command = generate_QR
)
button.pack(pady = 30)

img_lbl = Label(
    ws,
    bg = '#D2F2F2')
img_lbl.pack()
output = Label(
    ws,
    text = "",
    bg = '#D2F2F2'
)
output.pack()

ws.mainloop()
Explanation:
First we will import tkinter and all its sub-modules using the *. Then we will also import messagebox and pyqrcode. Tkinter module helps in creating GUI windows and apps where users can interact with events. We will generate object ws by assigning it with the Tk() constructor. Then we will give this application a title using the ws.title() method and pass "QR CODE GENERATOR" as its string. We can also configure the color of the app using the ws.config().
Then we create a user-defined function named generate_QR() where all our QR code logic will reside. The pyqrcode.create() generates the QR code as it fetches the string through user_input.get() method from the text box.
Also, this function will get executed when the user_input.get() is not equal to 0. Once the qr code gets generated using the pyqrcode.create(), we have to use the BitmapImage() and pass the data = qr.xbm()) along with a scale size (here 10) that will generate a Bitmap image of 10x10. If the user_input.get() is equals to zero, messagebox.showwarning() shows a warning to fill the data in that text box. Then within the try block we call the display_code().
This is another user-defined function that provides the image details as well as the status info that we can see at the bottom of that application.
We have to use the Label(), Entry(), and Button() constructors of the Tkinter module to generate the labels, text box, and buttons that will help programmers create a event-driven program. We will then store these Constructor initialization in three different objects lbl, entry, and button.
Finally, we will use the output.pack() method that is a geometry manager of widgets in rows or columns. Programmers can use options like fill, expand, and side to make changes in this geometry manager or pass it blank without any parameter.
Lastly, the mainloop() is used, which is an infinite loop implemented for running the application, wait for an event to occur and process the event as long as the window does not get closed by the user manually.
Output:
Conclusion:
Among all these modules, the pyqrcode is the most useful one. The second popular is the MyQR module that leverages programmers to generate color QR or QR blended with images and logos. This makes the module more interesting. But it requires the os module to make it fully functional. So, another efficient module is the qrcode module that renders QR code with less time and space complexity.