When users establish an IIS web server and install an SSL certificate, it is crucial to enforce HTTPS protocol. HTTPS is a protocol securing communication between the web browser and the websites of a user.
Configuring an IIS server allows an administrator to manage the services, administer security, and supervise website content. This article is all about the steps of redirecting HTTP to HTTPS with Windows IIS 2019, which are as follows:
Click on the given link to download and install the IIS URL Rewrite module.
Then, users have to launch the Internet Information Services (IIS) server and validate after the installation of the URL Rewrite module completes.
Open IIS Manager and users can select the website they want to add a redirect and then open the URL Rewrite application.
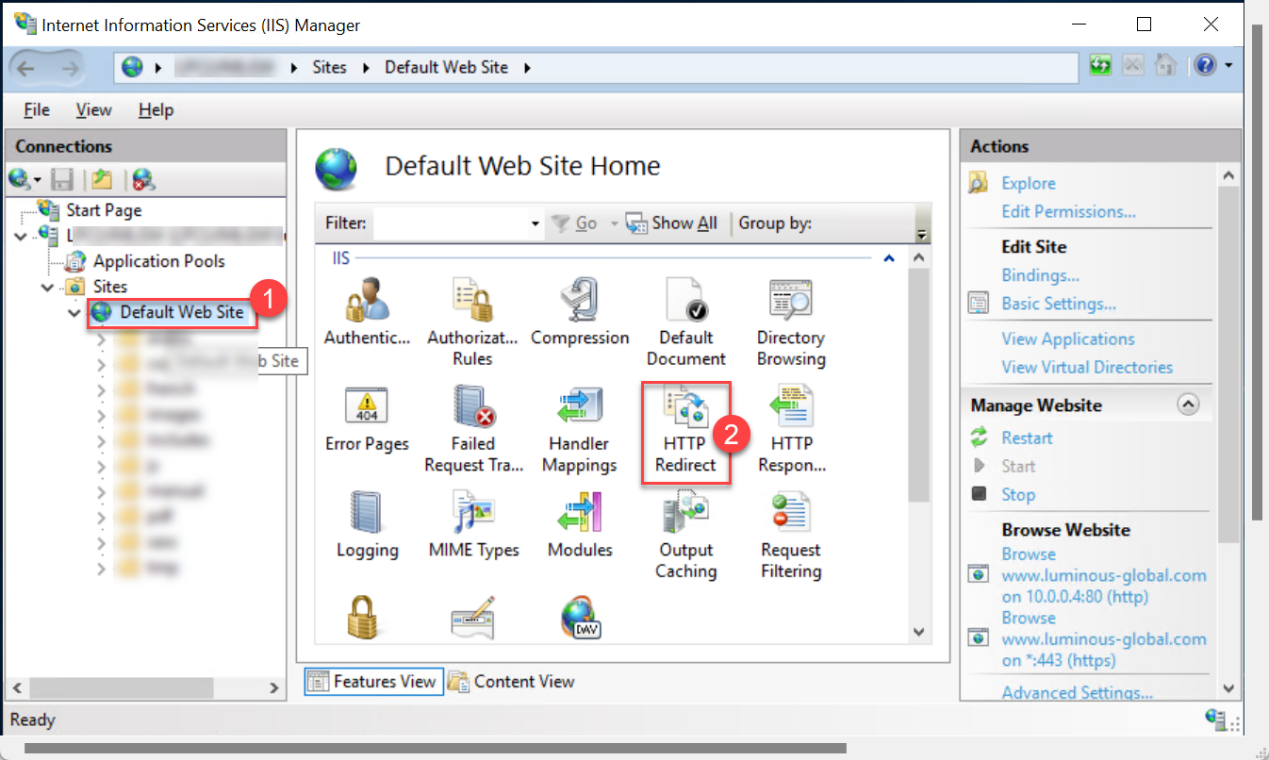
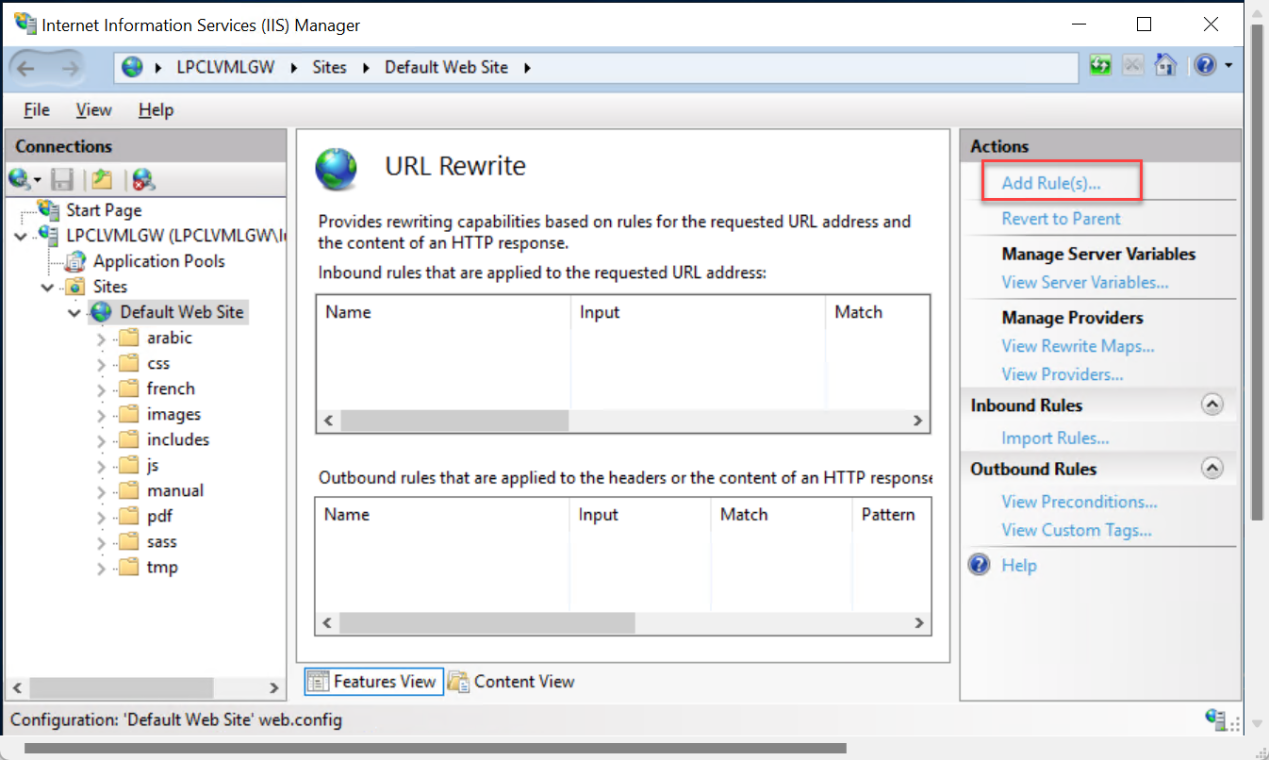
Users select their desired website and double-click on the URL Rewrite icon. After entering the menu, click on the Add Rule(s) at the right-most side of the menu inside the "Actions" option.
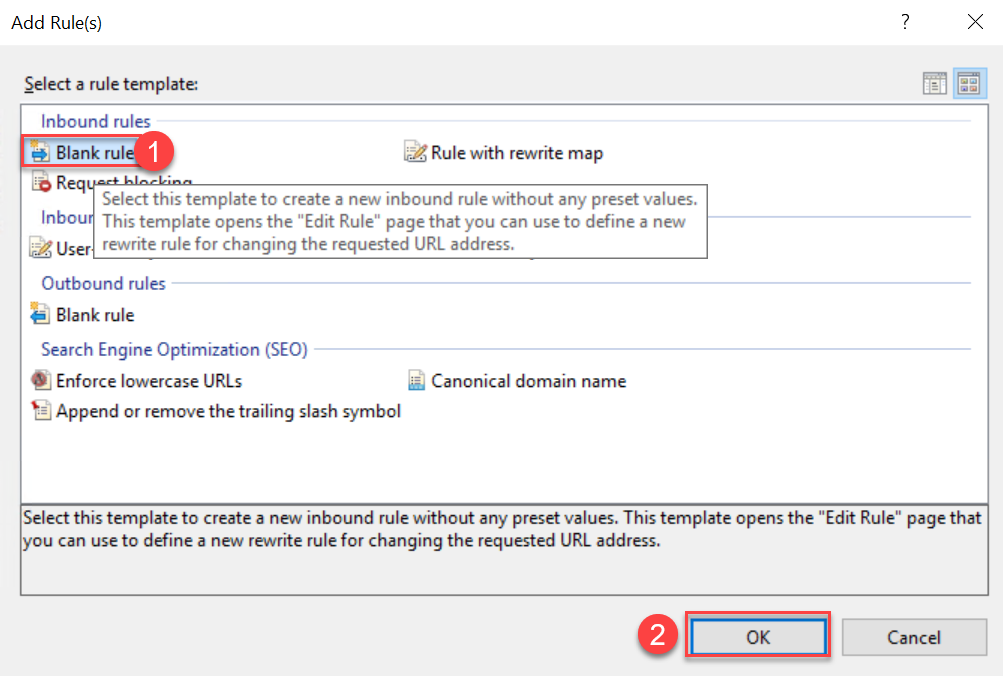
Then, users select Blank Rule within the Inbound Rules option and press OK.
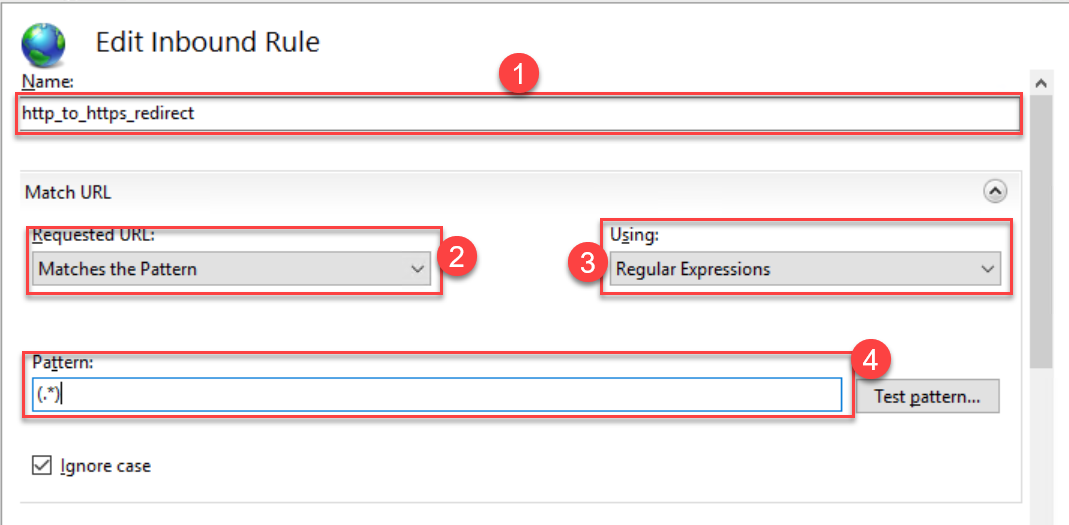
Users type a name under the Name section to specify the rule, followed in the Matched URL section. Then, users set the Requested URL section to Matches the Pattern and select the Using section to Regular Expressions from the dropdown list.
Then, in the pattern option, type (.*) and mark the checkbox of the Ignore case option.
Under Conditions tab select followed by logical grouping, select “Match All” and click on Add button
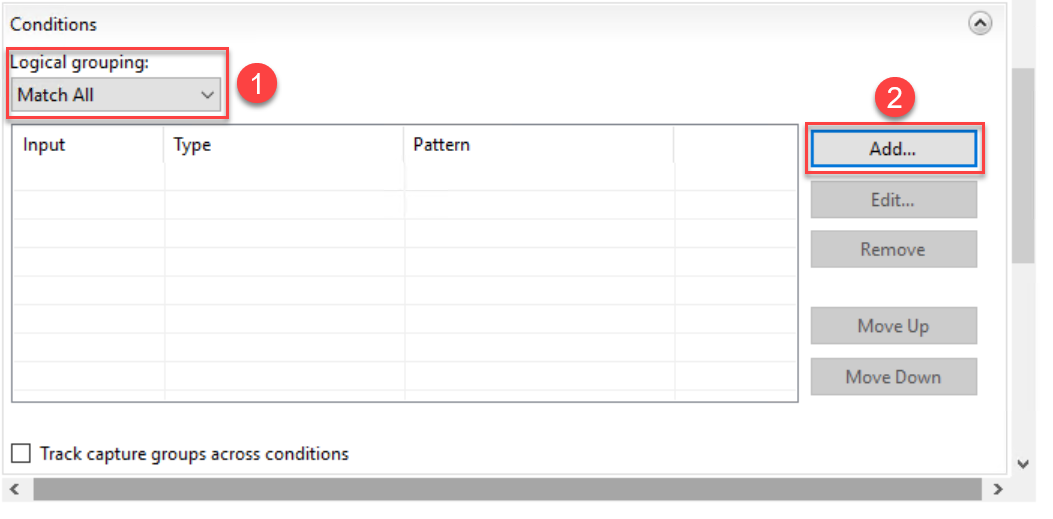
It will direct the users to a new popup window. Here, users set the following values and then click the OK option:
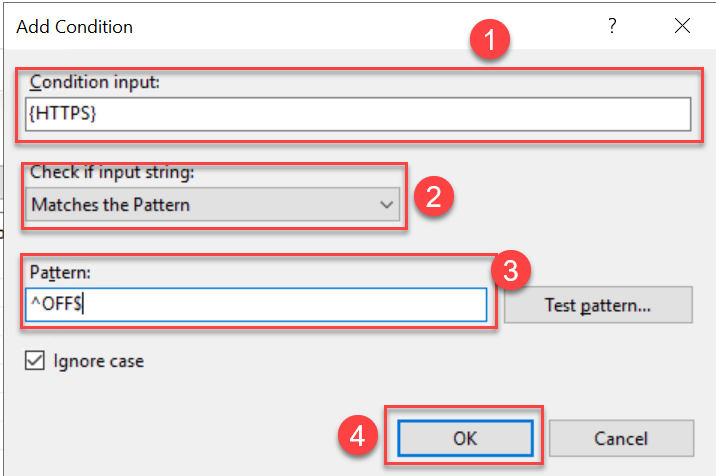
- In the Condition Input checkbox, type {HTTPS}
- Go to the Check if input string dropdown list and select Matches the Pattern
- Set the Pattern as ^OFF$ by typing in the drop box.
- Mark the checkbox of the Ignore case option.
- Press OK
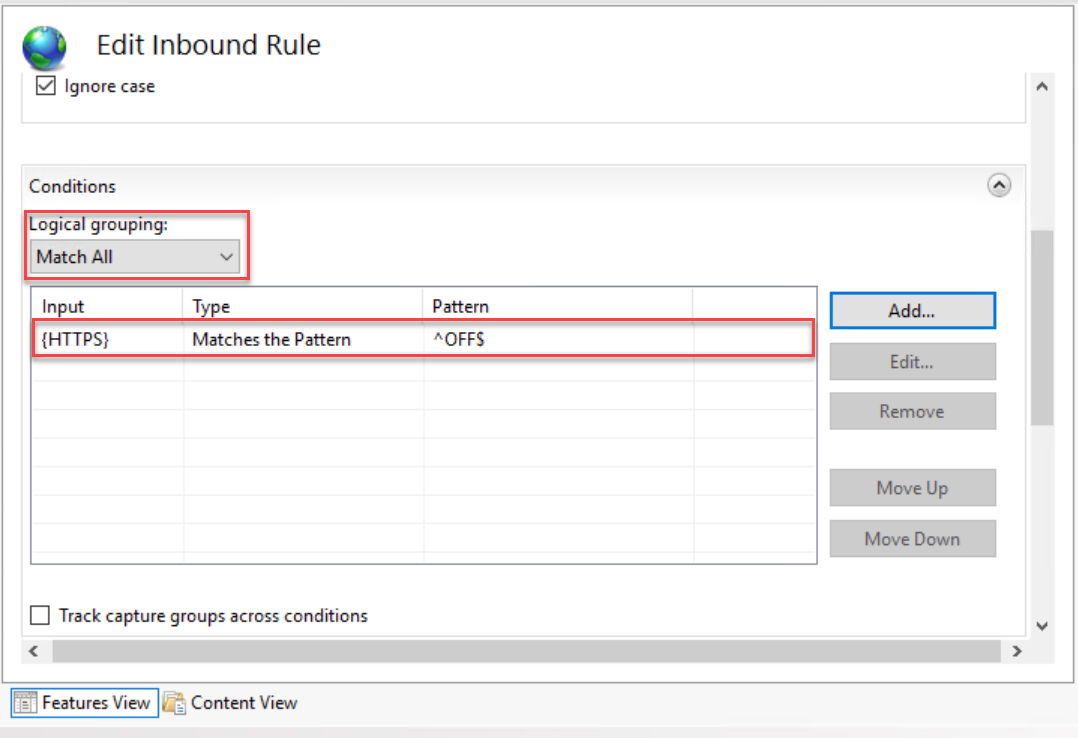
It will add the new condition to the Conditions option.
Go to the Action option, and from here, users need to configure the following settings:
- In the Action type option, select Redirect from the dropdown list
- Go to the Rewrite URL and type https://{HTTP_HOST}{REQUEST_URI}
- Then uncheck the Append query string option
- Go to the Redirect type and set it to Permanent (301)
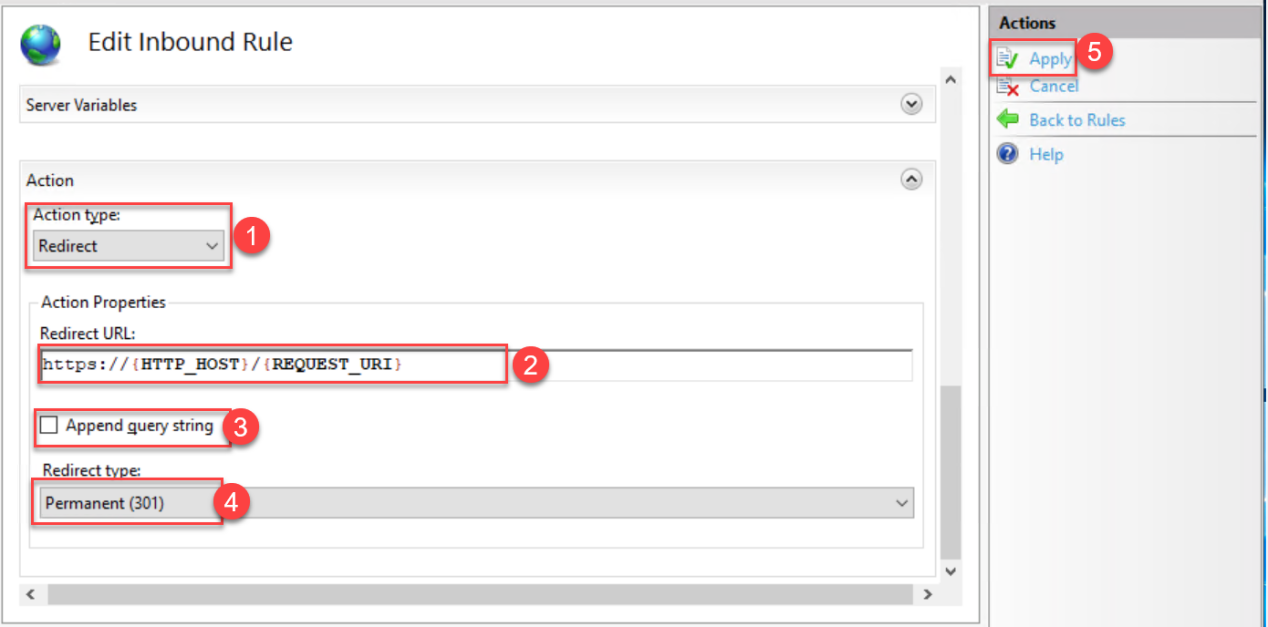
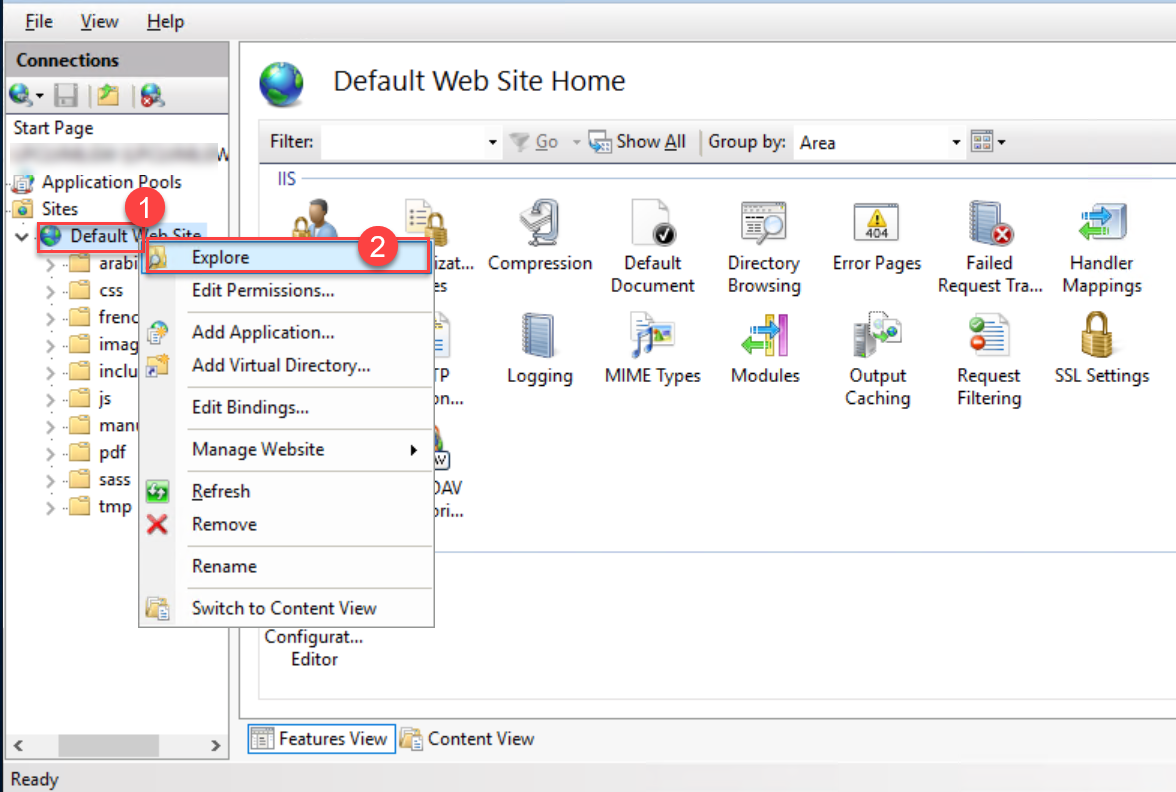
Open Default Web Site and click on Explore. Finally, click on Apply.
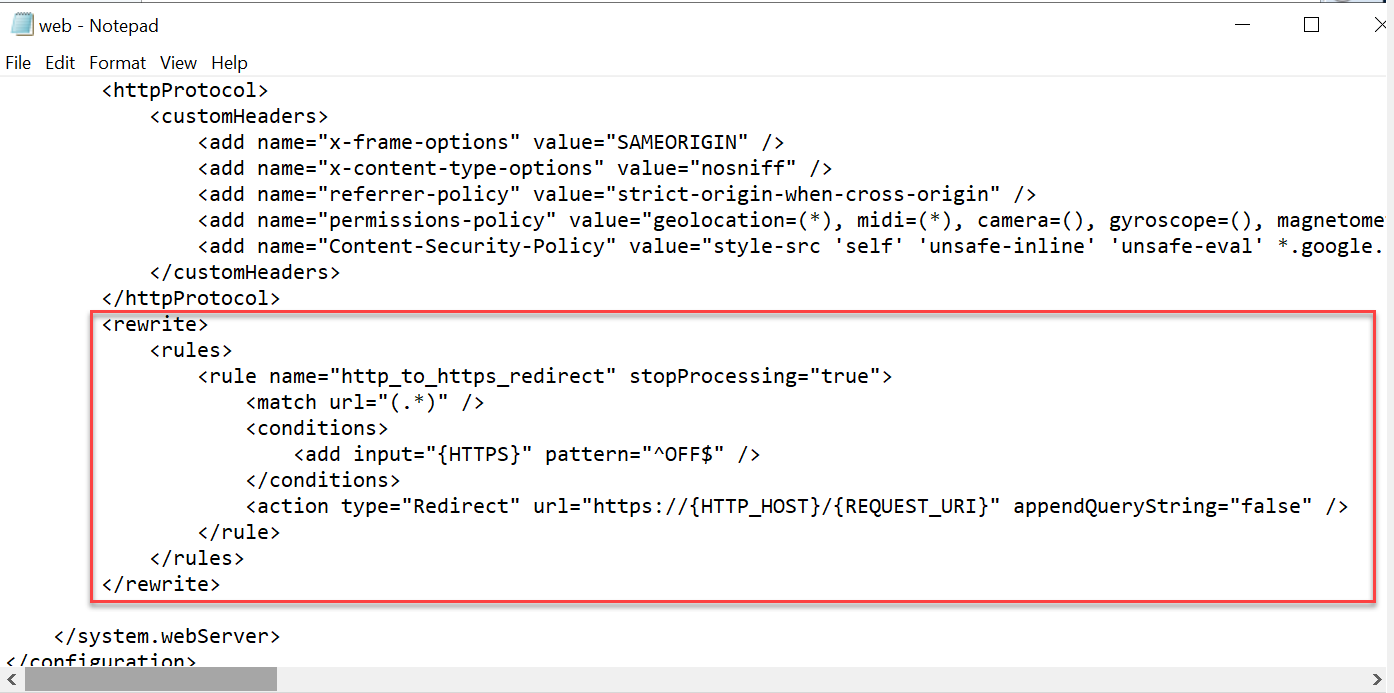
Open web.config file in notepad and users will see this redirect route is added. Users open their desired file saved on the folder of their website and search for the <system.webServer> section. Open the code in the notepad, and add or edit the rewrite section with the code snippet:
<rewrite>
<rules>
<rule name="HTTP-to-HTTPS-Redirect" stopProcessing="true">
<match url="(.*)" />
<conditions>
<add input="{HTTPS}" pattern="^OFF$" />
</conditions>
<action type="Redirect" url="https://{HTTP_HOST}{REQUEST_URI}" appendQueryString="false" />
</rule>
</rules>
</rewrite>
Conclusion:
Configuring the IIS server and setting the HTTP to HTTPS with Windows IIS 2019 can be easy with these steps mentioned above. Remember the requirements before starting the redirect process.