If you are a Linux user, then you must know to find the disk size and memory distribution by their operating system. In Linux, we have two kinds of methods using which we can know the disk drives size, their subdirectories size, etc.
In this article, we will explain the two approaches to get the total size of a directory in Linux. Listed below are the two approaches to perform it:
- Using Command Line Interface.
- Using Graphical User Interface.
1) Using Command Line Interface
In dealing with Linux, we have the ls -l command, which lists only the directories metadata. To know the exact size of the directories, we use disk usage-related commands (du commands). Below listed are the majorly used du- commands and their respective outputs:
Get size of files in the directory
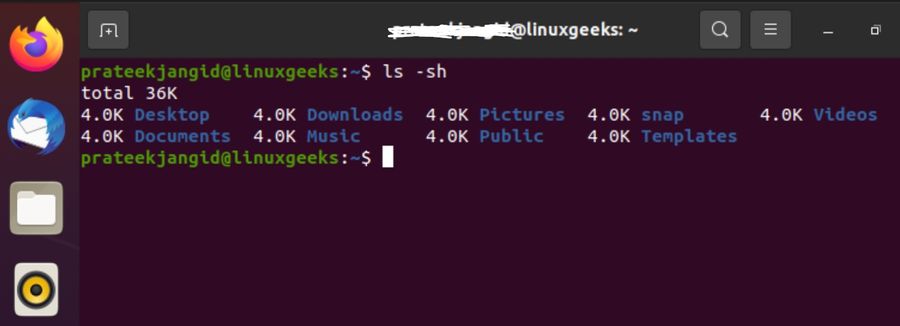
You can use the ls -sh command to find out the size of the available files in the directory
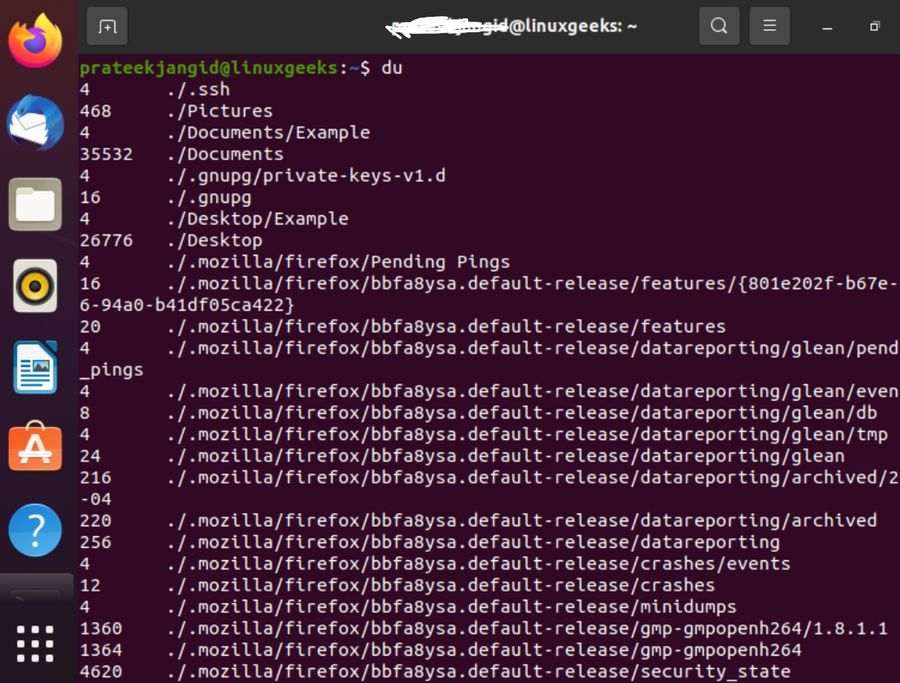
Get size of files and directory in current working directory
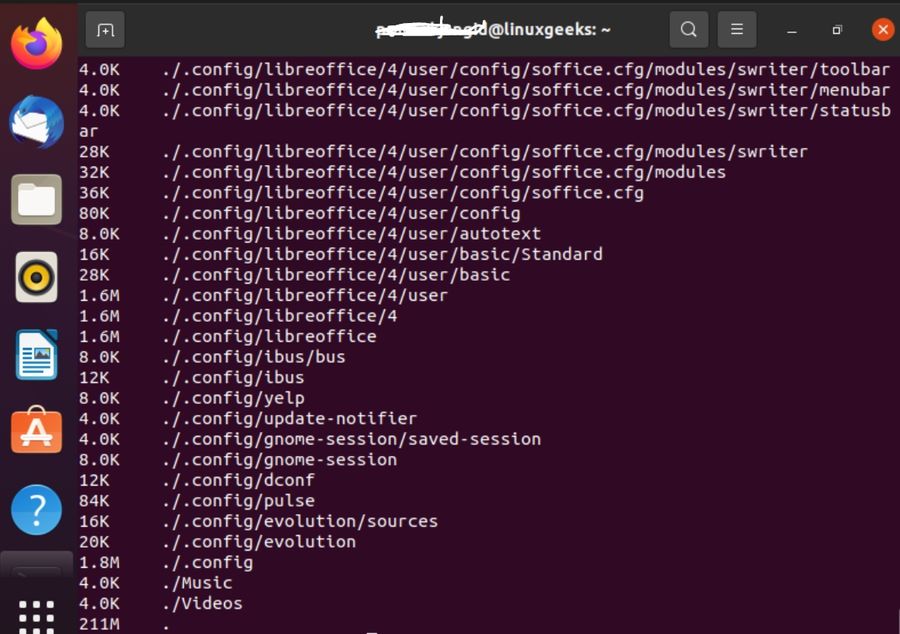
The full form of DU is disk usage, so this command lists all the directory and subdirectories names and their sizes (in bytes) present in the active directory in which the user is working.
Get size of files and directory in a current working directory in human-readable format
du -h command performs the same task as the 1st command, but it displays the output in a more human-readable format (h represents human-readable format).
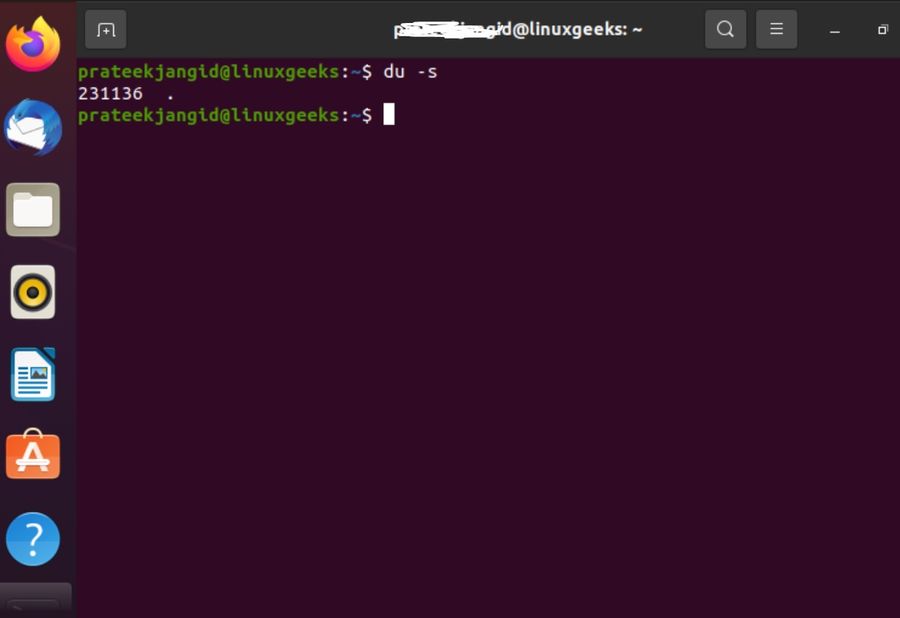
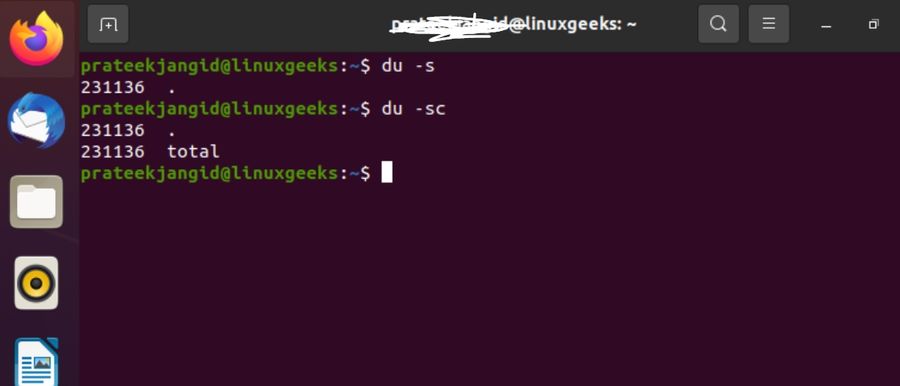
Get the total size of current working directory
du -s command shows only the size of the current directory in which the user is active.
Get the total size of the current working directory
This du -sc command shows the total size of only the current working directory. In this command, c represents the total number.
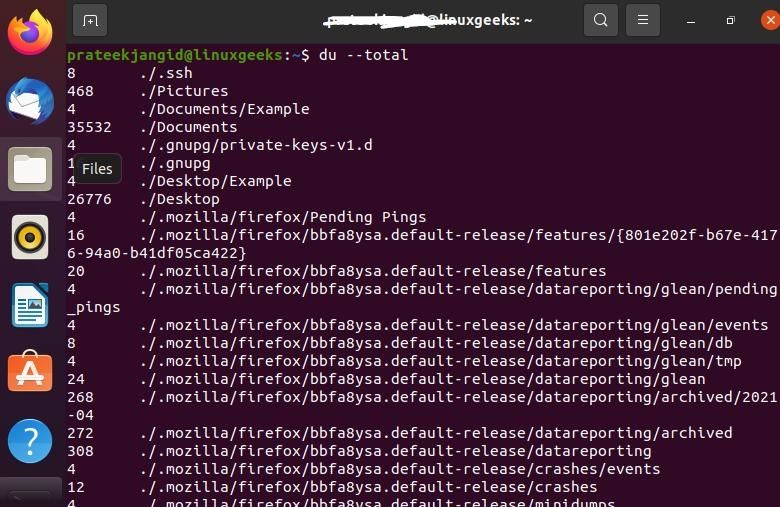
Get total disk space in Mbs
du --total command displays all the 1st level subdirectories size present in the /var/ relative path.
Get total disk space in Kbs
This du -kh command lists the file sizes in terms of 1024 byte format and in a human-readable format.
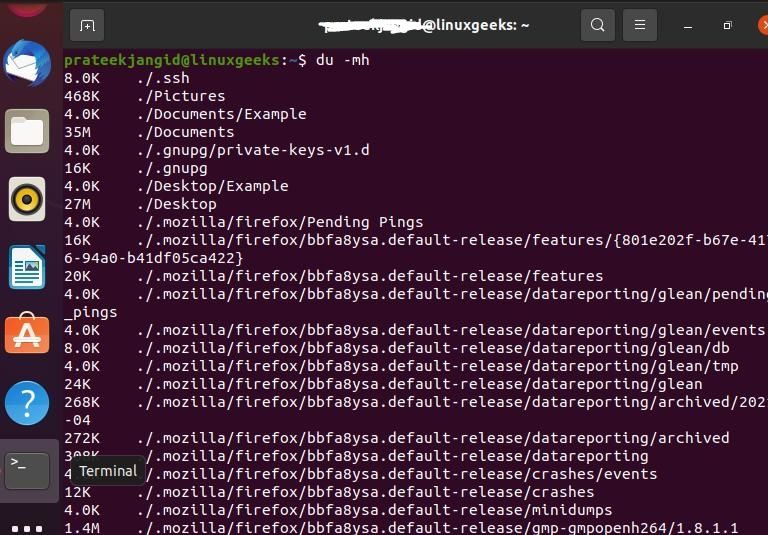
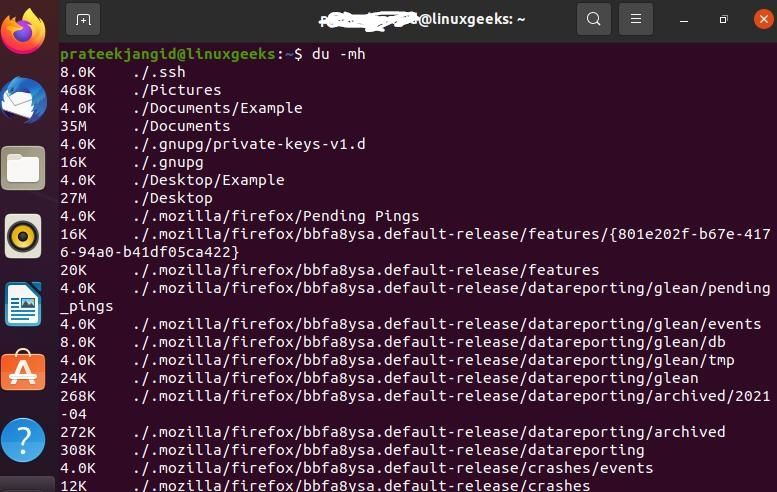
Get total disk space in Mbs
This du -mh command lists the file sizes in terms of MegaBytes (MB) format and human-readable format.
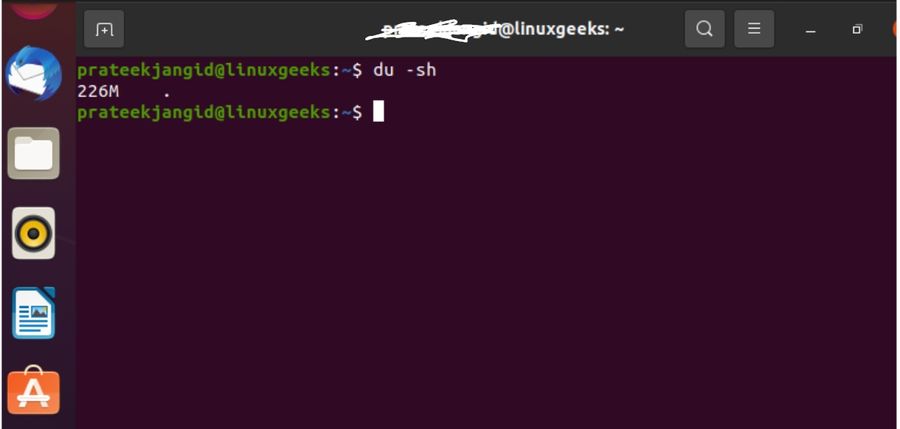
Get total disk space by listing the true file size.
This du -sh command works to list the true file sizes.
Tree du commands
Tree commands are a small tool designed for Linux users. This tool displays the file structure in a recursive way along with the path to the respective files.
Before using this tool, run the below command to install the tree tool command in your system:
sudo apt install tree
After the successful installation, we can run the below command to display all the files and their respective paths in the relative folder.
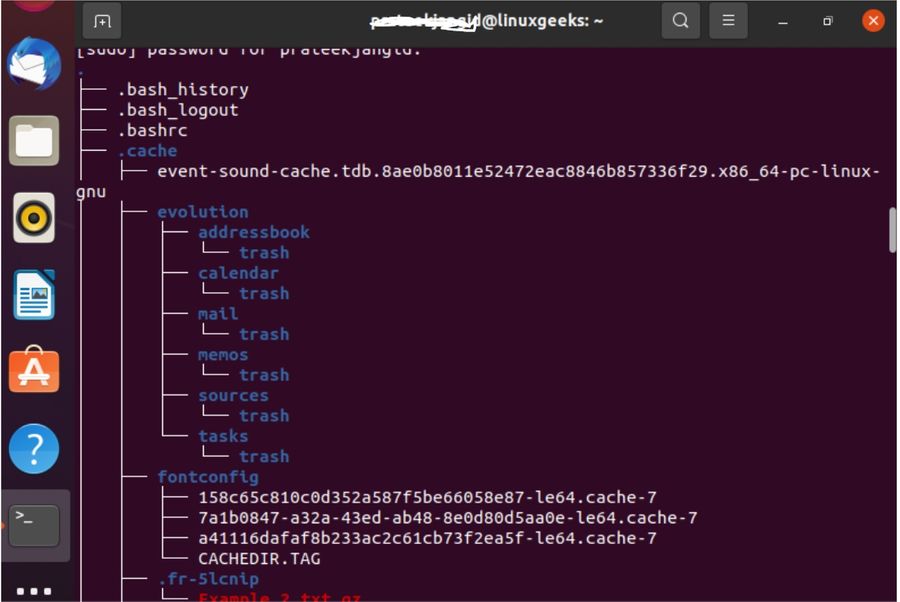
sudo tree -a
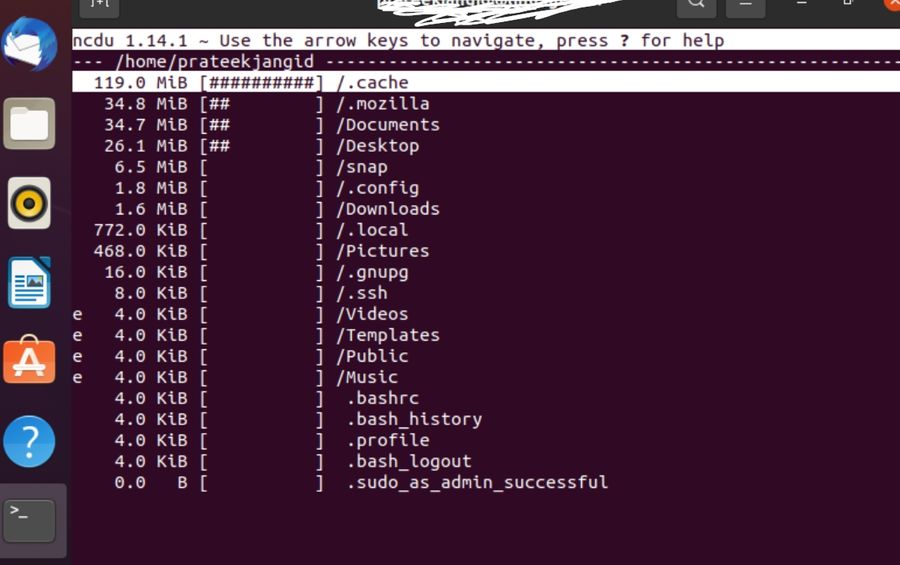
NCDU Commands
Unlike du commands, ncdu commands are not very raw. It just outputs the disk usage of all the files present at the first level of the root directory. It does not dive deep into the folder tree-like du goes and recursively displays all the file sizes individually.
Due to this, du commands provide more detailed information than ncdu commands and are more robust. So here is the command to install ncdu package:
sudo apt-get install ncdu
To run the ncdu command, type the ncdu command and analyze the output.
Using Graphical User Interface
Most users, especially those belonging to a nontechnical background, need some tools to analyze their disk and directories size easily. So, to facilitate such users, we will discuss some of the GUI, which will make the user's tasks easy.
Here are some of the tools listed covering all the cool features offered by them:
- FileLight
- XDiskUsage
- CrossDirStat
- JDiskReport
a) FileLight
FileLight is a very lightweight and easy-to-use GUI tool. It also uses pie chart representation to visualize the disk size and folders contained in it. If you want to install FileLight, then run the following command in the terminal:
sudo apt-get update -y
sudo apt-get install -y filelight
Now, go to the search menu and search "filelight" in the search bar to open it. Below is the image depicting how the tool UI looks like:
Key features:
- We can select only a specified directory to get scanned and analyzed.
- This tool offers a customizable user interface using which a user can change to represent the tool outputs. The user can change the color and size of the [pie chart to represent each pie chart segment as per the requirement.
- Facilitates the user to open a specific directory from GUI as well as from CLI.
- Shows all the major details about the respective folders where the input device will hover on.
- A user can navigate within the file system by just clicking a few buttons.
b) XDiskUsage
Users do not prefer XDiskUsage because it does not have a more interactive user interface. Step to install XDiskUsage:
Now, go to the search menu and search "XDiskUsage" in the search bar to open it. Below is the image depicting how the tool UI looks like:
Key features:
- This tool represents the directories in a hierarchical tree structure.
- Each folder is represented by using a rectangle with different grey color densities.
- A more dense folder is represented using a darker folder and vice versa.
- It highlights every detail very clearly.
- Hovering the mouse allows users to copy the path of the respective directory.
- Allows users to navigate through the tree structure of the folders easily.
c) CrossDirStat
CrossDirStat is the latest tool released in the market with an easy-to-use User Interface. Since it is an open-source application, you can download it directly from the git-hub repository.
Now, go to the search menu and search "CrossDirStat" in the search bar to open it.
Below is the image depicting how the tool UI looks like:

Key features:
- Represents different files in the directory using rectangles.
- Have a settings option on the front screen to enable the users to change the settings on the homepage as per the needs.
- Offers customizable features such as changing the color of rectangular lines as per the requirements.
- This tool has an android style User interface to make the users feel more adaptive towards the tool.
- This tool also offers the feature to export the visualization produced in PNG, JSON, etc., format to the local system for reference.
- It can also generate the hierarchical tree-like structure of any user-selected directory.
JDiskReport
JDiskReport is a tool designed to analyze the space occupied by the files and Directories present in the Disk. It is a cross-platform tool and can be installed in different Operating systems.
The only disadvantage of using this tool is, it performs very slow disk read-ups and is very expensive concerning CPU and memory utilization.
So here is the procedure to install JDiskReport:
- Runs on the Java platform. So, first, install Java JDK in your system.
- After installing java, we can download the executable file from the official website and proceed with the normal steps.
Now, go to the search menu and search "JDiskReport" in the search bar to open it. Below is the image depicting how the tool UI looks like:

Key features:
- Designed using java language.
- Has various visualization tools to let users see the disk/directories size using charts and graphs.
- Offers the feature of tabulation. Using this, the user can see the disk sizes in tabular form.
- This also contains the inbuilt tool to clean the junk and duplicate files.
- Shows the relative as well as absolute size of directories.
- It scans the whole tree structure of files.
- Each segment of the pie chart displays the respective file size and disk space occupied/unoccupied.
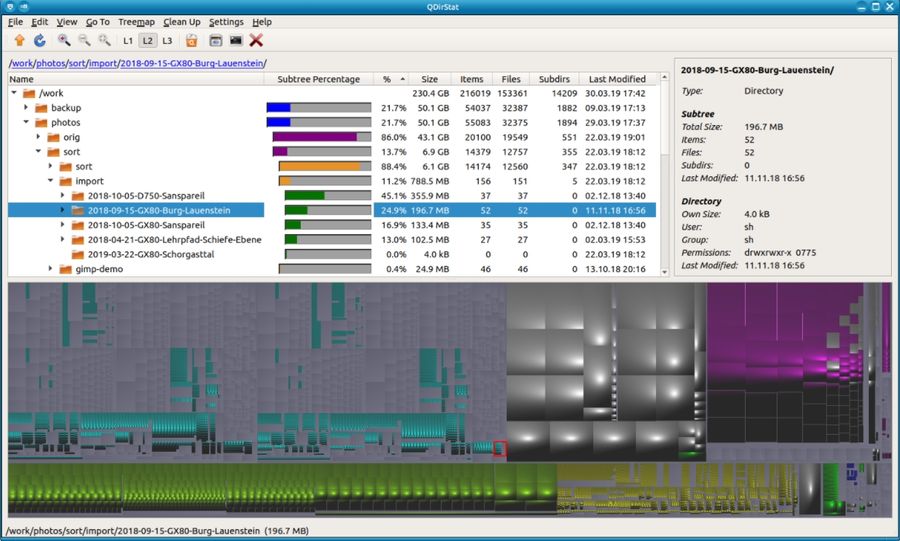
d) QDirStat
Like the above tools, this tool also presents the graphical representation of the disk structure. This tool also offers an inbuilt disk cleanup feature. Users prefer to use this due to its easy-to-use UI and rich UX. You can use the below commands to install QDirStat.
sudo apt-get update -y
sudo apt-get install -y qdirstat
Now, go to the search menu and search "QDirStat" in the search bar to open it. Below is the image depicting how the tool UI looks like.
Key features:
- It uses grids to represent each directory individually.
- It offers a rich user interface and allows the users to self-configure each directory's colors individually as per their convenience.
- This tool offers a directory cleaning feature that allows users to analyze and clean the duplicated and junk files.
- This tool is the updated version of the KDirStat tool.
- It does not depend on the environment or platform to run. It is a cross-platform application.
- It offers an unlimited number of cleanups in the normal versions.
- Log errors (if any) after performing the cleanup activity.
Quick Wrap-Up
In this article, we saw different ways to analyze disk-related information. In the first section, we saw different du (disk utilization) commands. The du commands are mostly preferred among developers as it presents information in a human-friendly way.
We hope you got good information from this article related to disk size analysis and its utilization. We will continue to explore deeper information with the upcoming new technologies and strategies to deal with them.