A signature is a kind of identification tool which is attached to a person or a thing from the help of which one wants himself to be easily recognized. The signature can be his way of writing his name or a particular way in which he does his things or his work. For example, the moonwalk is considered as a signature step of famous legend Michael Jackson. It was attached to his singing or even his music. The same rule applies to emails also. While doing their work, Professionals needs certain information of theirs to be attached with the messages they send to their clients. It may be their phone number, their contact information, their social media profiles or any other predefined set of texts or a logo which they want their receivers to gain information about.
An email signature works as a footer with an e-mail and helps the sender send a message with a closing statement and helps the receiver gain knowledge about the sender. If you are here to know how to create an email signature in outlook, don’t worry. We have got you covered. Follow the following steps and you’ll have full knowledge of how to create and add your logo as an email signature to your emails.
How to create or add email signatures in outlook.
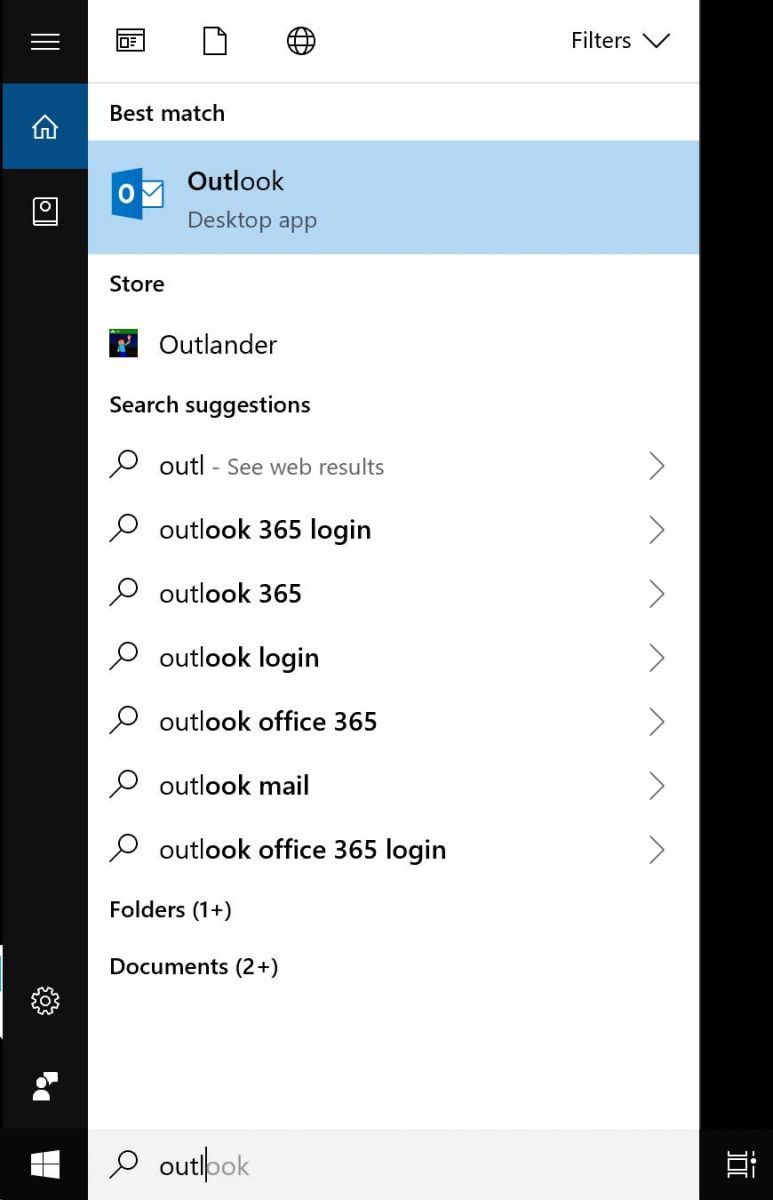
Step 1) Launch Microsoft outlook- First, you need to launch Microsoft outlook from your computer. Go to the bottom left corner and search for the program of Microsoft outlook. Click on the icon of Microsoft outlook.
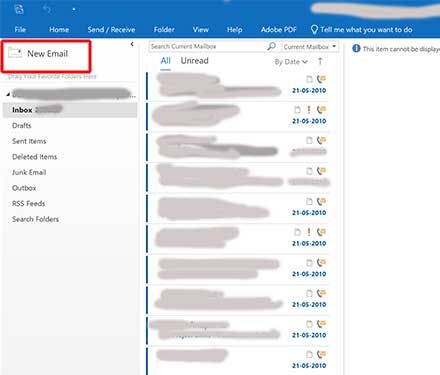
Step 2)Select New Email- you will see a popup window on your screen. Select mail option on that popup window and then click on signatures.
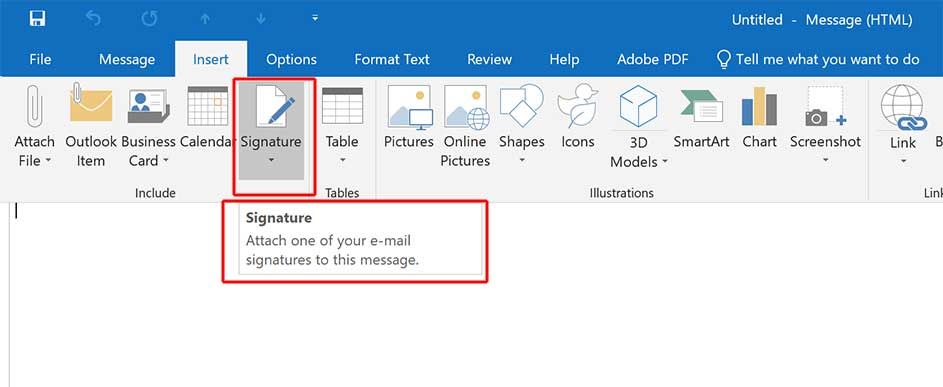
Step 3)In new Email, Tab Click on Insert Tab on top and then click On Signature Button under insert menu
Step 4)A signature window will appear
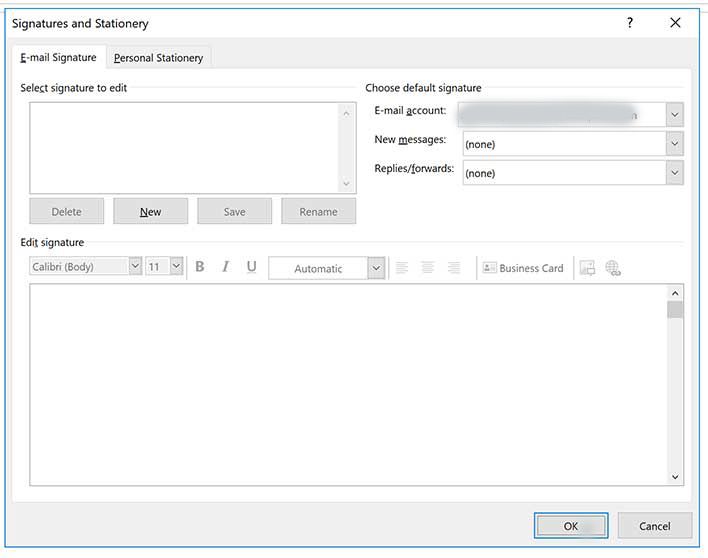
Step 5)Click New- you need to click on “New” to create your first ever signature
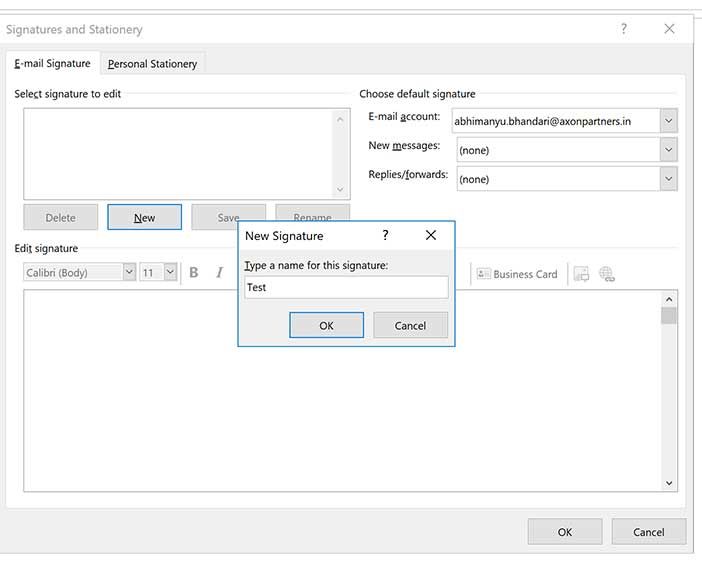
Step 6). Name your signature- you can name your signature and add multiple signatures to choose and identify from.
Step 7)Click on ok button
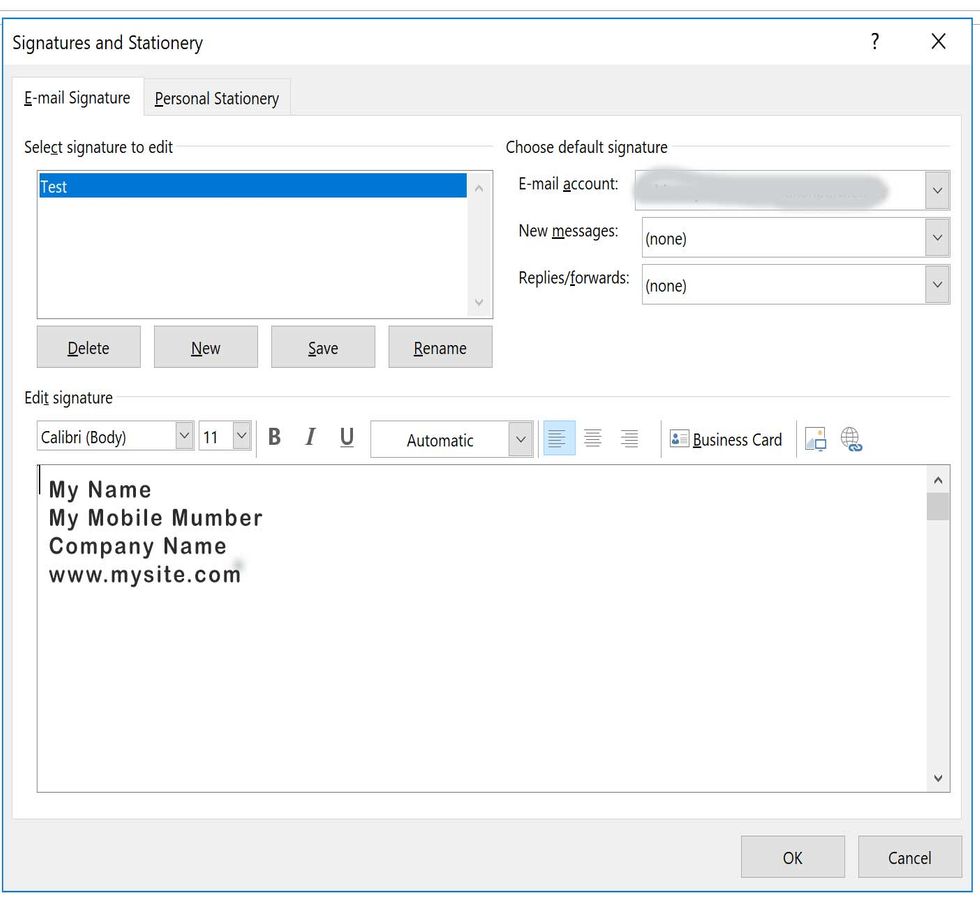
Step 8) Type what you wish to display – after naming your signature, below you shall see a blank white space. Now type what you wish to display in the signature.
Step 9)Select the account- if you have multiple email account then in the right-hand column you can select different accounts you wish to use for new messages, replies and forwards.
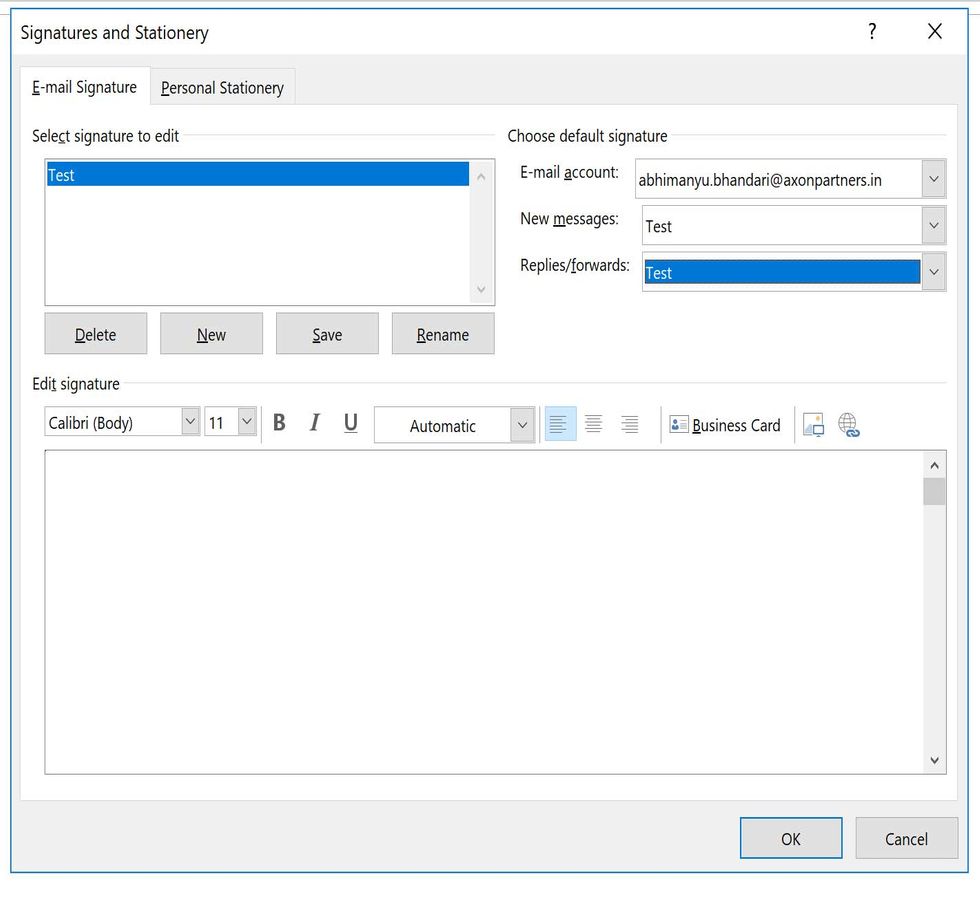
Step 10) Click ok – click ok and save your signature which you want to attach to your emails.
How to change/edit signature in outlook?
Step 1)Launch Microsoft outlook
Step 2)Select the file tab and navigate to the options button.
Step 3)On the popup window select the mail option and then click on signatures
Step 4)You will see the names of your existing signatures there. Click on the name which you want to edit.
Step 5)Below you will see a white typing space where you have your current signature saved. Rewrite or edit the current one to change your signature.
Step 6)Click ok to save the changed signature.
How to add image or logo to signature in outlook
Adding a logo to the signature is very simple. You just need to follow the following steps.
Step 1)Launch Microsoft outlook.
Step 2)Select the file tab and navigate to the option button
Step 3)On the popup window select the mail option then click on signatures.
Step 4)You will see your saved signatures here. Click on the name of the signature on which you want to add your logo. (If you don’t have any existing signatures saved you can create one by following the steps required)
Step 5)Below you will see a white typing space where your signature text is written
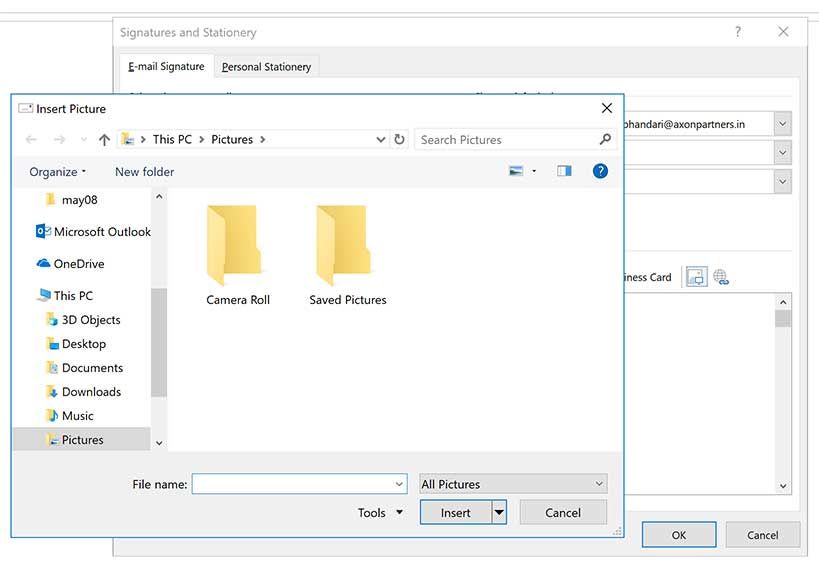
Step 6)Click on the image button which is placed above the white typing space of your signature. Before selecting a logo, you need to save your logo as an image on your computer.
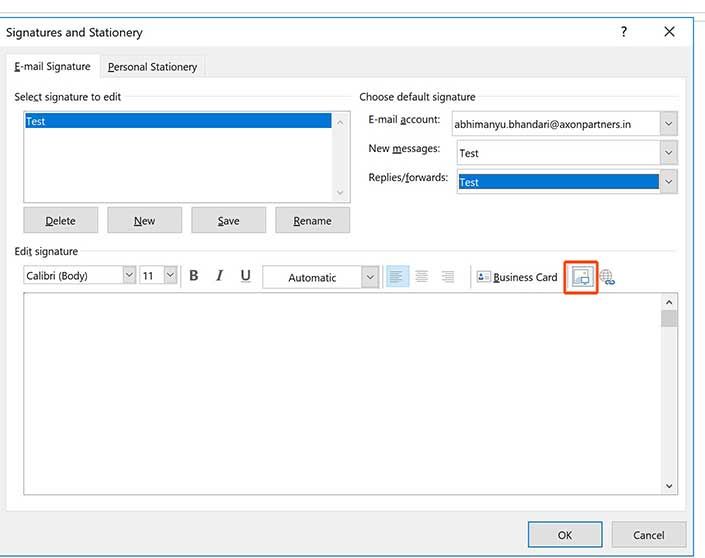
Step 7)Select a logo- after clicking the image button; you will see an insert picture dialog box. Select the picture of your logo you want to put as a signature.
Step 8)Click ok and save the logo to your signature.
How to change/add signature in Outlook 365?
Step 1)Log in to outlook- first, you need to sign in to your outlook account on the web ( outlook.live.com)
Step 2)Select the mail option- after signing in you will see many different options like mail, newsfeed, calendar etc. click on the mail option.
Step 3)Click on settings- you will see an option of setting gear on the top right corner of the screen. Click on the setting gear icon.
Step 4)Extend the mail option- on the left side scroll down to look for the option of “mail”. After finding the “mail option” extend it to find the layout option.
Step 5) Extend the layout option-
Step 6)Select the email signature option- after extending the layout option, look for the “email signature” option and click on that.
Step 7) Type the signature – After clicking the email signature option, you will see a white typing space on your screen. Type or copy-paste the signature you want to add to your emails.
Step 8)Check the “Automatically include my signature on new messages I compose” box and click on that box.
Step 9)Save- click on the save option to add the new signature you typed.