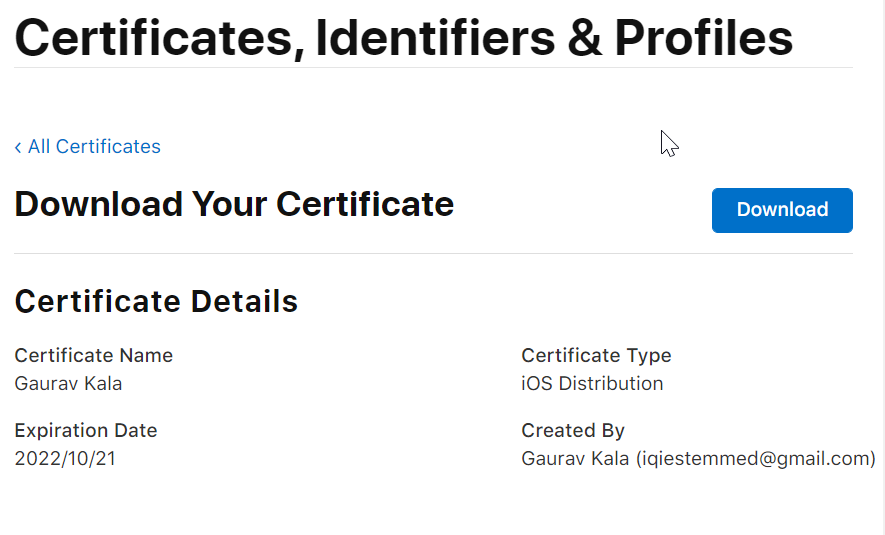
In this tutorial, we can assume that you have successfully built your IOS App, using Xcode. Moreover, the next step will be publishing your app on Apple App Store, Which is the most demanding app store in the world.
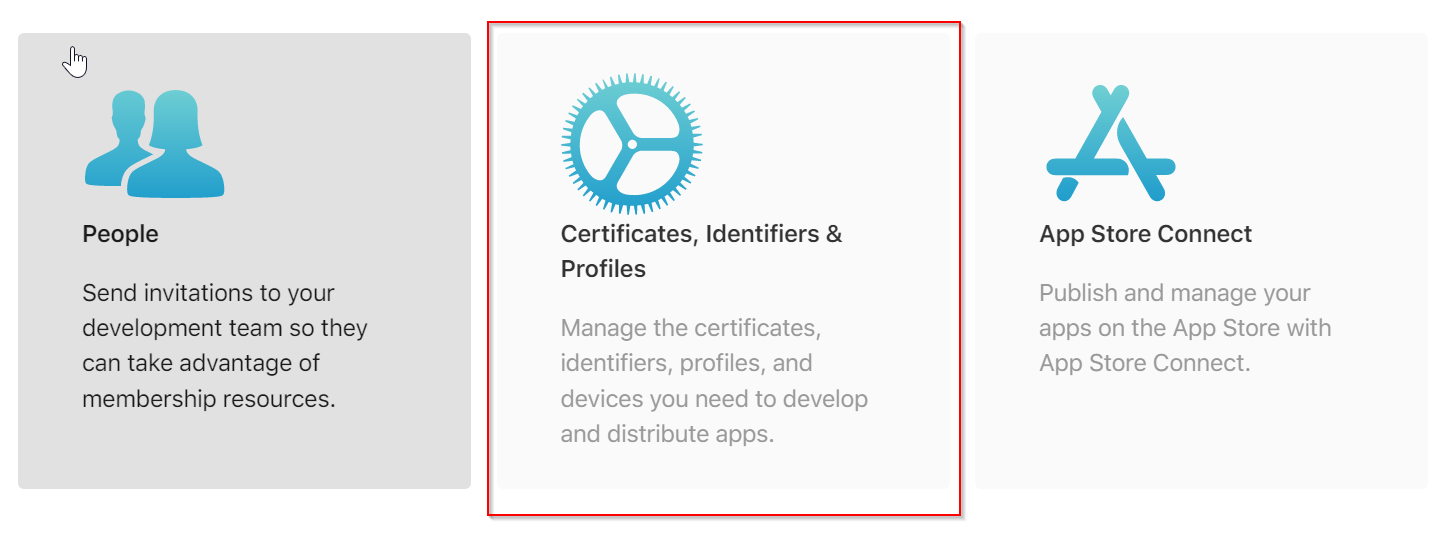
Furthermore, you need to login to Apple Developer console (https://developer.apple.com/), And click on Account link from the top navigation panel.
Step 1: Create Certificate
Step 1.1: Create Development Certificate
To Publish Apple app first you need to create Certificates.
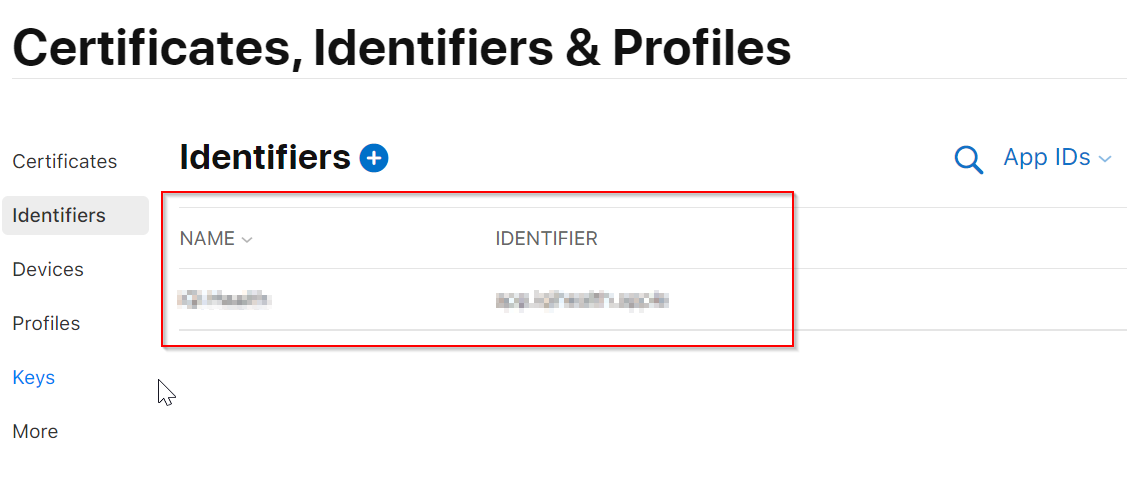
- Firstly, click on the Certificate, Identifiers & Profiles Link as shown in the following image
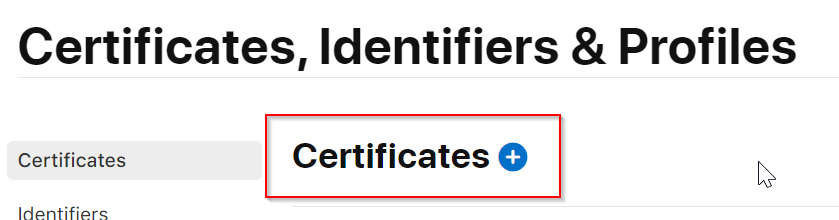
- We need to create two certificate one for Development and Second for Distribution
- In the next screen click on Plus Icon in submenu of Certificate to generate development certificate
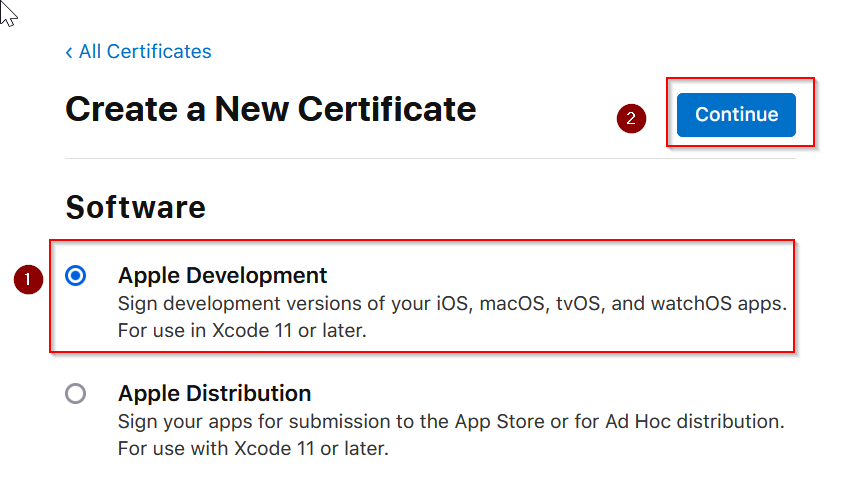
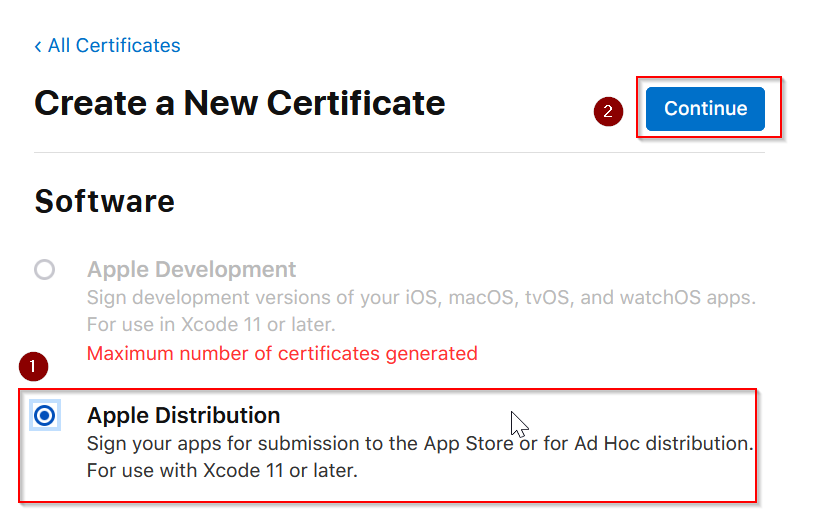
- Under Create New Certificate Window select “Apple Development” and click on continue button
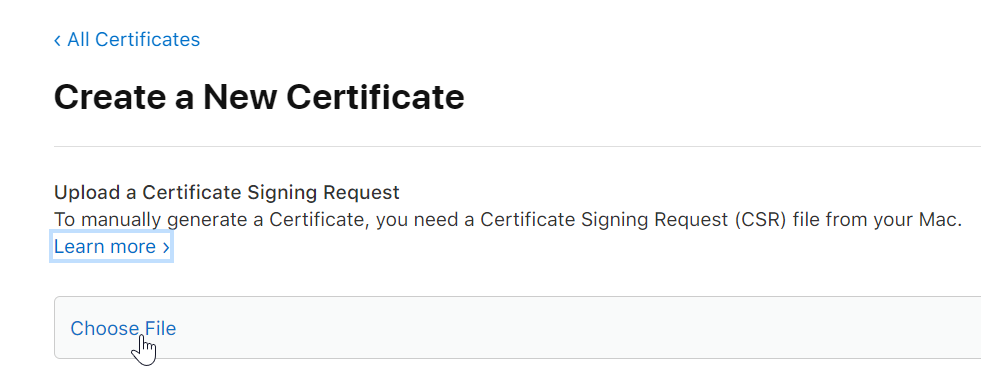
- In the next screen, you need to upload certificate, for the apple developer console.
Step 2: Create Certificate for Apple Developer Console
The step2 is all about creating certificates for app development and distribution, the Certificates here represents digital certificates you will use to indicate or sign your IOS apps, or to distribute.
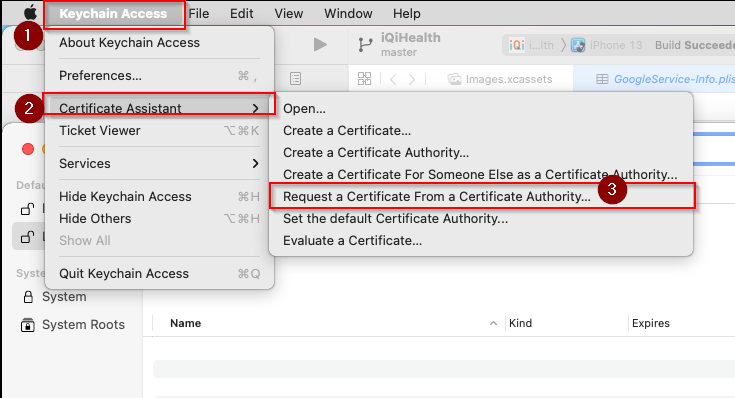
- Open Keychain Access tool in you Macbook
- Then Click On the following options.
- Keychain Access >>
- Certificate Assistant >>
- Request a Certificate From a Certificate Authority.
This picture below is representing how to request a certificate from an authority
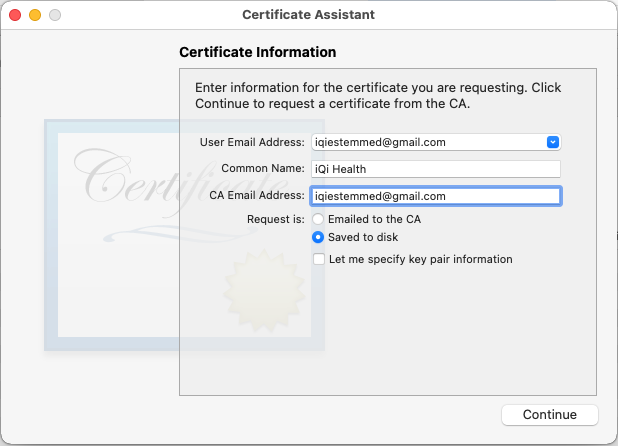
In addition, it will ask you about the certificate or certificate information
It includes information like:
- Email Id:
- Common Name: (Common name is the name of the application for which you will generate certificate)
- Ca Email Address:
By doing this, the certificate assistant will generate certificate for you and it will be saved in your device/drive.
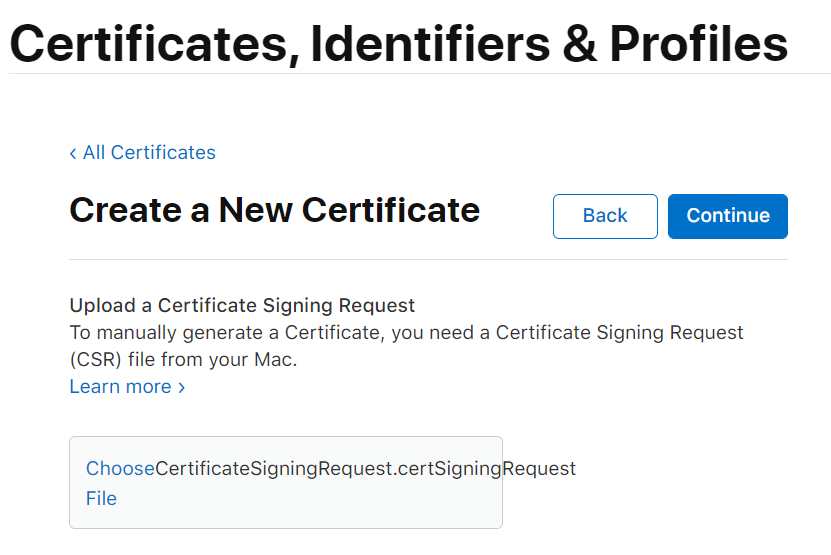
- Now go back to Apple Developer Console
- Under Create a New Certificate window Select the certificate that you have created.
- click Continue button
The above image shows that generated certificate is uploaded and Now your Certificate is stored in Apple Developer Console Database
Step 2.1: Create Distribution Certificate
Please follow these steps to create Distribution Certificate:
- Select Create New Certificate
- Then Click on Apple Distribution
- Next, Click On Continue button, then Select Certificate Signing Request file (From Your System)
- And click on Continue button
- After following above steps you can proceed ahead.
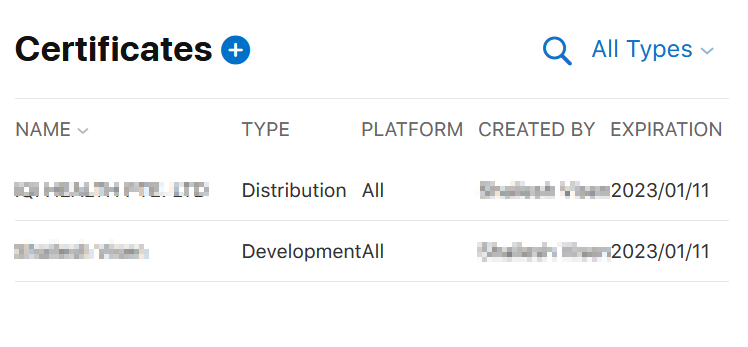
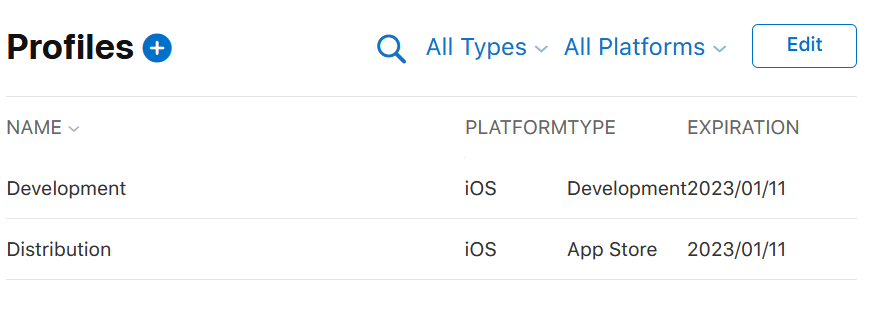
Now In your certificate window you can see two certificate one for development and another for distribution
By following step 1 and step 2 you can create and upload certificates on apple developer console.
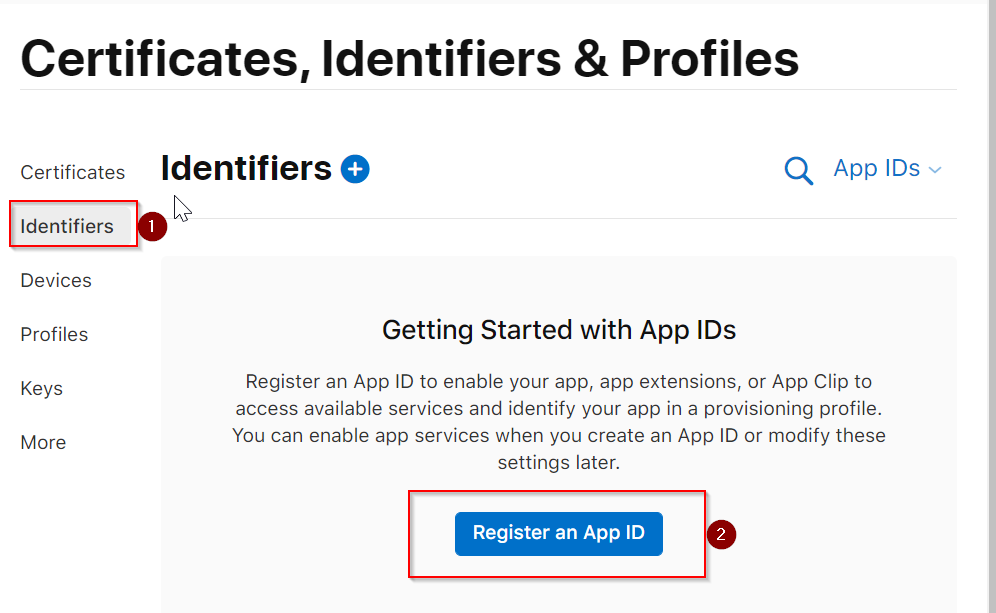
Step 3: Create Identifiers
- To Create, Identifiers & Profile
- click on Identifiers link and then click on Register an App ID button
- In the next screen, Check App IDs button and click on Continue
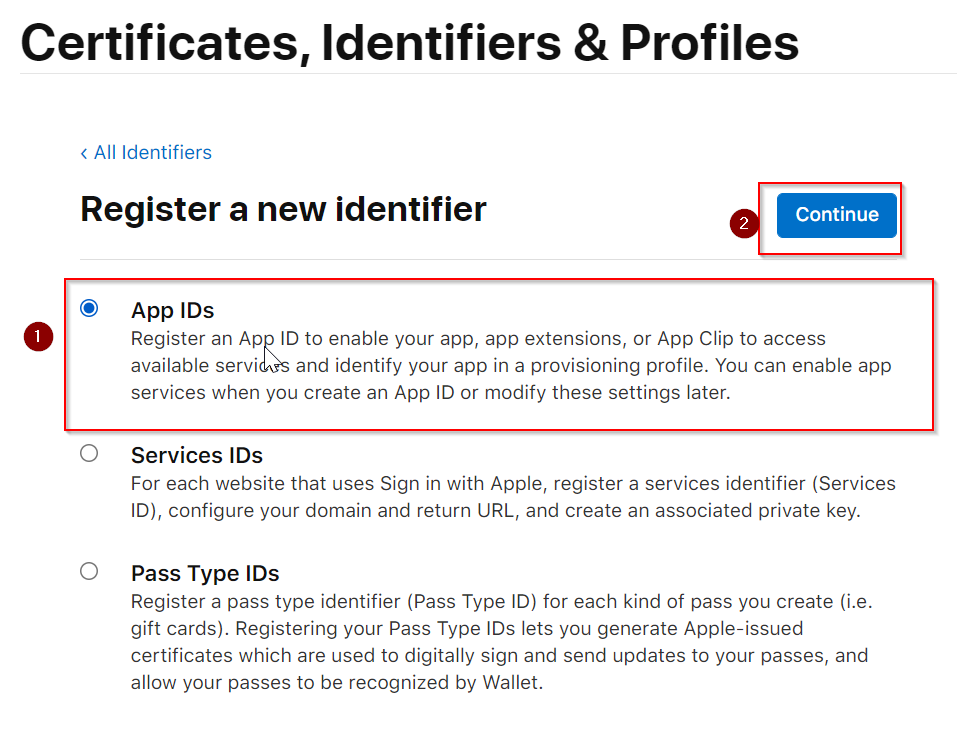
Above picture shows Register a New identifier Window
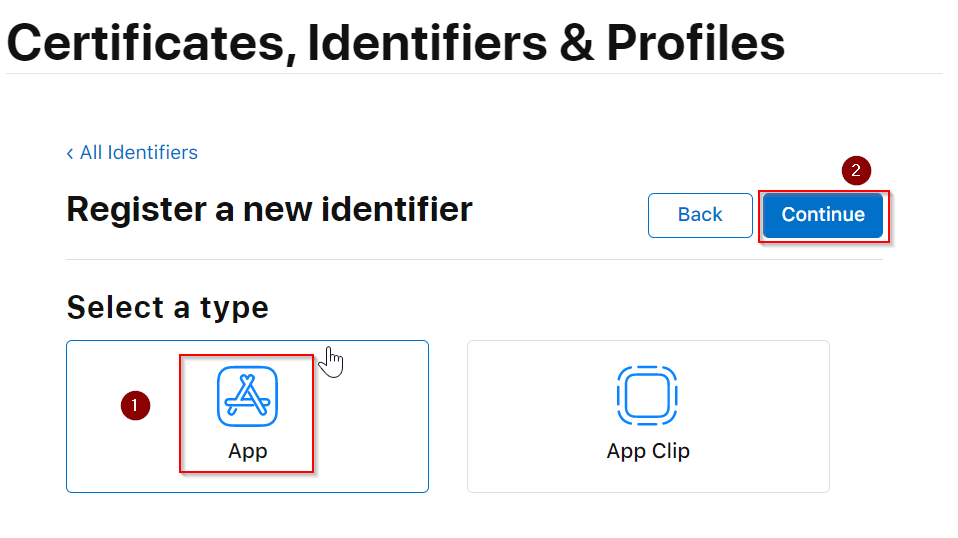
- In Register a new identifier window
- Select “App Ids” click Continue
- then select “App” in App type
Register an App ID
- to register an App ID you need to give information about your app like
- Description: Please give name of your application
- Bundle ID: Pleas give ID of your project that you have given at the time of creating project in Xcode example: ios.appname.com
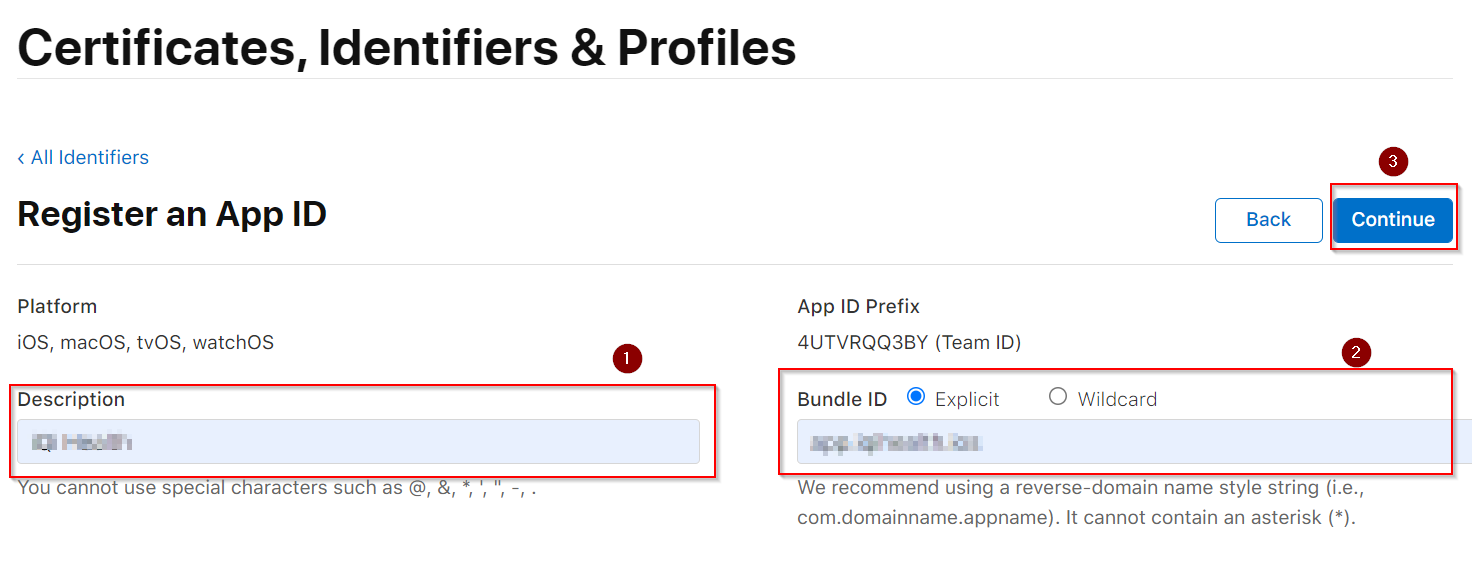
- After filling the information that is required, click on ‘Continue’.
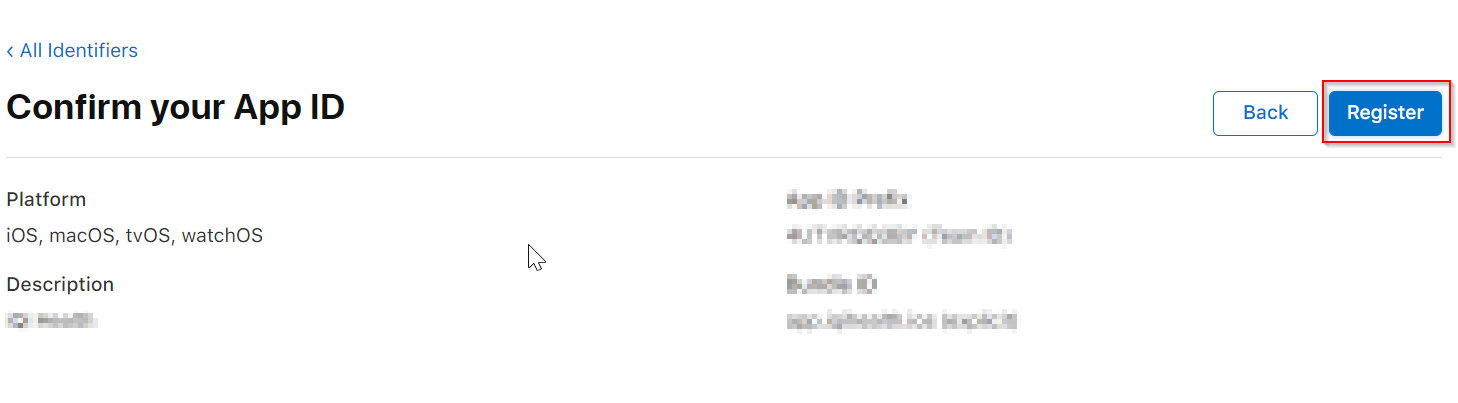
-
- After following above steps shown and as illustrated in pictures, your App Identifier is created successfully.
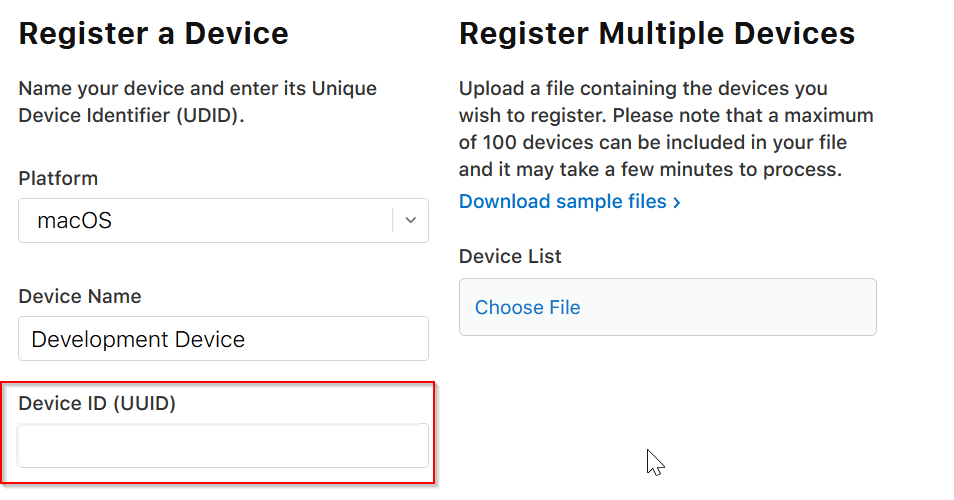
Step 4: Register Device
In this step we are going to register our device:
- To register your device we need to have UUID of you Mac Book
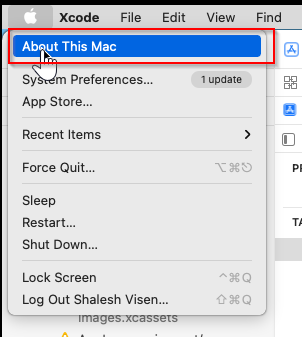
- To get UUID
- open your Macbook and go to About This Mac
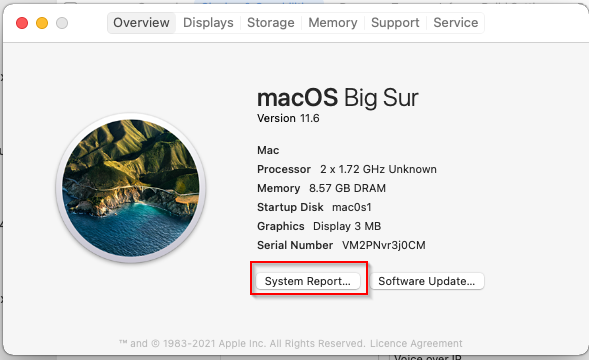
After clicking on the ‘About This Mac’ a window will popup like the picture shown below
You can see all the detail of your Macbook as well as UUID (shown in below image)
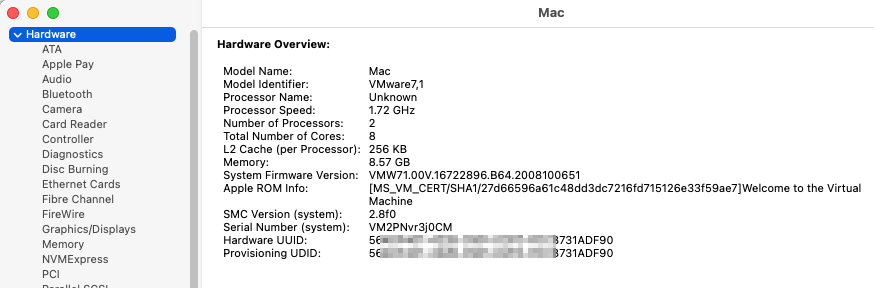
- Now you need to Copy the Hardware UUID and paste it into the Device ID(UUID) field.
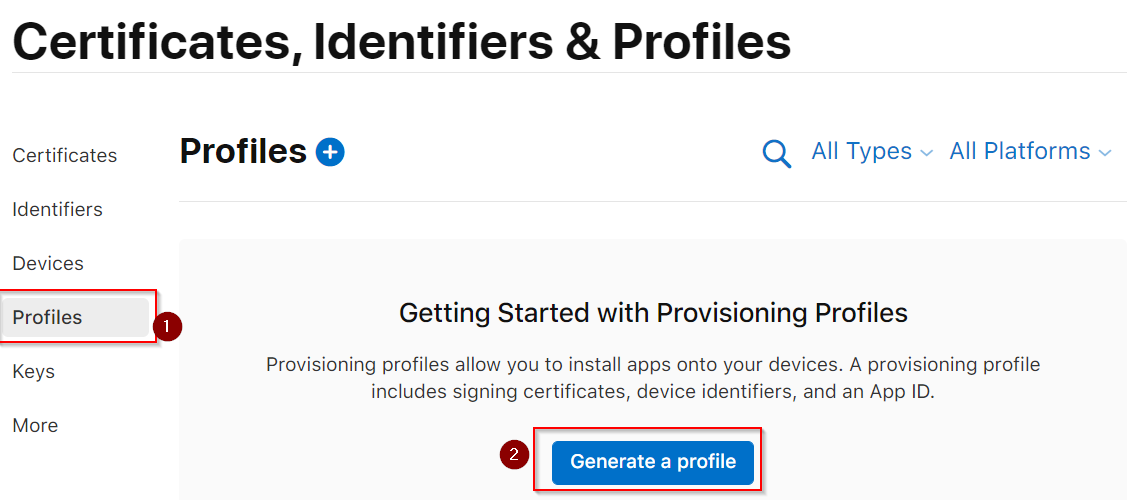
Step 4: Create Profiles:
A Provisioning Profile includes signing certificates, device identifiers, and an App ID.
Provisioning profiles are used to connect certificates, IDs, and devices. A development profile assigns an app ID to a developer or team, as well as other enabled services or capabilities, such as push, and the devices for which the profile will be used. A production profile will also have the distribution cert, IDs, and services, but it will be used for re-signing by Apple for the app store and will not be limited to a small number of devices.
- Let’s move into the next step, Now we need to create Provisioning profiles
- It lets you install your apps into your devices,
A Provisioning Profile includes signing certificates, device identifiers, and an App ID.
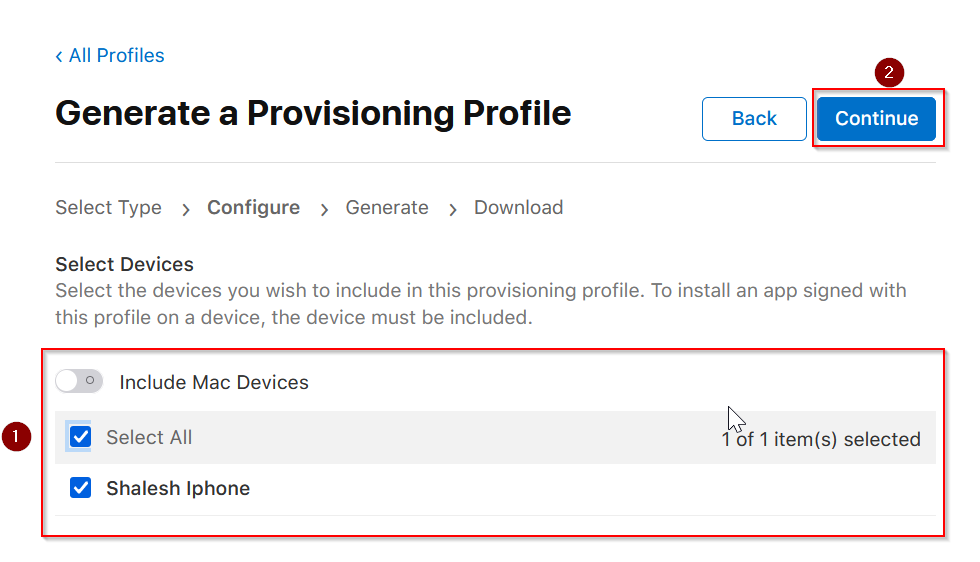
Step 4.1: Create Development Profile
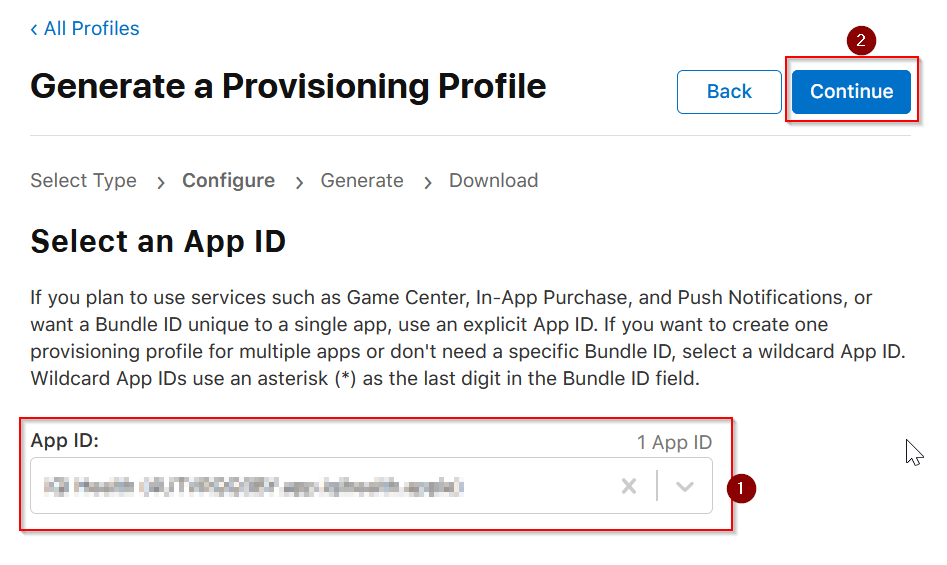
In Register a New Provisioning Profile window
STEPS:
- Select iOS App Development radio button and click Continue
- Select the APP ID and then click Continue

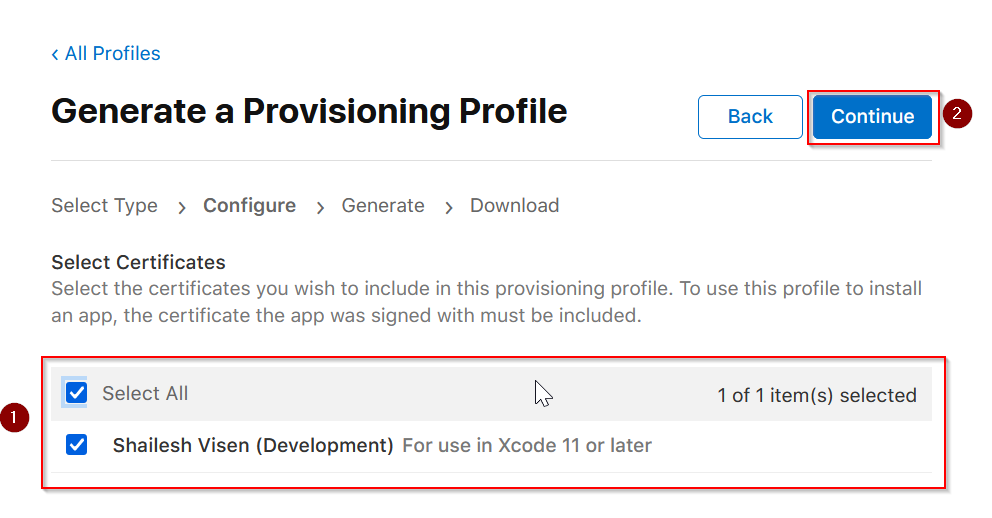
- Now Select the Certificate that we have created in step 1
- And then select Mac Device.
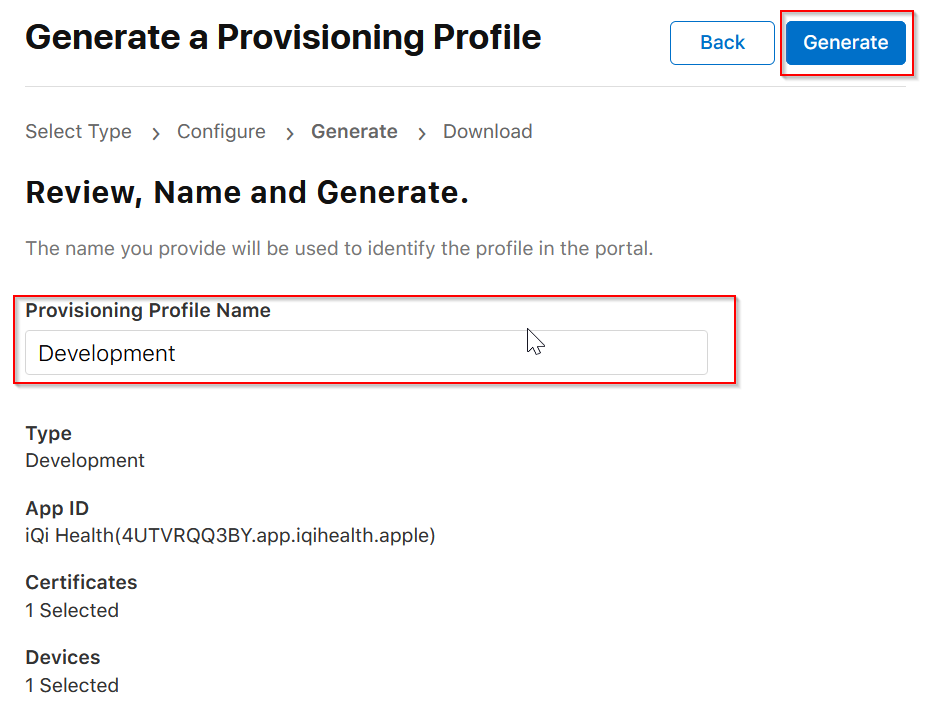
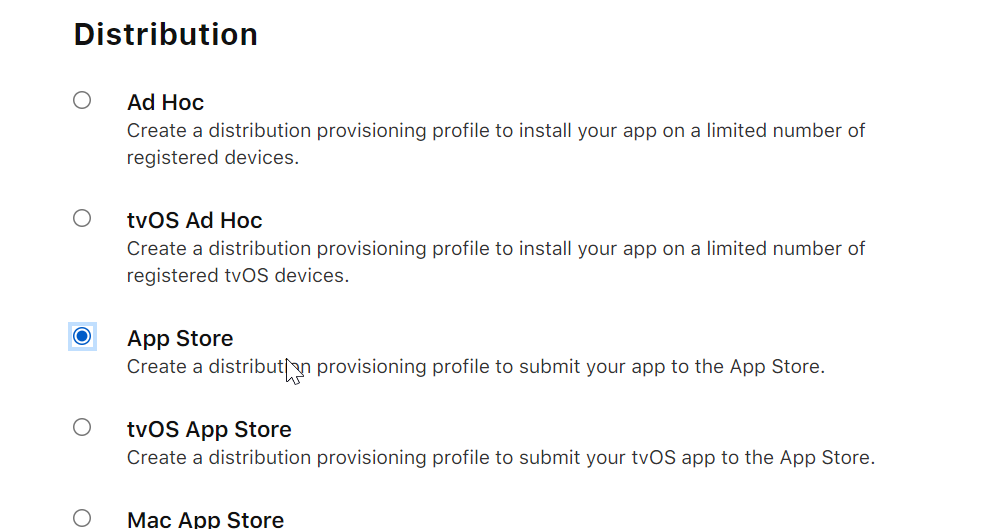
Step 4.2: Create Distribution Profile:
To submit your app to the app store, we need to register new provisioning profile.
- In Register a New Provisioning Profile window under Development section Select App Store Radio button and click Continue button
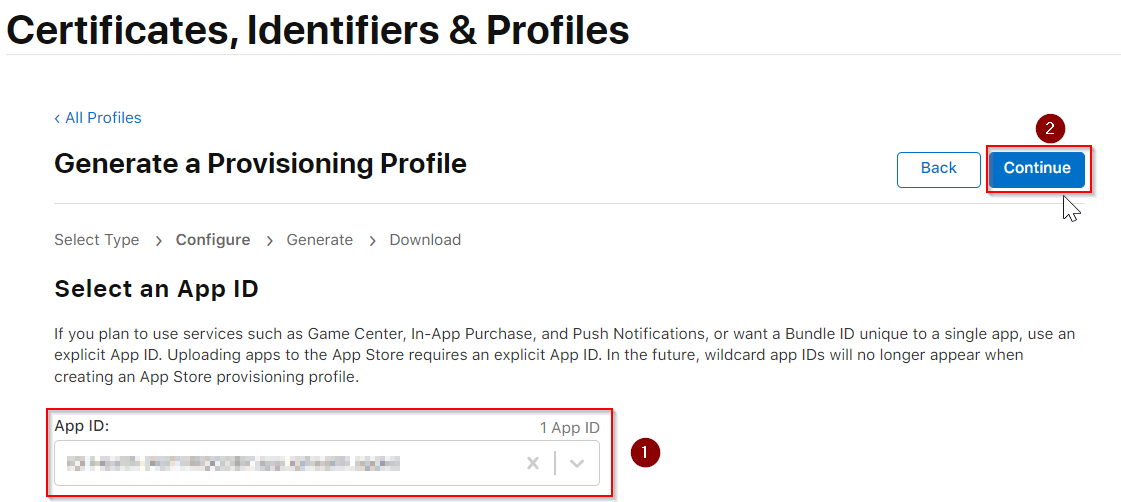
- Moving forward, as you can see, next picture shows Generate a Provisioning Profile window
- In the same window, Select An App ID that you have just created in the previous step and then click on Continue
- Moreover select the certificate and click Continue button
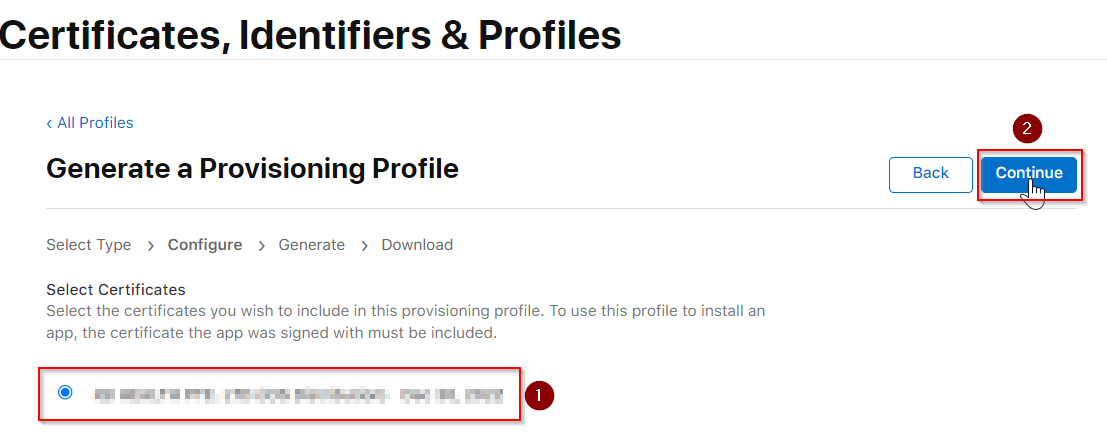
- In the next step just give Provisioning Profile Name (although it’s a display name) and click on Generate button

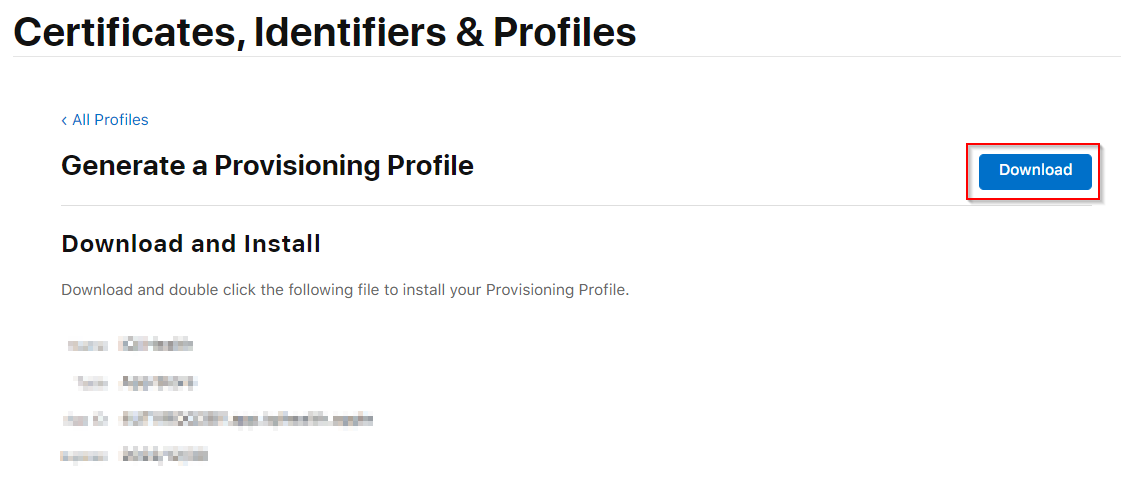
As you can see, your Provisioning Profile is generated successfully and now you need to Download this profile because it is required to publish you IOS app.
Now as our profile and certificate got genereated now we need to create App
Now as our profile and certificate got genereated now we need to create App
To conclude, our provisioning profile and certificate got generated, now in the next step we are going to create App
Step 5: Create App in Apple App Store Connect
- After successfully creating certificates we are going to create app
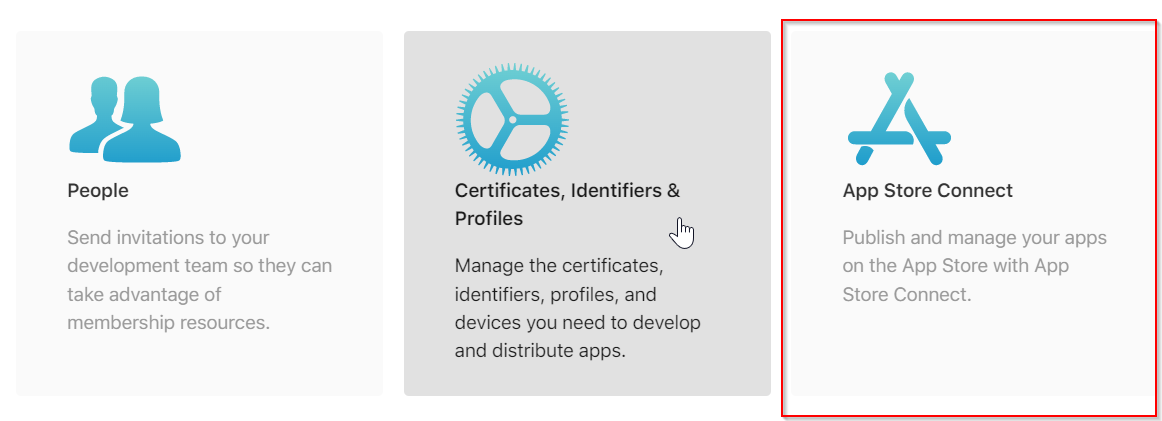
- For this go to url https://developer.apple.com/account/#!/overview/4UTVRQQ3BY
- click on App Store Connect
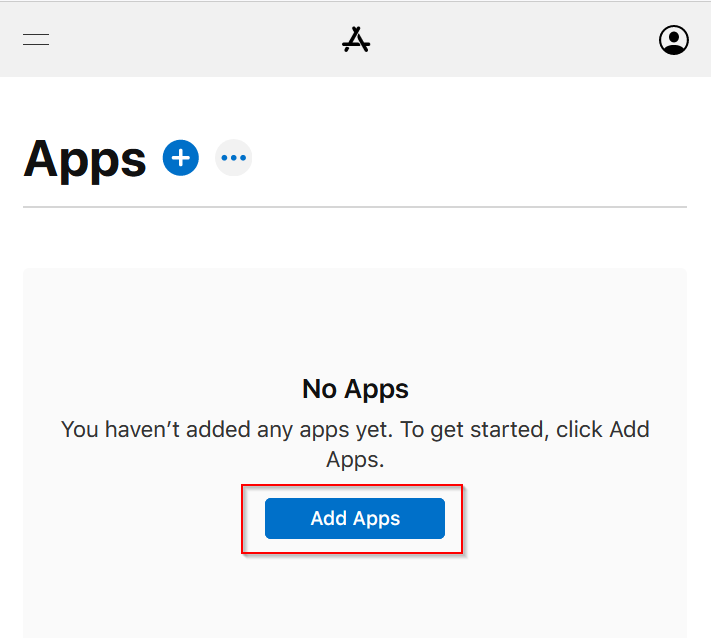
- In app store connect click on ‘My App’
- Moving forward now proceed to the App store connect window and click on Add Apps button
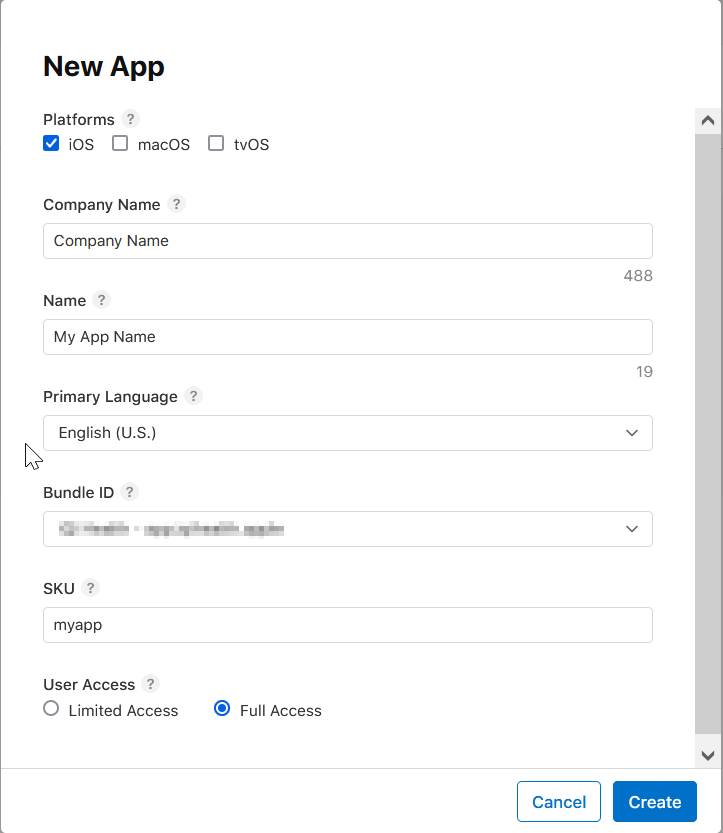
In New App window, it will ask for the required filed
- Platform: ios, macOS, tvOS
- Company Name: Name of your company
- Name: Name of your App as is show in app store
- Primary Language: Your app primary language
- Bundle ID: Select Bundle id that we have just created
- SKU: short name of our App
- User Access: User access type
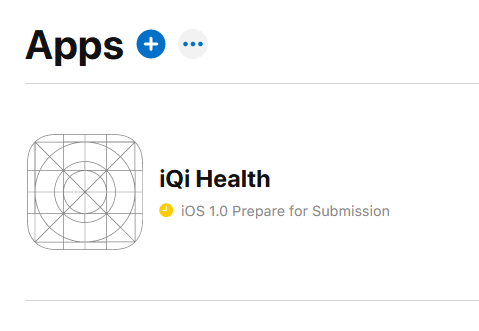
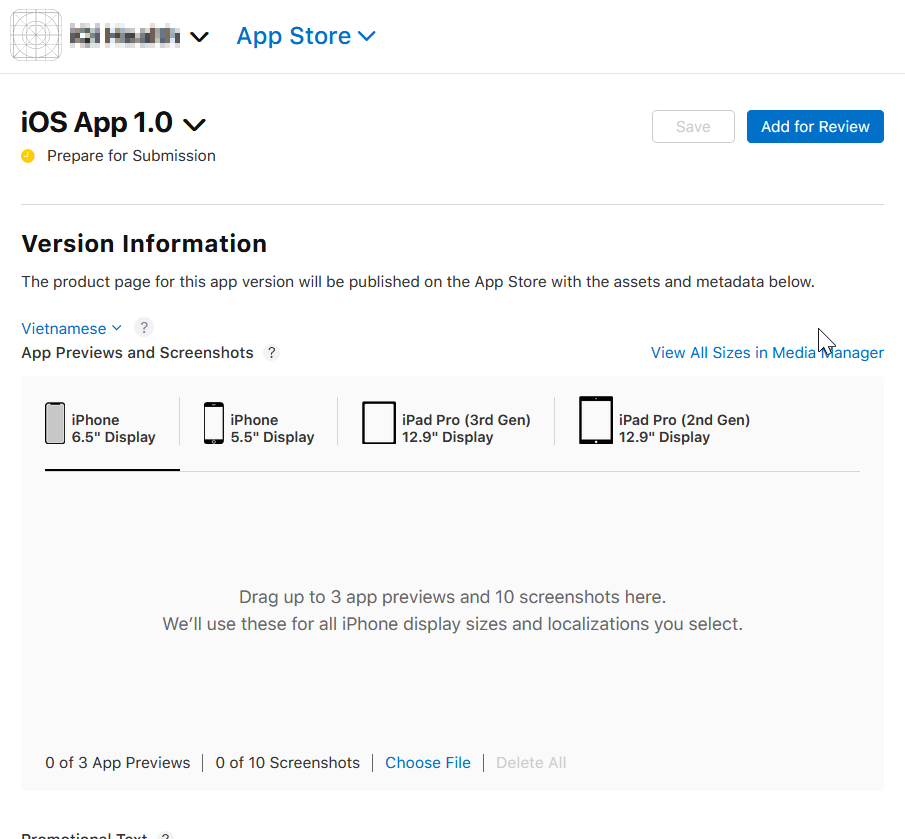
Now you can see that your app is created and we need to enter app details like
Ico, screen and app description. Now click on your app icon
Next Page, it is showing: “Version Information” and basic details to publish app.
And furthermore, App Previews and Screenshots for different devices
- Promotional Text
- Description
- Keywords
- Support URL
- Marketing URL
- Copyright
- Version
Step 6: Upload app on Apple App Store
In the 6th step we are going to upload app on apple app store.
Open Xcode in your Mac Book then opne Preference window by click on
Xcode >> Preferences
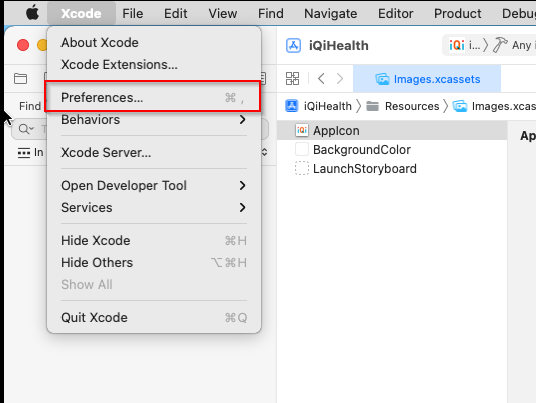
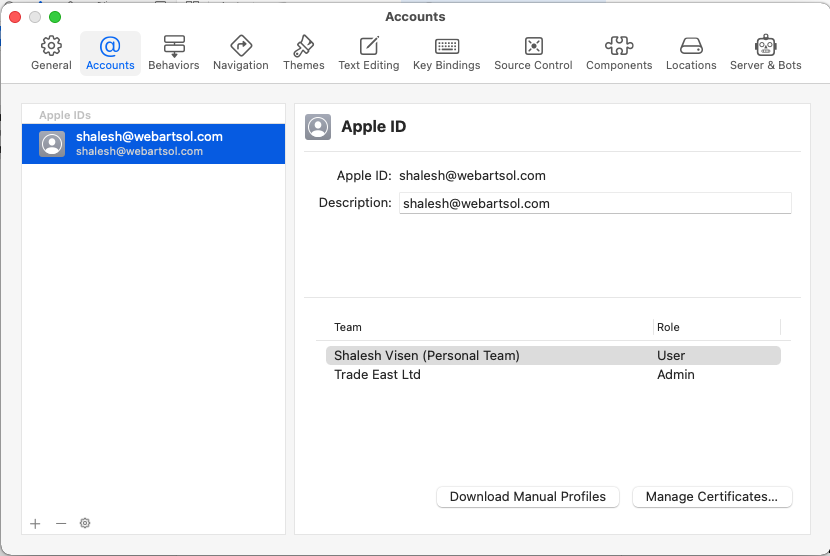
To add account just follow the steps shown in the picture
- Under Xcode Preference Window select Account
- Then click on Add Account icon
- In the following screen it will ask for the Apple id and password you already aquire.
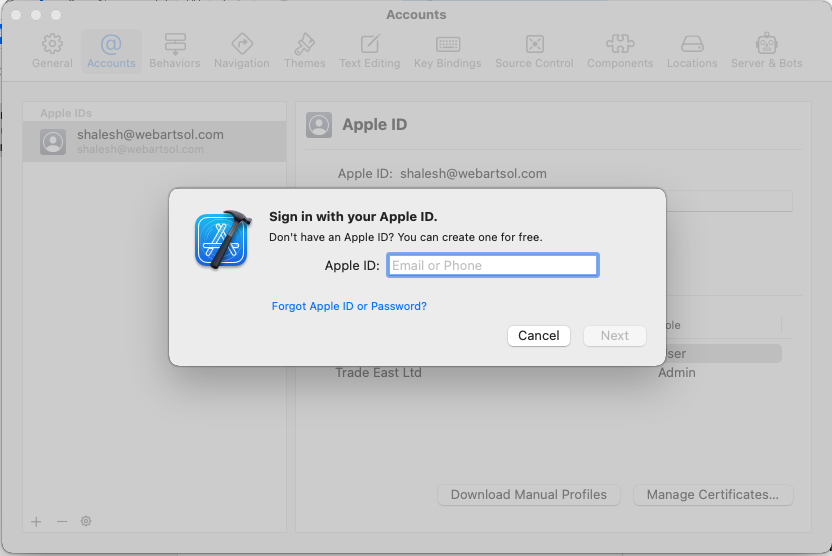
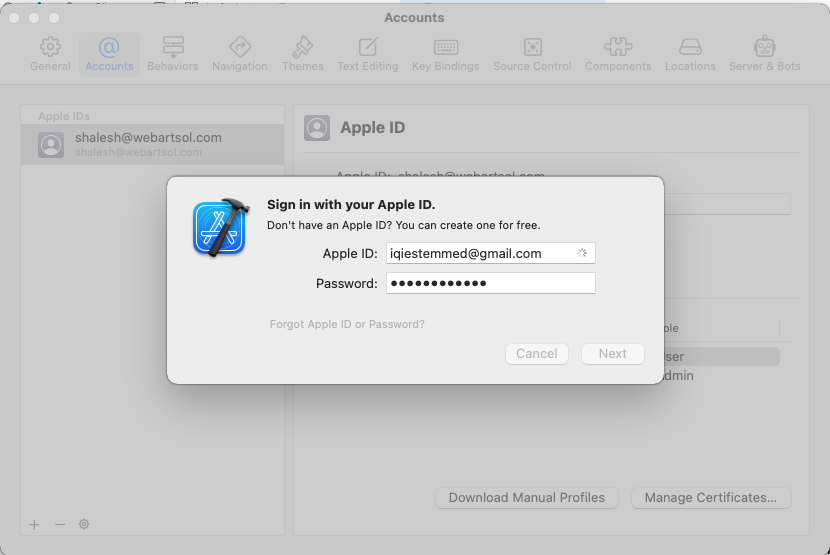
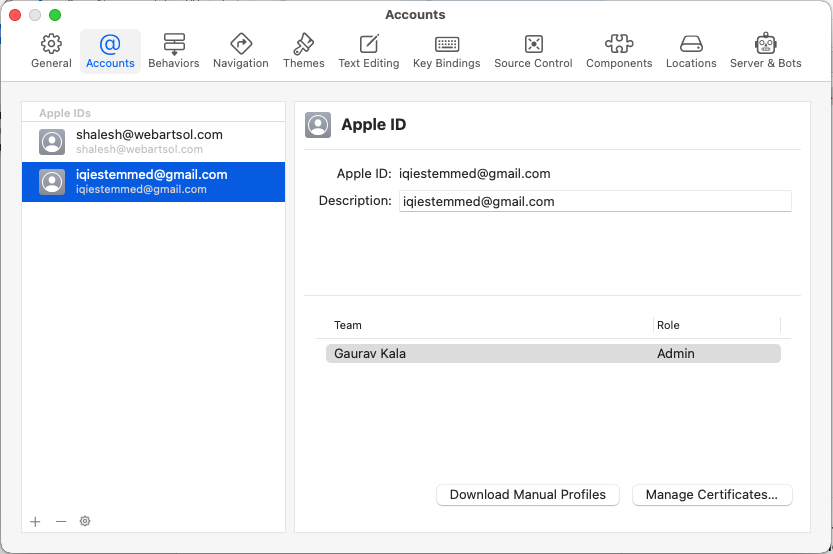
- After entering your apple id and password, your account will be added.
- Now you can see that the account is added in Xcode.
Your account and profile which is required for uploading app is created and added successfully.
In the end, Publish your IOS app on Apple App Store
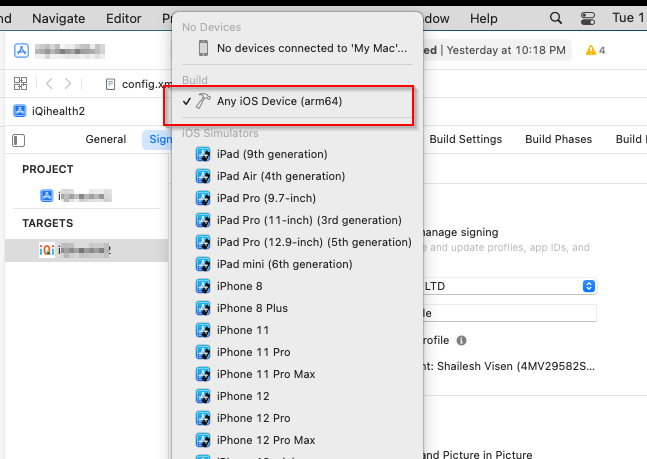
- Change Simulator to “Any IOS Device”
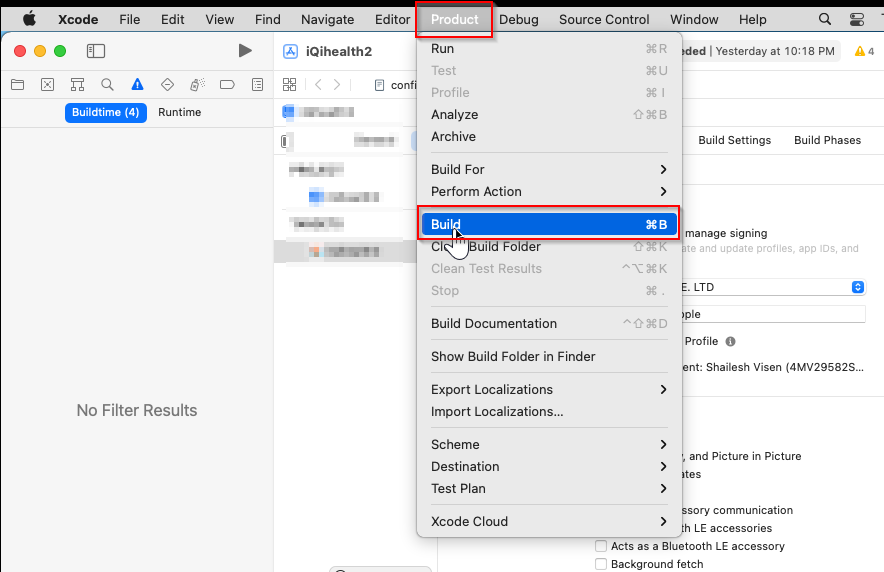
- Go to product menu and click on Build
By doing this, you will generate build for production and it will add on to uploading process.
Now your build created successfully and then we need to upload the build, to move ahead.
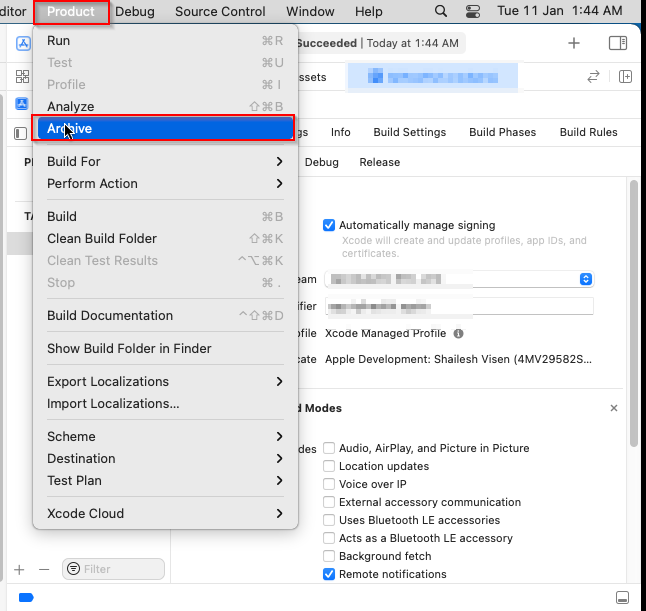
To do this,
- click on Product
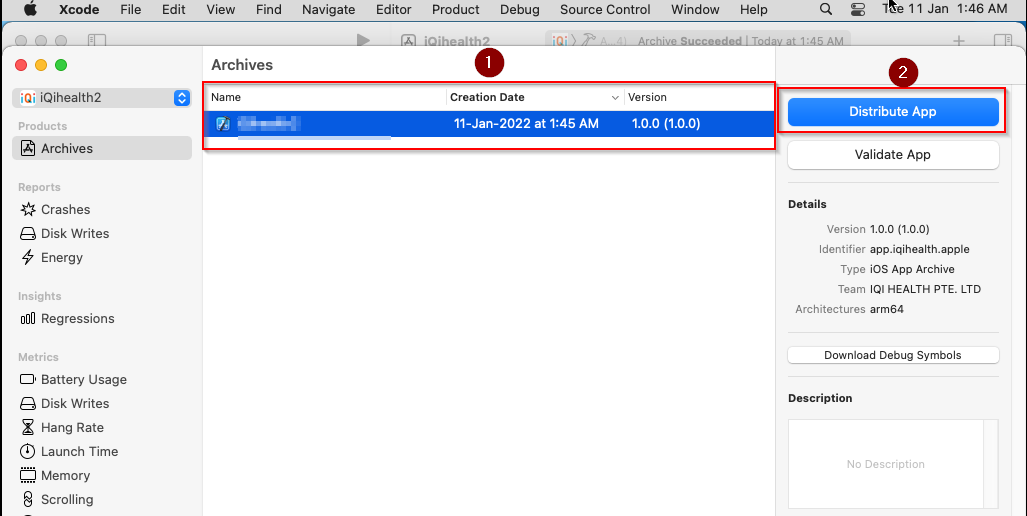
- go to Archive
- In the archive window select the build you want to publish
- Then click on Distribute app button
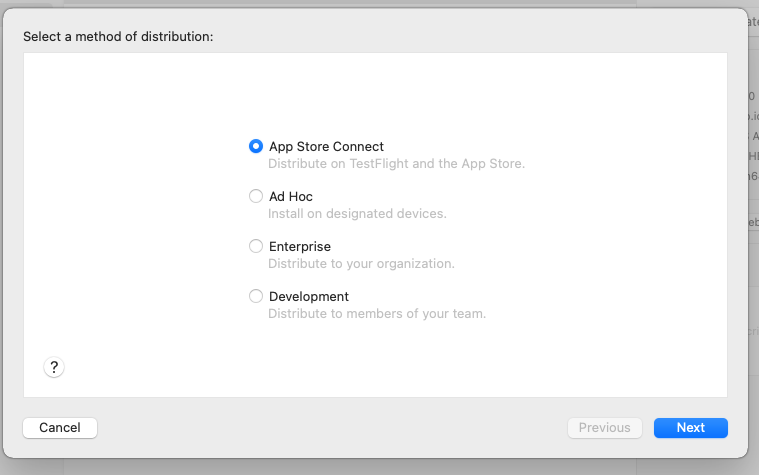
Now we will conncet app store by following this step
- Select App Store Connect and click Next
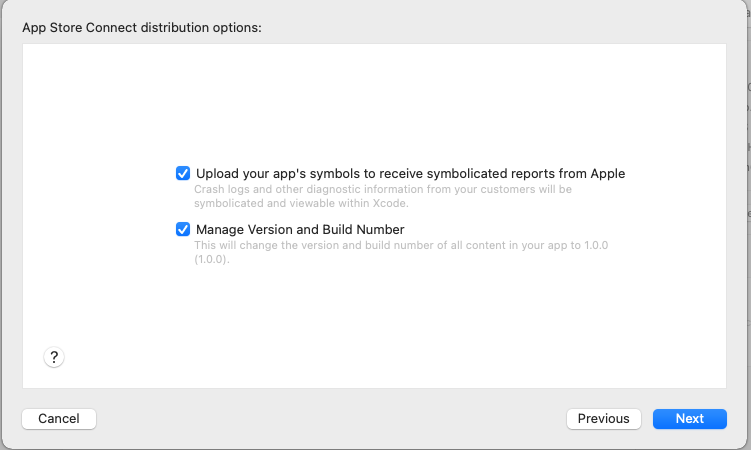
- Leave Default settings
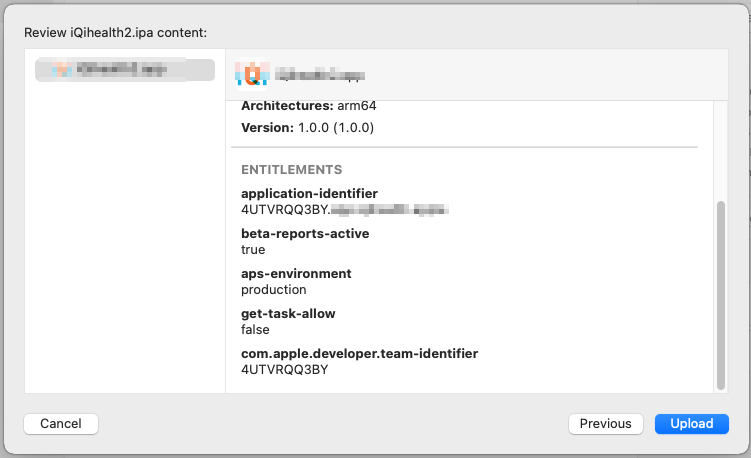
- In next step it wil show your the summary to upload build
- If you don’t understand just look at the pictures to gain clarity
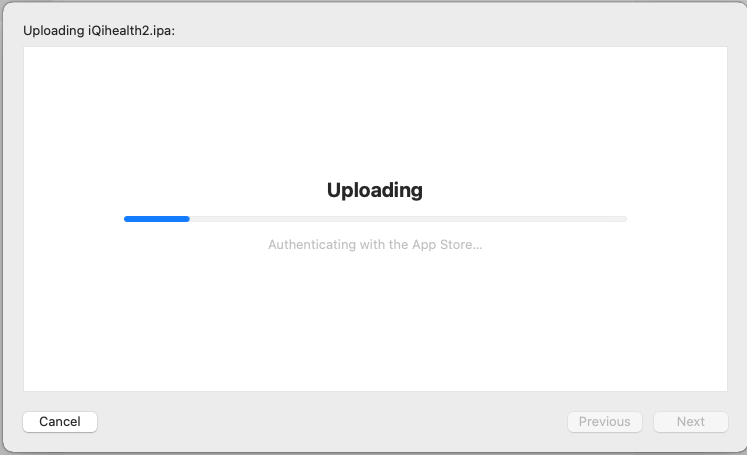
Click on Upload button to upload build on Apple app store.
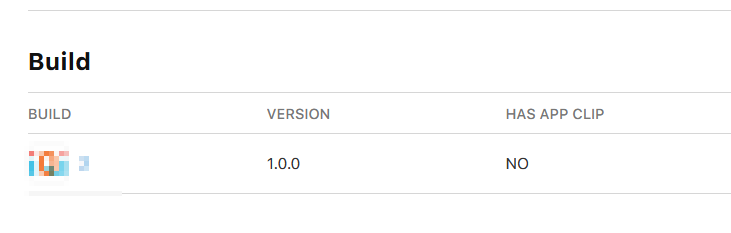
After uploading the App successfully on the App store you can see the details of it under the App Store Connect window and click on “My App”.
- Normally it may take some time to upload your app fully.
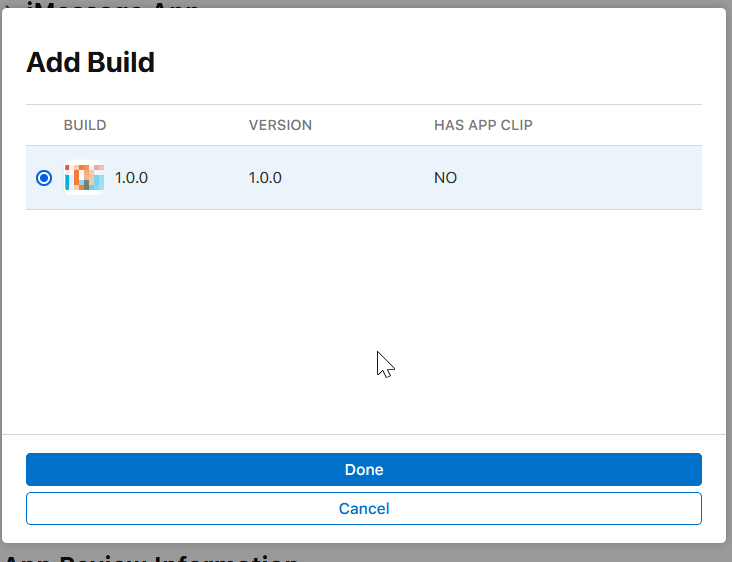
- After your build is uploaded on the App Store, it will show you a button to “Select your build before you submit your app”
.png)
- Now you need to select “Export Compliance Information” if your application requires any of it.
To conclude, we have successfully completed all steps and our app as shown in the pictures, is already published and you can find the app on the app store.