Please follow the steps below in order to add menu items with icons to your action bar:
Step 1) So first of all, we need to have some icons in order to add it to our app. So the best way to find icons for your action bar is to search the internet and just search for Android icon packs here on your favourite browser.

And there is a website which is from Android itself which is called developer.android.com/design/downloads.

Click the link and you will reach to the Android website.
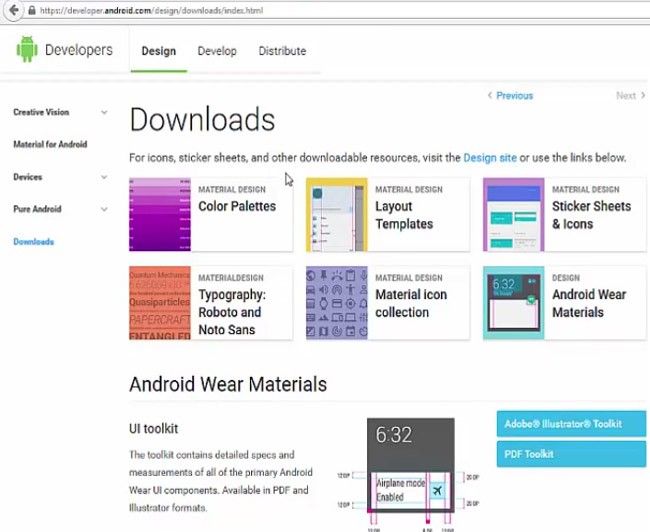
Step 2) Now just click this Material Icon button
![]()
And in there you will be able to see many items which you can use in your app.
![]()
So for example, if you want to add the info icon to my action bar menu you can just select it
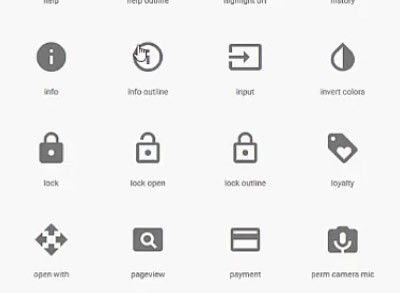
You can also choose whether you want the white or the black background. So because my action bar has black background, so I can choose this white here. So it’s going to look like this.
And then you can select this png so it’s going to download this as a png file. So let’s download it by just saving it in zip file.
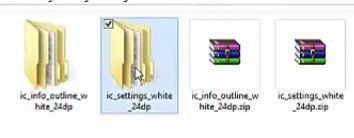
Step 3) So once you have saved your zipped files you can go to the location where you have saved them, and you can extract these files. Extract them and you will be able to see 3 folders.
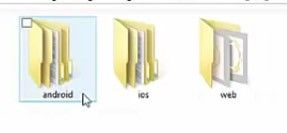
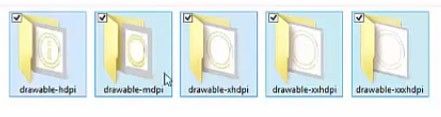
Now go inside this Android folder and there you will see different resolution png files. So drawable hdpi, drawable mdpi and other resolutions.
Step 4) We are going to use this hdpi image so copy the hdpi image.
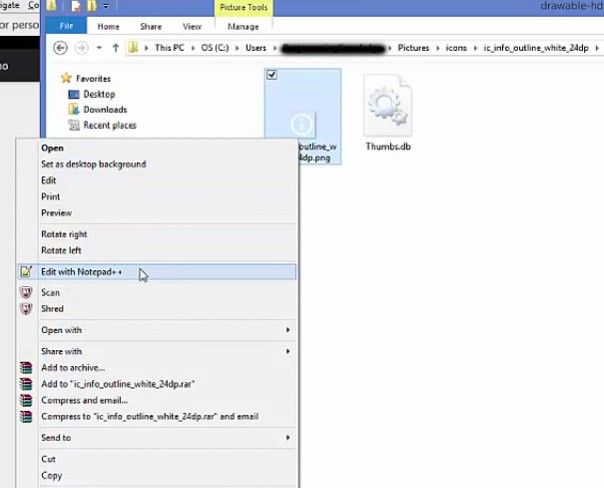
Now go to your Android studio -> go to your drawable->right click and paste it there
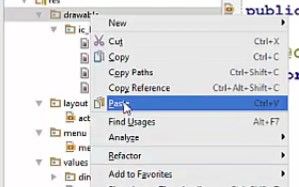
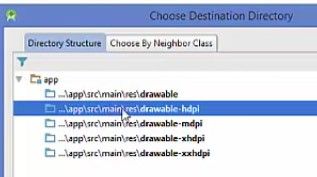
And now it’s going to ask in which folder do you want to paste it? we are going to paste it in drawable hdpi.
So it’s going to add this picture there.
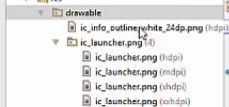
Now if you want to add other resolutions pictures to this drawable, just do it in the same manner.
Step 5) And now go to the other folder which is Settings -> Androids-> drawable hdpi.
Right click, and copy from here
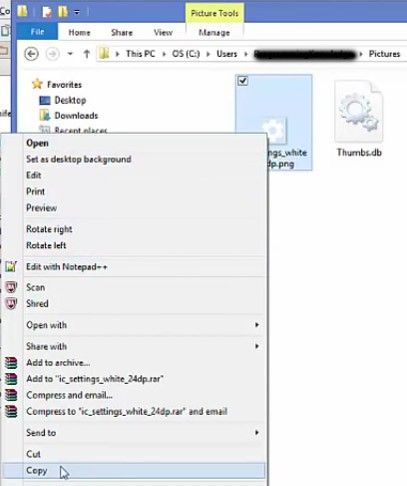
And then go to your Android, then drawable, paste it here and inside this drawable-hdpi and click Ok.
.jpg)
So it’s going to add two pictures in your drawable folder.
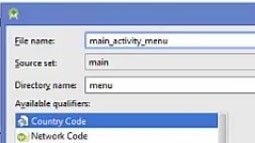
Step 6) Now we have our icons and we want to display them on our Action bar. So what we are going to do is we are going to create a new Menu, so let’s click on this Menu, right click on it and we are going to create New Menu resource file.

And in here, you need to give some name, for example, main_activity_menu and click Ok.
And it’s will create this menu resource file.
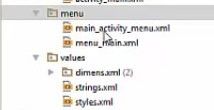
Step 7) Now inside this menu resource file, you can add some items to your menu.
So first, go to this Main menu_main.xml which was already present and just copy this line

And the go to your new file which you have created and then paste it here.
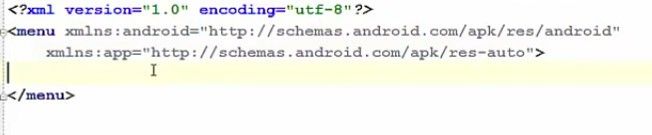
Step 8) Now after adding we go here, and we are going to add items here. So, first of all add id totheour item. And in here we can give some id to my icon. For example, we want to give some id to my info icon, so we will just say info id. And once again, you can add some more attributes, for example, title for your item and then you can add some icon to your menu item. So, Android icon and go to drawable, just search for ic info. Now after that, we just need to add 1 more line which is, app and show as action and here we are using never for now.
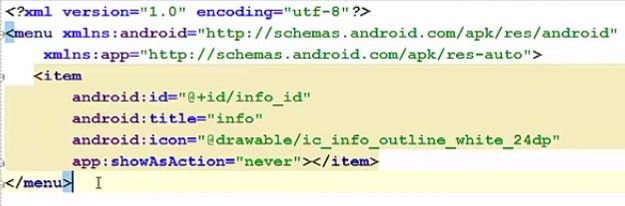
So this is our menu resource file and we have 1 menu inside our menu and
Step 9) Now to see this menu, what we need to do is we need to go to our main activity.java file
And we need to override this onCreateOptionMenu.
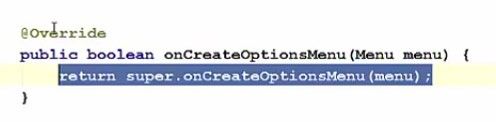
And in here inside this onCreateOptionMenu, we just need to create an object of menu inflater.
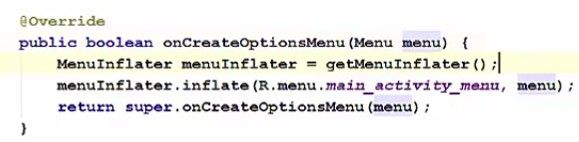
So now let’s run our program and let’s see if we are able to see our icon or not.
Step 10) Our app is running now and you can see this overflow menu but you don’t see the icon.
![]()
And that’s because we have added never in the action method in our main activity menu.xml file.
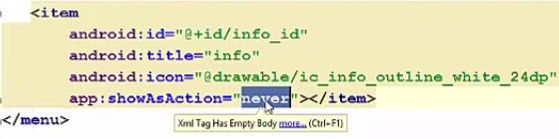
So this stops your icon to show it shows only your item but without your icon
Step 11) So, change it to 'always' from 'never'
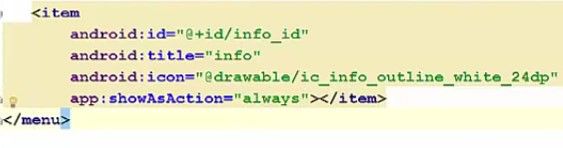
Now once again run your program, now when you see here on the Action bar, you can see your info icon here.
![]()
Step 12) So now let’s add 1 more item for setting icon to our menu. The id here will be settings id.
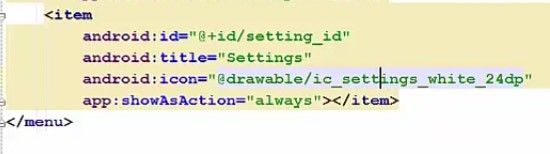
Now when we run the program, we will see both icons. One is setting icon and the other is info icon here.
![]()