The Scroll View is scrolling your application from the top to bottom or bottom to top.
We need to add Scroll View is to add multiple items into an Android app. The screen may be not enough to fit the items. In that case, you can use the Scroll View which is highly helpful to add multiple items.
Please follow the steps below in order to use Scroll View in Android:
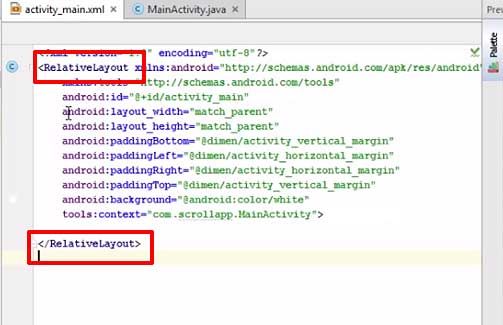
1.Open Android Studio and go to Text.

2.Change the Relative Layout/Linear Layout to Scroll View.
<?xml verson="1.0" encoding="utf-8"?>
<RelativeLayout xmls:android="http://schemas.android.com/apk/res/android"
     xmls:tools="http://schemas.andoid.com/tools"
     android:id="@+id/acivity_main"
     android:layout_width="match_parent"
     android:layout_height="match_parent"
     android:paddingBottom="@dimen/activity_Vertical_margin"
     android:paddingLeft="@dimen/activity_Horizontal_margin"
     android:paddingRight="@dimen/activity_Horizontal_margin"
     android:paddingTop="@dimen/activity_Vertical_margin"
     android:background="@android.color/white"
     tools:context="com.scrollapp.MainActivity">
</RelativeLayout>
<?xml verson="1.0" encoding="utf-8"?>
<ScrollView xmls:android="http://schemas.android.com/apk/res/android"
     xmls:tools="http://schemas.andoid.com/tools"
     android:id="@+id/acivity_main"
     android:layout_width="match_parent"
     android:layout_height="match_parent"
     android:paddingBottom="@dimen/activity_Vertical_margin"
     android:paddingLeft="@dimen/activity_Horizontal_margin"
     android:paddingRight="@dimen/activity_Horizontal_margin"
     android:paddingTop="@dimen/activity_Vertical_margin"
     android:background="@android.color/white"
     tools:context="com.scrollapp.MainActivity">
</ScrollView>

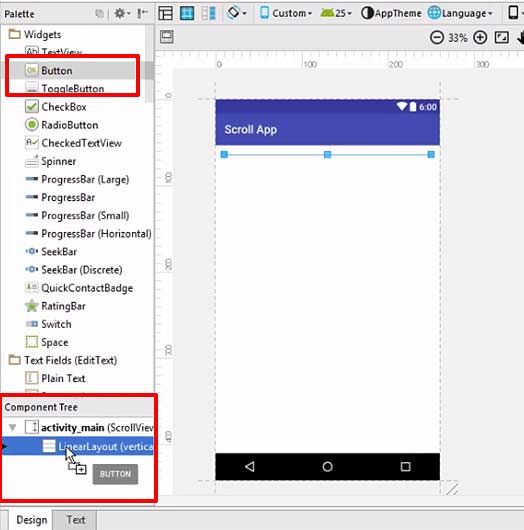
3.Go to Design. Add a Layout into the Scroll View. This is because you can add only a single item into the Scroll view. You have to use the Linear Layout or Relative Layout to add multiple items.
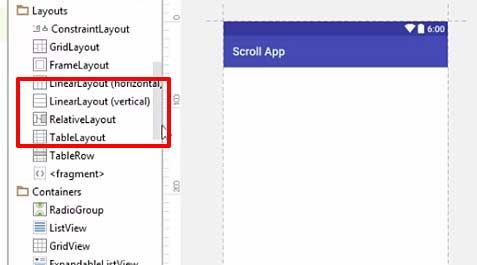
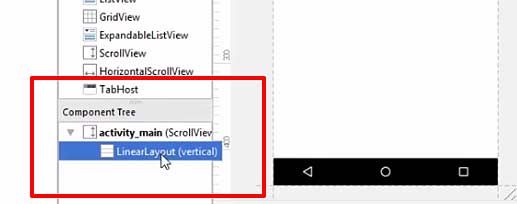
4.Drag and add Linear Layout (in this case) into the Scroll View.
5.Add a Button to the Scroll View.
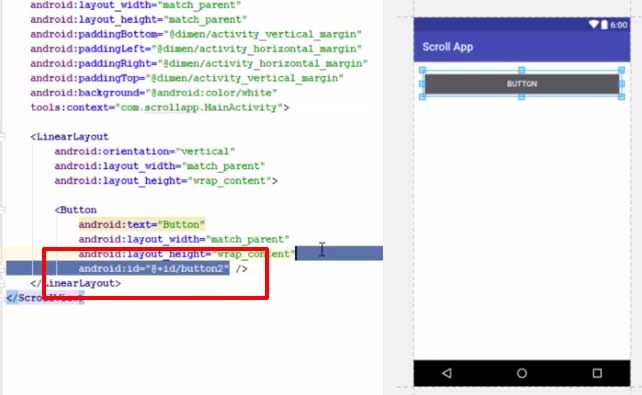
6. Go to Text. Remove the highlighted id stated below.
android:id="@+id/button2" />
android:layout_width="match_parent"
     android:layout_height="match_parent"
     android:paddingBottom="@dimen/activity_Vertical_margin"
     android:paddingLeft="@dimen/activity_Horizontal_margin"
     android:paddingRight="@dimen/activity_Horizontal_margin"
     android:paddingTop="@dimen/activity_Vertical_margin"
     android:background="@android.color/white"
     tools:context="com.scrollapp.MainActivity">

<LinearLayout
     android:orientation="vertical"
     android:layout_width="match_parent"
     android:layout_height="wrap_content">

     <Button
     android:text="Button"
     android:layout_width="match_parent"
     android:layout_height="wrap_content"
     android:layout_height="wrap_content"
     android:id="@+id/button2" />
   </LinearLayout>
</ScrollView
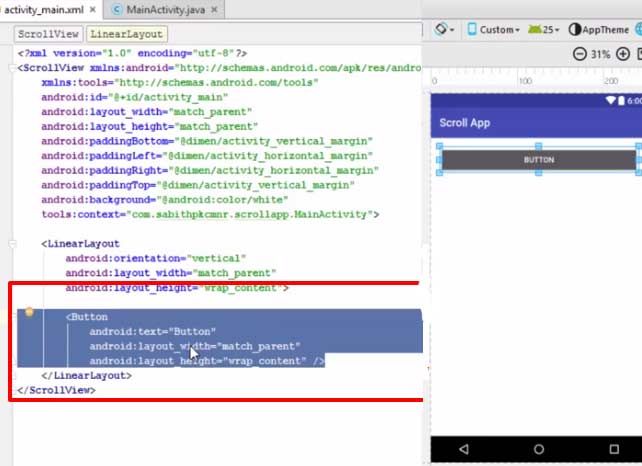
7.Copy the rest of the id from the same Button as below.
<Button
android:text="Button"
android:layout_width="match_parent"
android:layout_height="wrap_content"
<?xml verson="1.0" encoding="utf-8"?>
<ScrollView xmls:android="http://schemas.android.com/apk/res/android"
     xmls:tools="http://schemas.andoid.com/tools"
     android:id="@+id/acivity_main"
     android:layout_width="match_parent"
     android:layout_height="match_parent"
     android:paddingBottom="@dimen/activity_Vertical_margin"
     android:paddingLeft="@dimen/activity_Horizontal_margin"
     android:paddingRight="@dimen/activity_Horizontal_margin"
     android:paddingTop="@dimen/activity_Vertical_margin"
     android:background="@android.color/white"
     tools:context="com.sai thpkcmnr.scrollapp.MainActivity">
   <LinearLayout
     android:orientation="vertical"
     android:layout_width="match_parent"
     android:layout_height="wrap_content">

<Button
     android:text="Button"
     android:layout_width="match_parent"
     android:layout_height="wrap_content"
   </LinearLayout>
<ScrollView>
8.Paste it more than once as shown below.
android:background="@android:color/white"
tools:context="com.scrollapp.MAinActivity">
<LinearLayout
     android:orientation="vertical"
     android:layout_width="match_parent"
     android:layout_height="wrap_content">
  <Button
     android:text="Button"
     android:layout_width="match_parent"
     android:layout_height="wrap_content"
  <Button
     android:text="Button"
     android:layout_width="match_parent"
     android:layout_height="wrap_content"
  <Button
     android:text="Button"
     android:layout_width="match_parent"
     android:layout_height="wrap_content"
  <Button
     android:text="Button"
     android:layout_width="match_parent"
     android:layout_height="wrap_content"
   <Button
     android:text="Button"
     android:layout_width="match_parent"
     android:layout_height="wrap_content"
</Linear Layout>
.jpg)
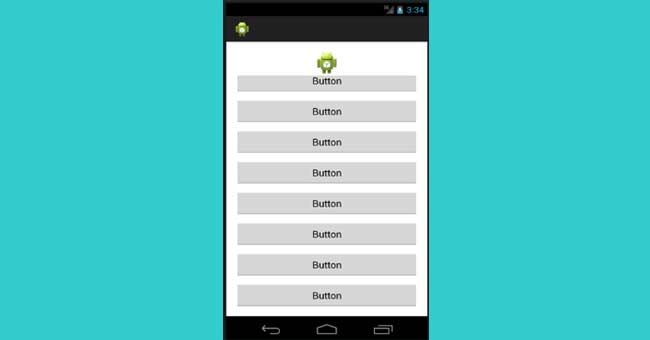
9.It will be more than enough for the screen.
.jpg)
10.Run it on your Android device to check it out. You can now scroll from top to bottom and from bottom to top. You can now add more items to the screen.