How to Integrate Facebook Login with your Android Application
Please follow the step below for integrating the Facebook login with your Android application
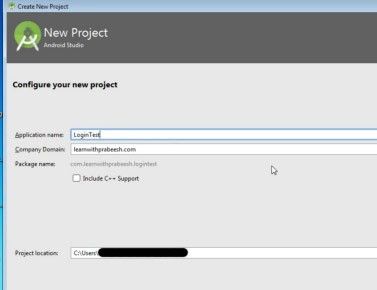
Start a new Android studio project.

Specify your application name. Here I name it as Login Test.
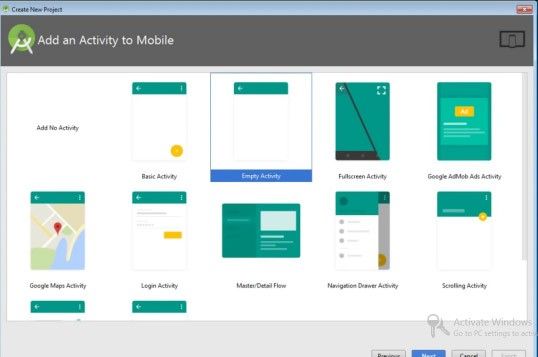
Select Empty activity.
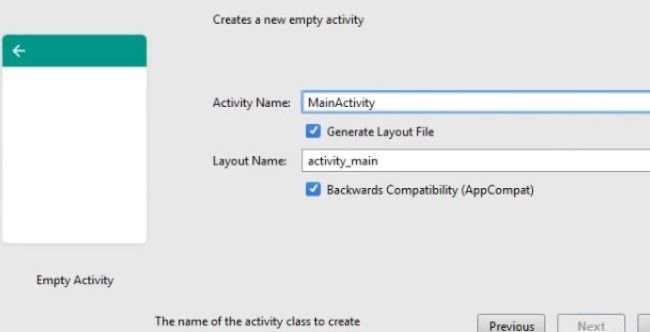
Click Next. And click Finish.
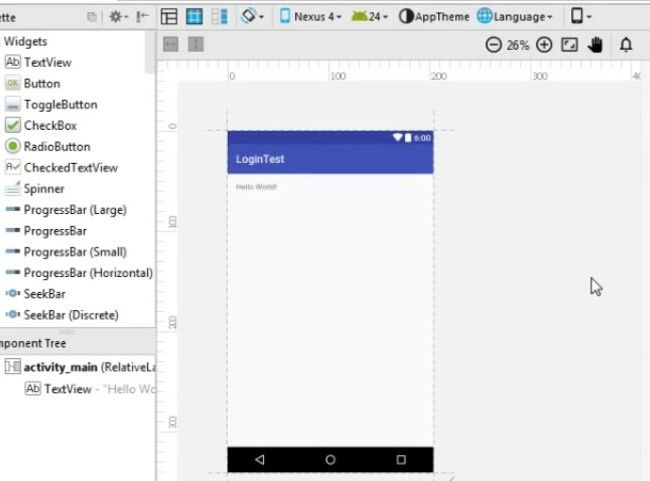
Ok now the project is created.
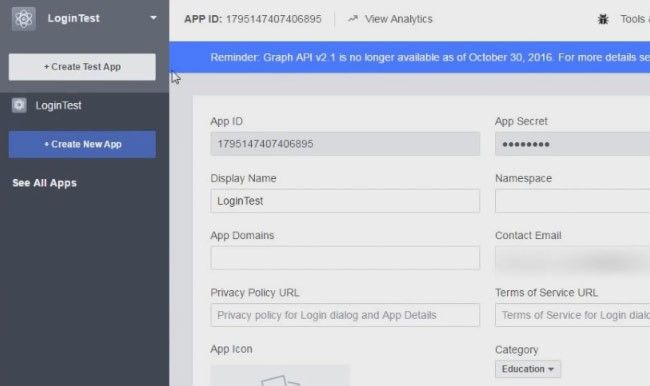
First, you must have a Facebook account. I hope you already have a Facebook account. Then how to log in into developer.facebook.com with your Facebook username and password. Open your browser and go to developer.facebook.com.

Here, you can create a New App. So select this option called Create App.

Provide an Application name. Here, provide your contact email.
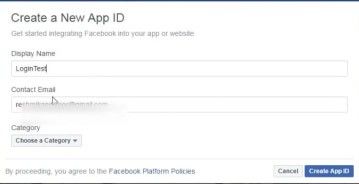
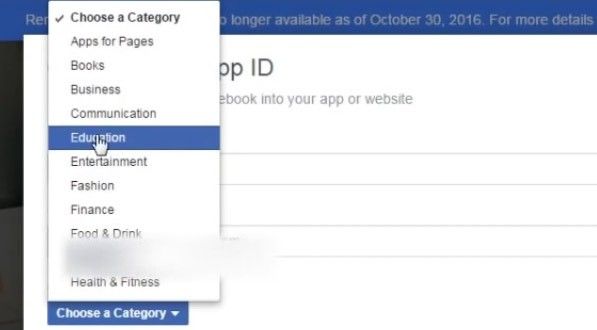
And now, you need to select a category. So I am going to select Category as Education. Now click this option called Create App ID.
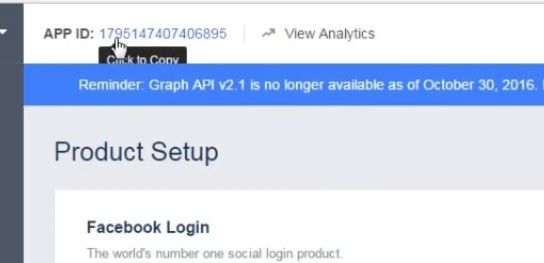
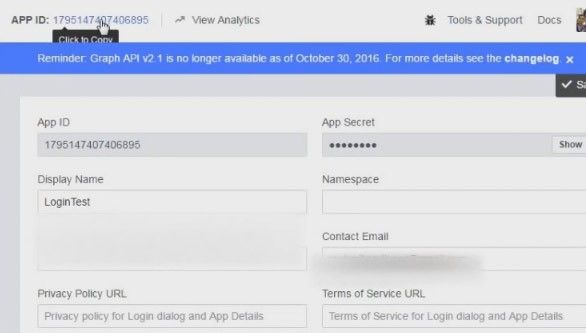
Ok now the App ID is generated here. Here you can see your Application ID. Now we will see how to place this application ID on this Android application?
Now go to this Settings option.

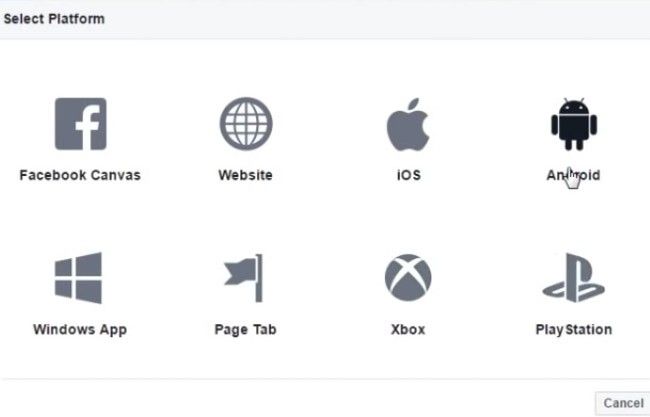
From here, how to select this Option called Add Platform.

Select Android as Platform.
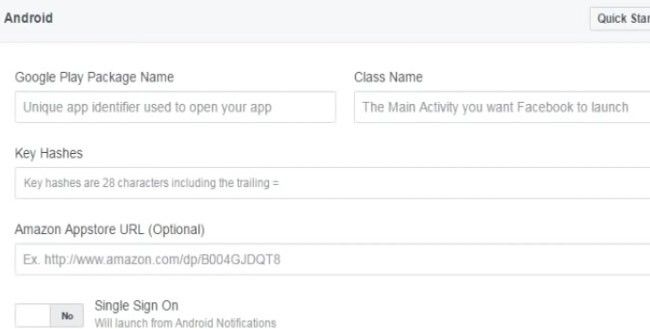
Here, you need to provide your Application Package name, the name of the class in which you are going to place the Login and here how to provide some key hashes.
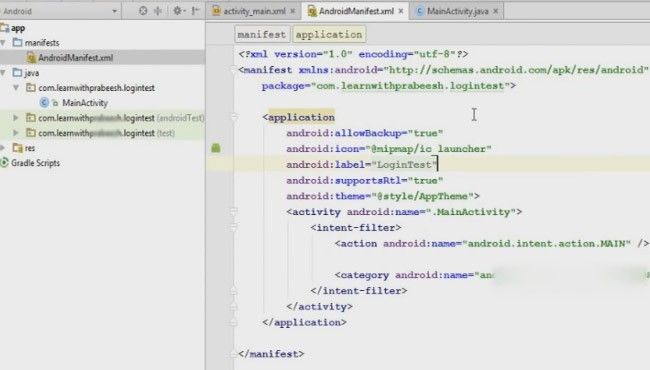
Now go to your Android studio project -> Manifest folder -> AndroidManifest.xml.
.jpg)
Copy your Application package name.
<?xml version="1.0" encoding="utf-8"?>
<mainfest xmlns:android="http://schemas.android.com/apk/res/android"
     package="com.learnwithprabeesh.logintext">

     <application
.jpg)
Provide your application package name. Now you have to specify your class name. Here there is only 1 class, that is the main activity. Now you need to provide some key hashes. So for getting key hashes, how to use Key tool, developer key store and how to use the open SSL. If you do not have open SSL, first you need to download open SSL.
.jpg)
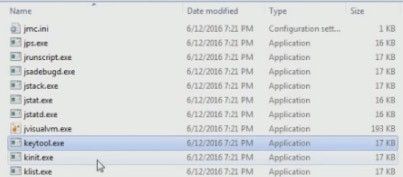
So, here I already have open SSL. Now go to the Java installation folder. Go to Program files.
.jpg)
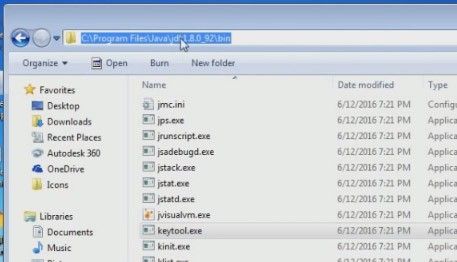
Go to the Java installation folder.
.jpg)
Open bin folder and you will find the keytool.exe file.
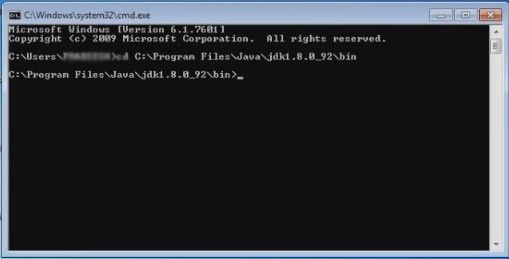
Copy this path of the tool as shown below.
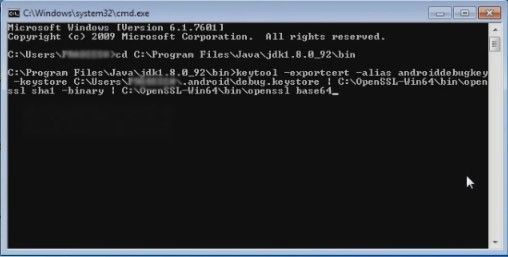
Now open command prompt, and change the directory.
Now you need to run some command.
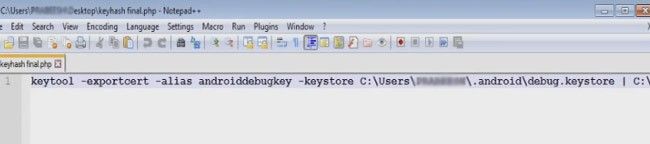
Now in this command, you see how to provide the key tool path, debug key store and you need to provide open necessary SSL path. So copy this command and paste it here.
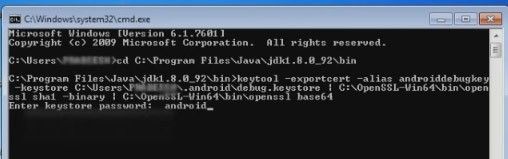
Now run it. So here it will ask for some password so, for example, we are going provide android as a password.
And here are you hatch keys. Now you need to copy this key and place the key here.
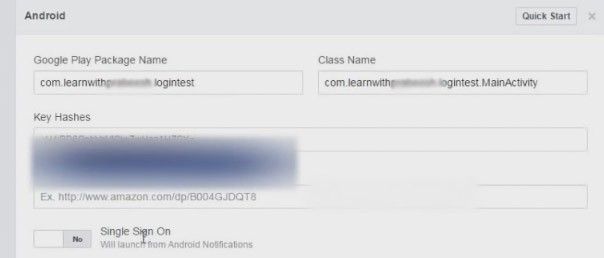
No change this Single sign on one into yes and finally save the changes.
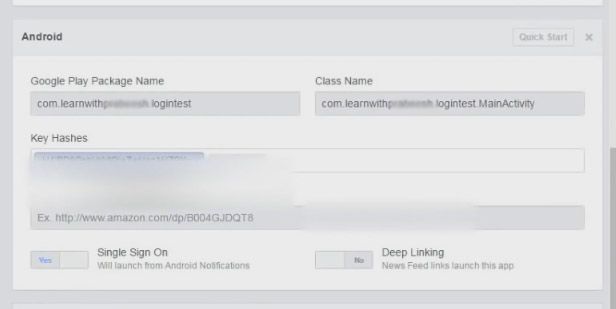
And here select this option and use this package name. Now you need to copy your package ID.
Now open android studio project.
<?xml version="1.0" encoding="utf-8"?>
<mainfest xmlns:android="http://schemas.android.com/apk/res/android"
     package="com.learnwithprabeesh.logintext">

     <application
          android:allowBackup="true"
          android:icon="@mlprsap/ic_launcher"
          android:label="LoginTest"
          android:supportaRtl="true"
          android:theme="@style/AppTheme">
          <activity android:name=".MainActivity">
               <intent-filter>
                  <action android:name"android.intent.action.MAIN"/>

                   <category android:name="and"
                 </intent-filter>
                </activity>
              <application>

        </manifest>
And go to resource folder -> values folder -> strings.xml file.
Now add a new string resource and specify the name as facebook app id.
Now paste the application id here.
<resources>
       <string name="app_name">LogininTest</string>
       <string name="facebook_app_id">1795147407406895</string>
</resources>

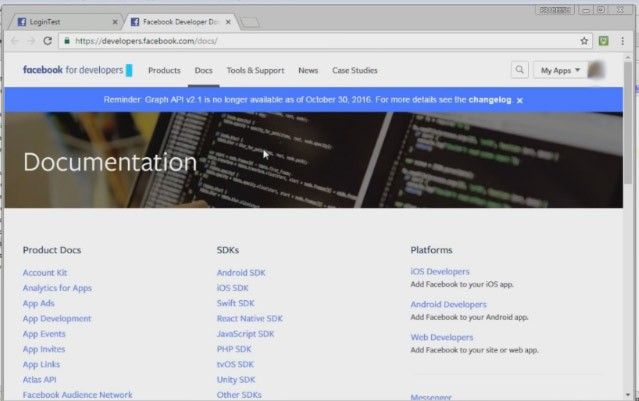
Now go to the documentation.
Select facebook login.
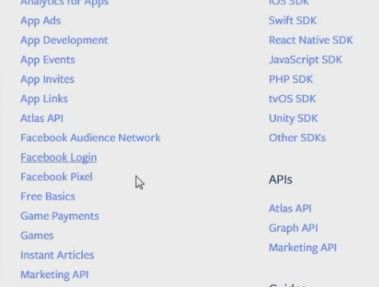
Select Android.
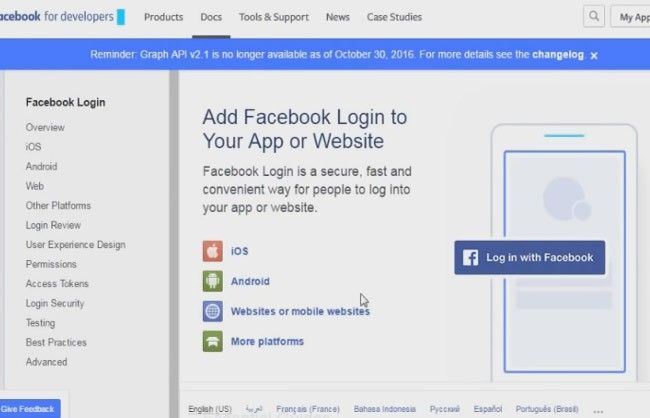
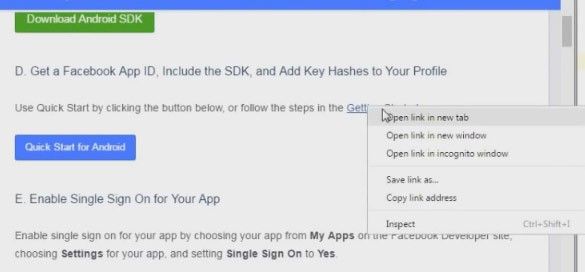
Go to the quick start guide.
.jpg)
Now we need to add some method to the contents. So copy this statement.
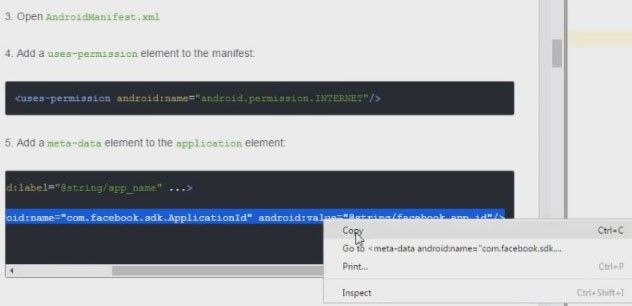
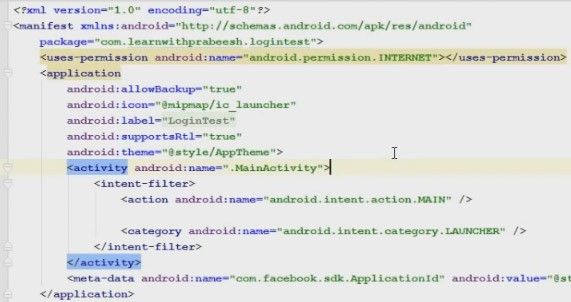
You need to add this method data element in the application tab. So go to the manifest file and paste it here in the application tab.
.jpg)
So here, the facebook app id gets it from the .xml file.
Now here you need to know how to provide the internet permission. So uses permission internet.
<?xml version="1.0" encoding="utf-8"?>
<mainfest xmlns:android="http://schemas.android.com/apk/res/android"
     package="com.learnwithprabeesh.logintext">

     <application
          android:allowBackup="true"
          android:icon="@mlprsap/ic_launcher"
          android:label="LoginTest"
          android:supportaRtl="true"
          android:theme="@style/AppTheme">
          <activity android:name=".MainActivity">
               <intent-filter>
                  <action android:name"android.intent.action.MAIN"/>

                   <category android:name="android.intent.category.LAUNCHER" />
                <intent-filter>
              </activity>
                  <meta-data android:name="com.facebook.adk.ApplicationId" android:value"
              <application>
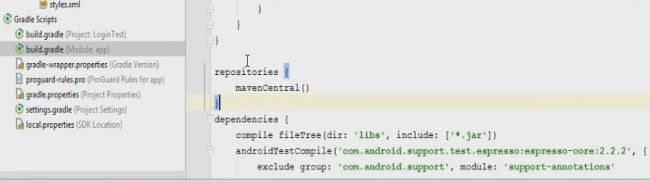
Now we need to add some dependencies. So the first thing is how to download the dependencies in our android application. For that, you need to add some repository and dependencies. So copy this repository.
repositories {
mavenCentral ()

Now go to your Gradle script file ->Open module app file -> paste it before dependencies.
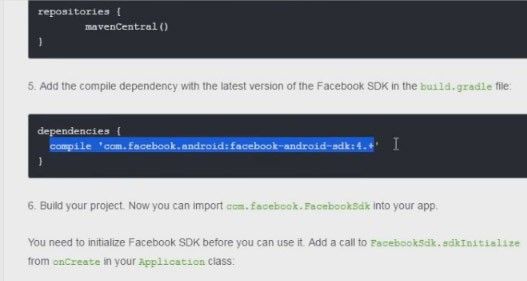
Now we need to add some dependency. Copy this statement.
compile 'com.facebook.android:facebook-android-sdk:4.+'
And add it in the dependency section.
dependencies {
     coompile fileTree (dir: 'libs', include: ['*.jar']}
     androidTestCompile ('com.android.test.espresso.eaprsso:eapresso-core:2.2.2', {
          exclude group: 'com.android.support', module: 'support-annotations'
     })
     compile 'com.android.support.appcompat=v7:24.2.1'
     compile 'com.facebook.facebook-android-sdk:?.+'
     testcompile 'junit:junit:4.12'
}
.jpg)
Now here, you need to provide the most recent version of Facebook SDK.
compile 'com.android.support.appcompat=v7:24.2.1'
     compile 'com.facebook.android:facebook-android-sdk:4.14.0'
     testcompile 'junit:junit:4.12'
.jpg)
Now make your project sync.
.jpg)
Now project sync is finished successfully.now go to activity main.Xml.
Now we can place the facebook login button.
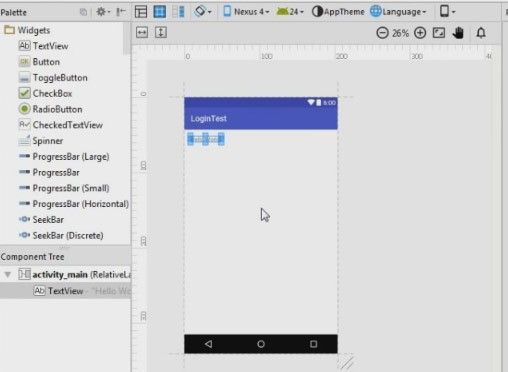
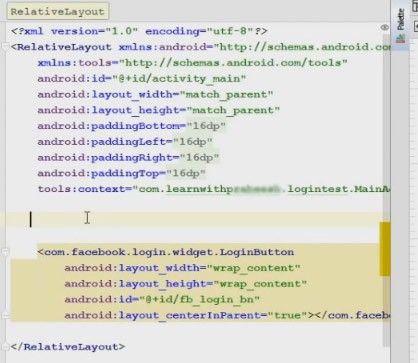
Now go to the XML file and there I am going to place the facebook login button.
And also specify the layout width and height to wrap content, specify an id for the button and name it as FB login bn and also align this one into the centre in parent.
<?xml verson="1.0" encoding="utf-8"?>
<ScrollView xmls:android="http://schemas.android.com/apk/res/android"
     xmls:tools="http://schemas.andoid.com/tools"
     android:id="@+id/acivity_main"
     android:layout_width="match_parent"
     android:layout_height="match_parent"
     android:paddingBottom="16dp"
     android:paddingLeft="16dp"
     android:paddingRight="16dp"
     android:paddingTop="16dp"
     tools:context="com.learnwith.logintest.MainActivity">


    <com.facebook.login.widget.LoginButton
         android:layout_width="wrap_content"
         android:layout_height="wrap_content"
         android:id="@+id/fb_login_bn"
         android:layout_centerinParent="true"></com.facebook

</RelativeLayout>
For display the login status, I am going to add some text views. Specify the width and height into wrap content. Specify some margin at the top into 50dp. Now specify some text on it login status. Now specify the id for it and I name it as text view. Now specify the gravity into centre. Now put some style for the text and name it as text style into bold.
<TextView
     android:layout_width="match_parent"
     android:layout_height="wrap_content"
     android:layout_marginTop="50dp"
     android:text="Login Status"
     android:id="@+id/textView"
     android:gravity="center"
     android:textstyle="bold"
     />
    <com.facebook.login.widget.LoginButton
         android:Layout width="wrap content"
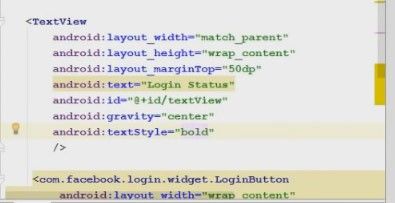
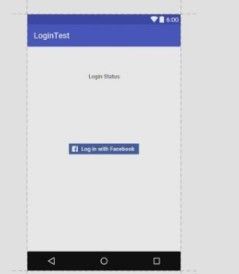
Now the layout is ready, there is the facebook login button and also a text view that displays the login status.
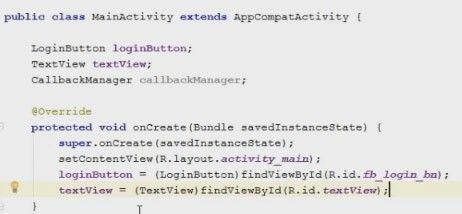
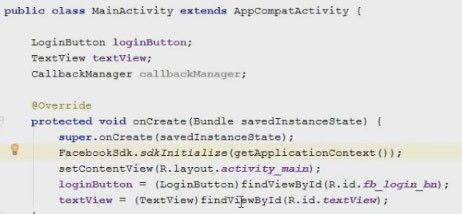
Now go to the MainActivity.java file and declare some variables. First is the login button and I name it as “login button”. Now we need some variables for text view. We need some variable for a callback manager feature and I name it as call back manager. Now we can initialise these variables. First, I am going to initialise the login button. Types cast the login button and now find it. Now initialise the text view and find it.
public class MainActivity extends AppCompatActivity {

      LoginButton loginButton;
      TextView textview;
      callbackManager callbackManager;

      @Override
      protected void onCreate (Bundle savedInstanceState) {
        super.onCreate (savedInstanceState);
        setContentView (R.layout.activity_main);
        loginButton = (LoginButton) findViewById (R.id.fb_login_bn);
        textView = (TextView) findViewById (R.id.textView);
}
So the first thing we learn how to initialise the SDK for that here you need to call a class called facebook SDK and call the method called SDK initialise and pass the context. And make you place this method before the set content view method.
public class MainActivity extends AppCompatActivity {

       LoginButton loginButton;
       TextView textview;
       CallbackManager callbackManager;

       @Override
       protected void onCreate (Bundle savedInstanceState) {
              super.onCreate (savedInstanceState);
              Facebook.Sdk.sdkInitialise(getApplicationContext();
              setContentView (R.layout.activity_main);
              loginButton = (LoginButton) findViewById (R.id.fb_login_bn);
              textView = (TextView) findViewById (R.id.textView);
Now we can initialise the callback manager. now we can set the callback manager call back for the button. So login button. Register call back. First pass the callback manager. Now there is an anonymous inner class called facebook call back.
So here we got three method called
- onSuccess,
- onCancel
- onError.
 super.onCreate (savedInstanceState);
              Facebook.Sdk.sdkInitialise(getApplicationContext();
              setContentView (R.layout.activity_main);
              loginButton = (LoginButton) findViewById (R.id.fb_login_bn);
              textView = (TextView) findViewById (R.id.textView);
              callbackManager = callbackManager.Factory.create ();
              loginButton.registerCallback (callbackManager, new FacebookCallback<LoginResult> () {
                   @Override
                   public void onSuccess (LoginResult loginResult) {

}
                   @Override
                   public void onCancel () {

                   }
                   @Override
                   public void onError (FacebookException error) {

                   }
});
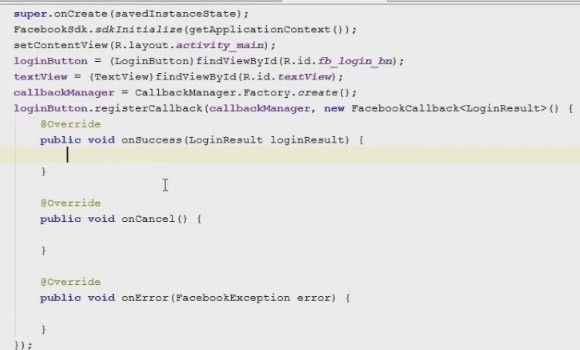
If the login is successful then this method will invoke and if the user cancels, the login then this method will invoke. And if any error occurs this method will invoke. So when you select the login button it will open another activity. In that activity user, enter the Facebook credentials. So the activity will return the result into the on activity result method. So here, you need to write one more method call on activity result method. So from this method, you need to pass the result into the call back manager. So how to call activity results in the context of call back manager. So here is how to pass the request code result code and finally data. Now we can display the login status.
@Override
protected void onActivityResult (int requestCode, int resultCode, Intent data) {
     callbackManager.onActivityResult (requestCode,resultCode,data);
}

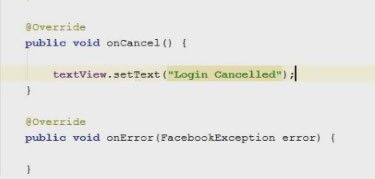
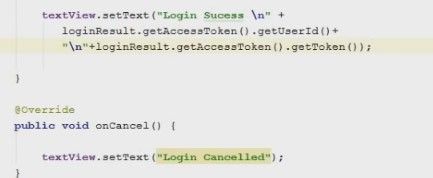
So if the user cancels the login this method will invoke. In that case, we can display some message. The message will be login cancelled.
@Override
 public void onCancel () {
      textView.setText ("Login Cancelled);
}
@Override
public void onError (FacebookException error) {

}
And if the login is successful the message will be login success. Now we can display the login id. So loginresult.getaccesstoken.getuserid. This will display the facebook user id.
public void onSuccess (LoginResult loginResult) {

    textView.setText ("Login Success n" +
        loginResult.getAccessToken ().getUserId ();

    }
  @Override
public void onCancel1 () {
    textView.setText ("Login Cancelled");
}

Now we can display the login token, therefore, add a new line login result.getaccesstoken.gettoken.
textView.setText ("Login Success n"+
   loginResult.getAccessToken ().getUserId ();
   "n"+loginResult.getAccessToken () .getToken () );

    }

@Override
public void onCancel () {
     textView.setText ("Login Cancelled");
}
Now the application is ready and we can test it. But before going to test the application, you need to know how to add something on developers.facebook.com website so go to the application.
Open your application and go the app review option.
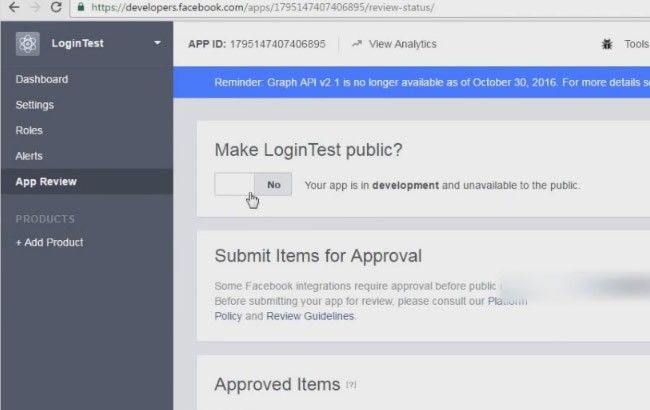
And turn login test public option into yes. And confirm it. So now the application is available for public.
Now you can test your application.
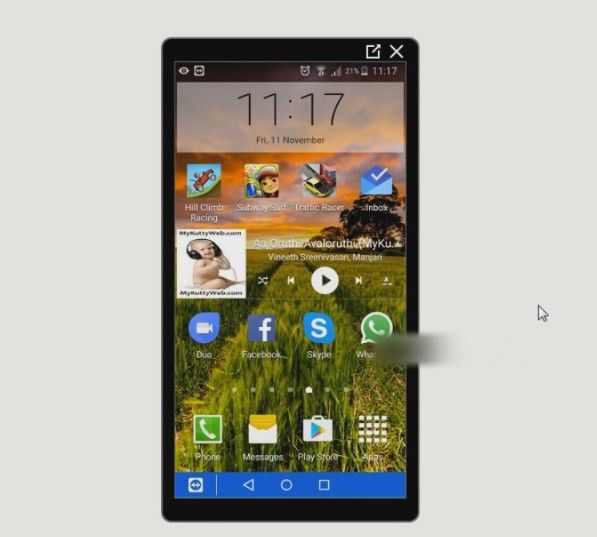
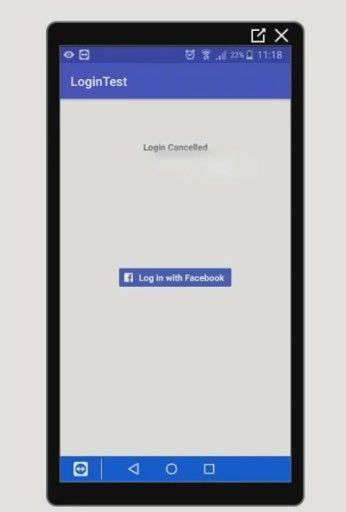
You can test your Android application. Here is your android application login test open it.
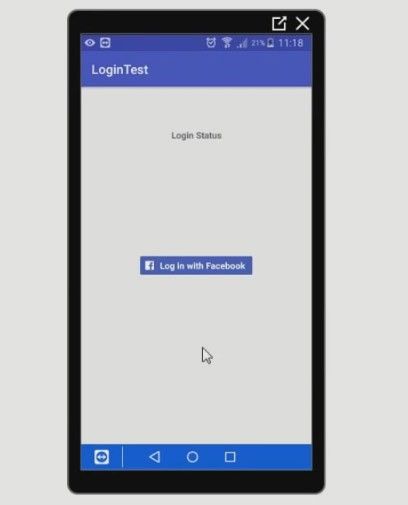
Now try to login with Facebook. Click the login button and this starts another activity. So now, I am going to cancel the login so I will click the back button. So now, the login status is login cancelled.
Now I am going to try to login again and now I will click continue and see the message is displayed that the login is successful.
.jpg)
And here is the facebook id and here is the login token. So this is how we place a facebook login with your android application. So after successful login, we can see that the button is changed into logout.