Android Checkbox Basics with Example
Use Of Checkbox
So generally we use check boxes whenever we want to choose a list of items. For example, you are making a groceries shop app, you can use checkboxes to select the items. Or for example, you want to give the option to the user to select his favourite animals or his favourite dishes or favourite things. So basically whenever we want to select multiple items, we use checkboxes.
Adding Checkbox
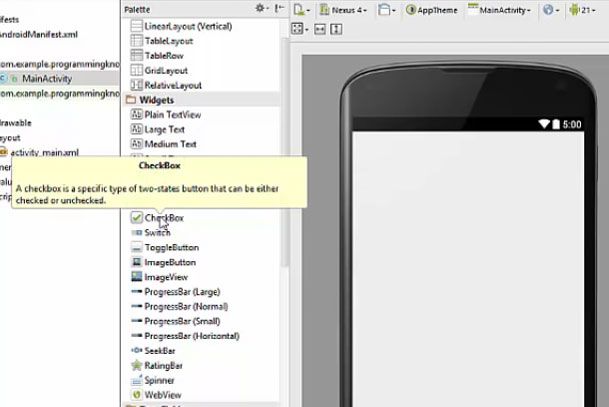
We can add checkboxes by going to the palette and in the widget section and then drag and drop checkbox widget to Android activity. We must also take a button so that on the basis of button click, we can decide which checkboxes are checked and on the basis of checked checkboxes, we can take some action.
Changing Properties
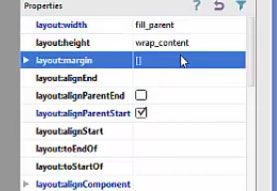
In order to change the properties please select all the check boxes and in the properties go to layout_width and change it to fill_parent so that this width is filled in the width.
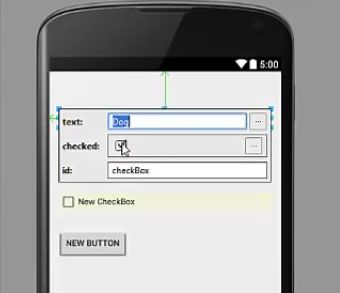
We can also change the name of these checkboxes, for example, we want to create a list of animals so that the user can choose his favourite animals such as dog and there you will see an option 'checked' so, if you choose this option checked, you can see whenever you run the application, it will be checked by default. Otherwise, when you uncheck this option, whenever you start your activity, the checkbox will be unchecked. So this is the default condition you want to check to your checkbox. The name to the checkbox according to user's need.
Now we will go to the code part of our activity, therefore, go to the MainActivity.java file and there we will declare three checkbox variables and one button variable.
import android.os.Bundle;
import android.view.Menu;
import android.view.MenuItem;
import android.view.view;
import android.widget.CheckBox;
import android.widget.Button;
public class MainActivity extends ActionBarActivity
     private CheckBox check1,check2 ,check3;
     private Button button_sel;

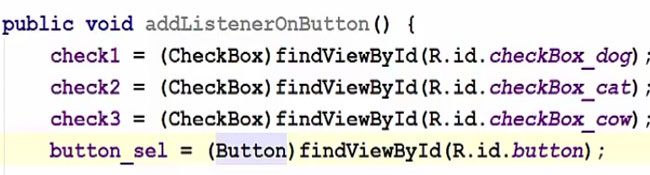
After declaring the variable we now have to create a method. This will be the public method and it’s not going to return anything and we are going to name our method as, for example, add a listener on the button and then it’s not going to take any argument and we will create or prepare the body of our function in these curly brackets. Inside our method, we have to cast our checkboxes and button for example, for the checkbox one we are going to cast it to the dog checkbox.
public void addListenerOnButton () {
      check1 = (CheckBox) findViewById (R.is.checkBox_dog);
      check2 = (CheckBox) findViewById (R.is.checkBox_cat);
      check3 = (CheckBox) findViewById (R.is.checkBox_cow);
      button_sel = (Button) findVIewById (R.id.button);
Now after casting all our widgets, we will have to add the listener so we are going to take our button variable and we will set the listener to it. Set on click listener and in here in the arguments, just press enter and we are going to create a new listener. So new on click listener and it will take three arguments.
button_sel.setOnClickListener (new View.OnClickListener () {
                                     @Override
                                     public void onClick (View v)

So we will create our String buffer and toast and in this result, we are going to append the checked items first. So first of all, take the result variable so in here Result.append and we can append any string to it, this will give you the binary option true or false or one or zero. If it’s checked it’s going to give you true or if it’s unchecked it’s going to give you false.
public void onClick (View v) {
     StringBuffer result = new StringBuffer ();
     result.append ("Dog : ").append (check1.isChecked() )
     result.append ("Cat : ").append (check1.isChecked() )
     result.append ("Cow : ").append (check1.isChecked() )
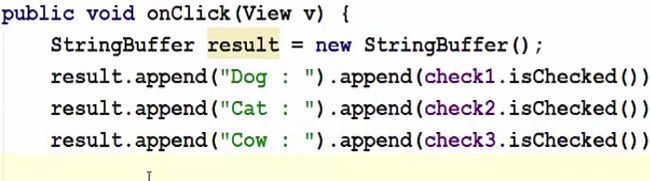
And now we can display this result to the toast.
Toast.makeText (MainActivity.this,result.toString (),
         Toast.LENGTH_LONG).show ();

Now once we have created this method we just need to call it in our onCreate method therefore just go below this function setContentView and just paste your method name.
super.onCreate (savedInstanceState);
setContentView (R.layout.activity_main);
addListenerOnButton ();

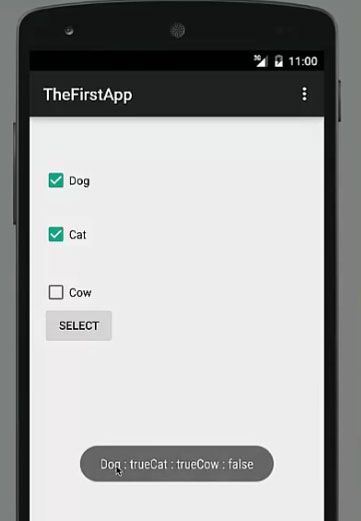
And now our application is running. for example, when we check box 1 and check box 2 and press this select button, the answer is a dog is equal to true and the cat is equal to true as you can see. Dog true cat true and cow false. So in this way you can choose your selection on the basis of is a select method here.
Method to take some action in Checkbox
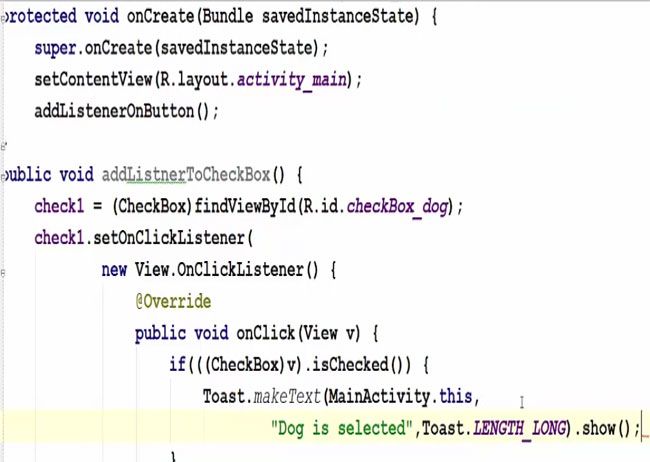
Now let’s create a method on which we will allow the user to take some action on the checkbox click itself. So for example, once the user selects this dog checkbox, we are going to display some message that you selected dog without any button click event. So for that, we have is declare one more method, which will be public and cast our checkbox 1 variable because we want to take action on checkbox 1 and add a listener.
protected void onCreate (Bundle savedInstanceState) {
     super.onCreate (savedInstanceState);
     setContentView (R.layout.activity_main);
     addListenerOnButton ();

public void addListenerToCheckBox () {
     check1 = (CheckBox) findViewById (R.id.checkBox_dog);
     check1.setOnClickListener(
           new View.OnClickListener () {
               @Override
               public void onClick (View v) {
                   if (((CheckBox)v).isChecked () ) {
                     Toast.makeText(MainActivity.this,
                           "Dog is selected",Toast.LENGTH_LONG).show();
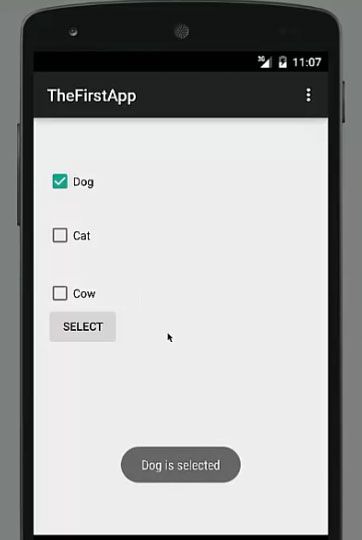
So as we added a listener to the dog checkbox only so whenever we check it, it shows dog is selected. But you can add the same kind of listener to these checkboxes also. So in this way, you can use checkboxes in your Android app.
Read More About Android Radio Button & Radio Groups Basics