How To Convert Responsive Website into an Android App
So first of all the pre-request is you need to have a responsive mobile friendly website of course.
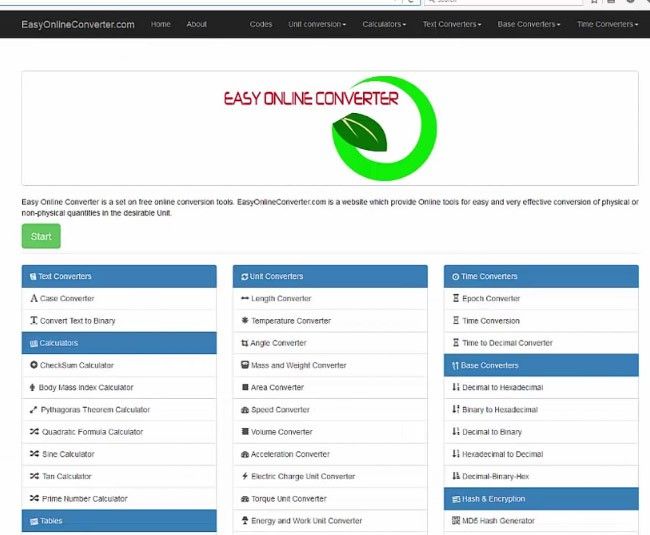
Please follow the steps below for converting your website into an Android app:
So, open your Android studio.
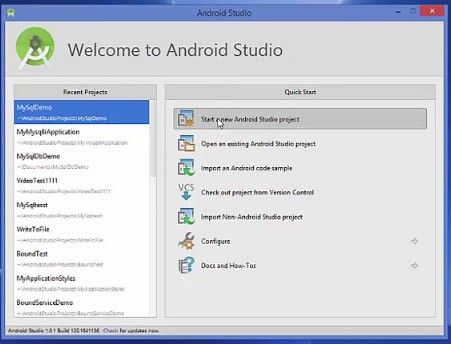
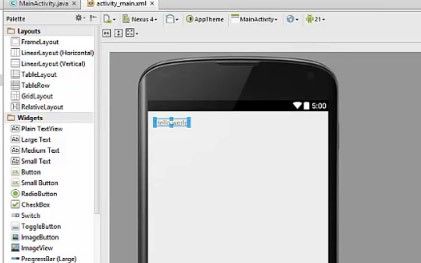
So open your android studio and create a new android project and in here you can name your project For example, "easy online converter" and click Next.
.jpg)
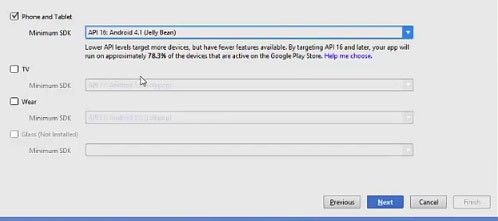
Now you can choose the latest version but it maybe not compatible with all the devices. So I would refer to use 4.1 jelly bean which covers 78% of the devices.
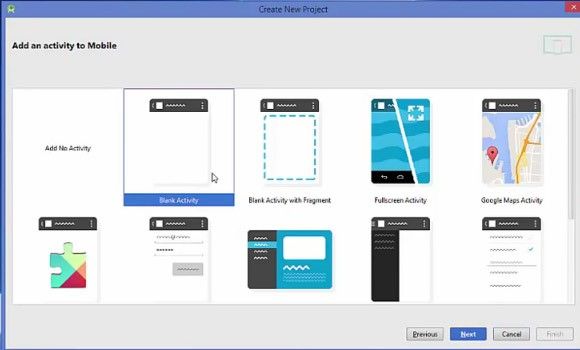
Now choose the blank activity and click next.
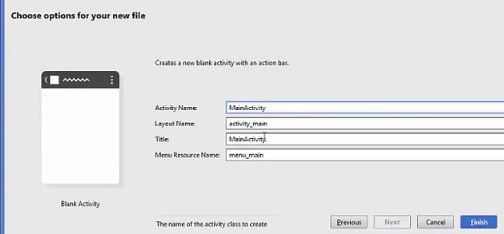
And here everything is default or you can change the name of your main activity but I don’t want so I will finish it.
So now, our project is created.
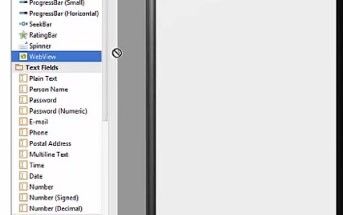
The first thing we are going to do is we are going to remove this “hello world” component from here.
Then what we are going to do is in the palette section we will search for the 'webview'. So select the web view and drag and drop this option into your activity here.
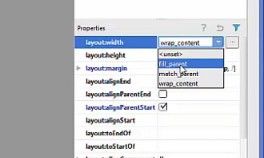
And what we are going to do is next is we will select our web view and go to the properties here. And will just choose fill parent and also the layout height with fill parent. And you can resize it like this.
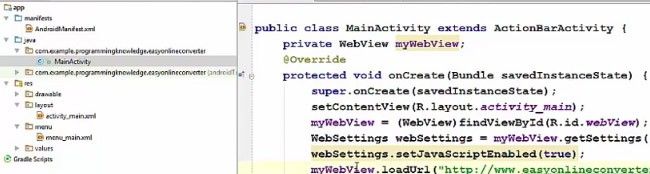
Now next step is to go to your java folder here and open your MainActivity.java file.
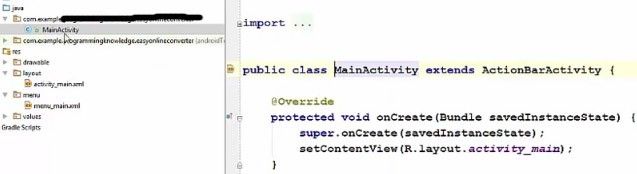
And in mainActivity.java file we are going to declare a web view variable and name it for example, 'web view'.
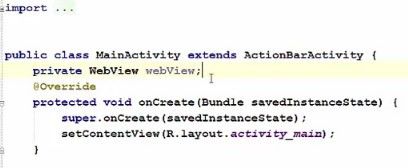
And once you have created the variable just copy your variable and go to your OnCreate method here and just here paste your web view
Then we are going to call this web view by casting it.
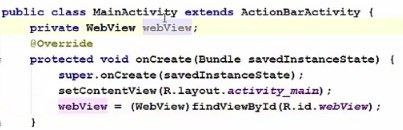
Now here you may be confused because here your component id is also web view and your private variable is web view with the same spelling for example, we can change it to my web view so that it will be clear.
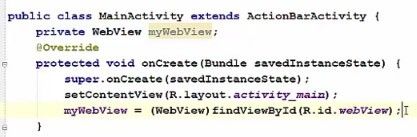
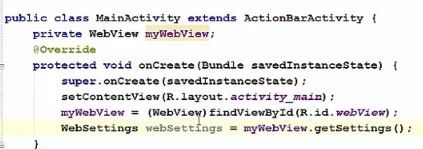
Now the second step is to create one more variable which is websettingsand just name it as websettings= then just take your mywebview. Then put a method called getsettings.
Next step is to take your websettings from here and then call a method called set java script enabled is equal to true. What it is going to do is it is going to enable the javascript in your webview. So whenever you use your website which is using javascript it is going to support this.
.jpg)
The next step is to take your web view variable, which is my web view, and then call a method called load Url. Give the url for your website. So I will just copy the url of my website.
And paste it in these double quotes.
.jpg)
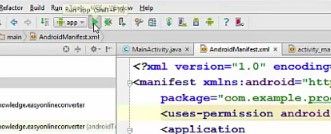
Now, whenever you are using a webview in order to give your device the permission to use internet you need to change the manifest file from here. So go to the manifest folder and open AndroidManifest.xml file from here.

In here at the top, you have to create one more element here. You can use uses permission attribute here and then you just need to choose the permission, which we want to allow. So in our case, we want to choose an Android permission for internet. So just, search for this, which is this one- android permission internet. Then close your element.

Once everything is done, we are going to test our app. So just, click this green button here.
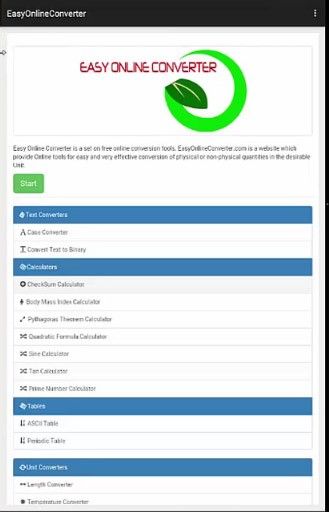
Then it is going to run our app in the emulator provide by the android studio. So now our app is running on the emulator and you can see this website.
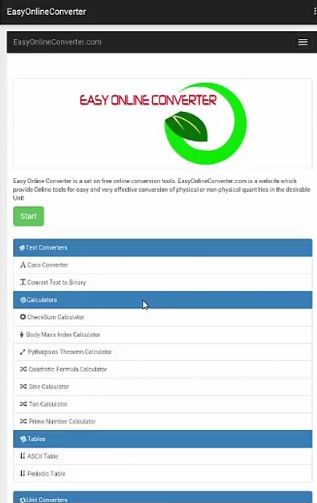
It is looking same as we as we have seen in the browser. Now for example, I will click one button here, it going to open this url in the browser.
.jpg)
And this we don’t want.
We want that whenever we click some option here it should be opened in your app itself. So we are going to correct this thing in a moment.
The second thing we want to add the functionality for the back button. So whenever we want to browser the pages forward and backward. Then we have to add the functionality for that.
And the last thing observe here is the padding around your app. So you will see little bit of margin left over here around your app which we are going to remove.
So to solve the first problem we are going to go to our MainActivity.java file.
In here we are going to take our web view variable and then we will call a method called set web view client and then will just call new web view client.

And what this line of code would do is it is going to prevent your urls to open in the browser whenever your app is open or when you click some link. It is not going to open this link in the web browser. So this line is for that.
![]()
Now to add the back button functionality there is a pre-defined method here, which we can call which is called 'Backpress'. Just press and select this on back press and this is going to add this method here.
Now, whenever the back button is pressed and we are browsing our website we want to go the last page we browsed. So we will add a condition here. This condition is just take your my web view first of all and then we will check if we can go back.
.jpg)
So this is for the back button functionality.
Now the third thing was adding extra padding. If you want to remove this extra padding from here then go to your activity_main.xml file.
In here, at the top there are some properties related to these padding,these are the attribute which are responsible for padding around your app.
.jpg)
But in our case, we don’t want this padding so remove the attributes padding left, padding right, padding top and padding bottom and save your code

Then once again we are going to run our app.
.jpg)
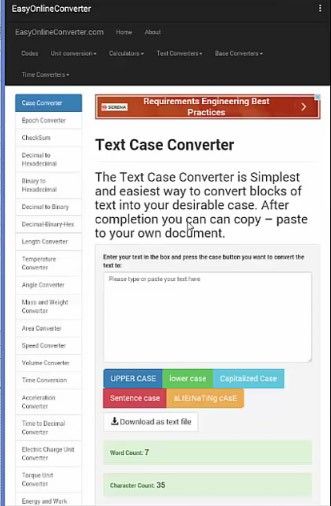
For example, when I click on this case converter, this time it is going to open inside the app, this link.
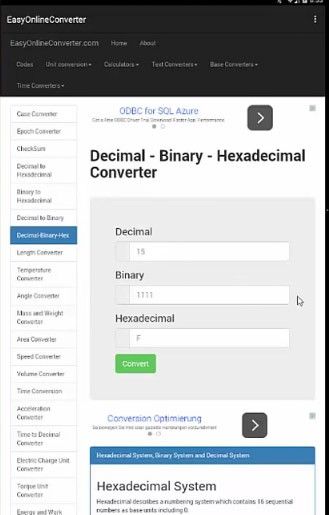
Once again, I am going to open this decimal binary hexadecimal convertor from here. And you will notice it is opening this url inside your app.
And when I press this back button from here it will go back to the last browsed page.
Now the only thing, which is remaining is the need to create an APK file of this app and then upload it on the google play or other app store.