How to install Apache Cassandra In Windows
What is Apache Cassandra?
Apache Cassandra is a NoSQL database. It is a free and open-sourced distribution management system, designed to handle large amounts of data. It is an Apache foundation software.
Please follow the steps below in order to install Apache Cassandra in Windows 10:
First, just copy this below link and open it in your browser.
downloads.datastax.com/community/datastax-community-32bit_2.2.8.msi
.jpg)
Once you will press enter, the dropbox will come for saving the software, so click ‘save file’.
.jpg)
After downloading the software just double click on the software, you will able to see ‘Welcome to DataStax Community Edition 2.2.8 setup’.
.jpg)
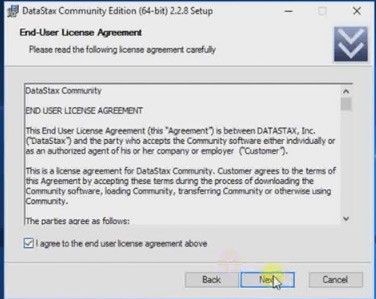
So click next, just select the checkbox, click next.
No need to change this, click next.

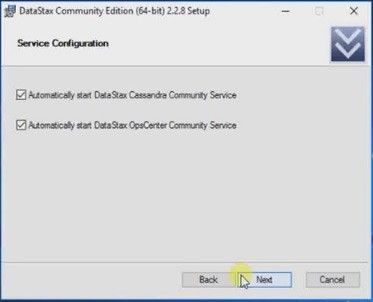
And just click the checkbox no need to change anything, just be on default, click next.
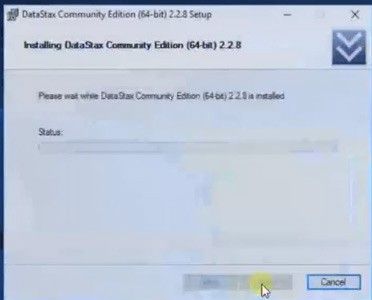
Click install.
And it is others choice of ___, so no need to do anything, just wait. After installing of DataStax Community edition, we’ll check how to create __ as well as tables and I will show you also that how to open __ system, means __ system. So as you can able to see - that’s a windows command promptly opened.
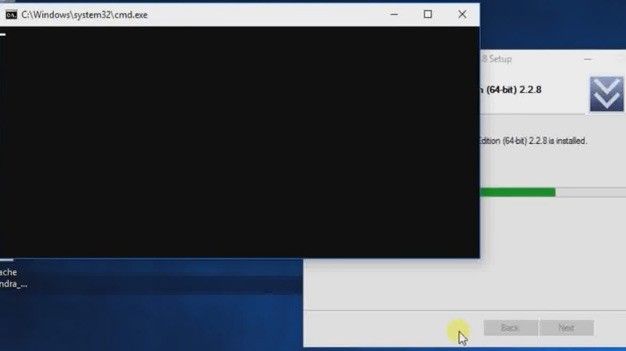
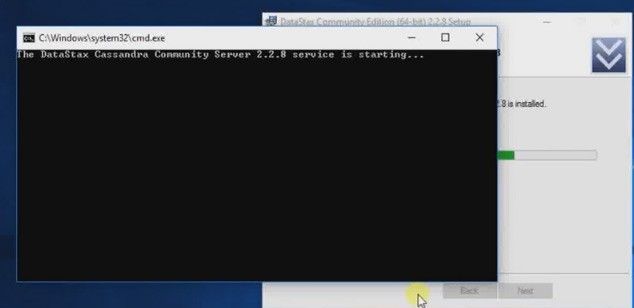
And so now no need to do anything, just wait and watch for that, Cassandra Community Server 2.2.8 service will start.
The best part of windows installation is, it will auto install and as well as it will start, once you will start our software then we can start anything. So, finally we have this installation completed. So, just click ‘Launch DataStax OpsCenter’.
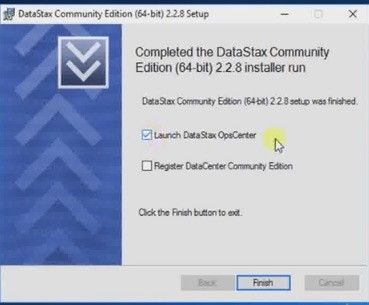
If you are clicking to ‘Register DataCenter Community Edition’ but before this you have to make an account in DataStax website.
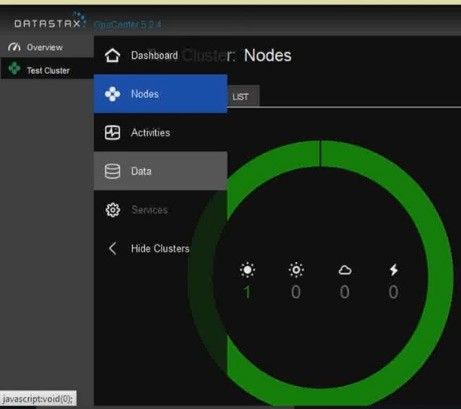
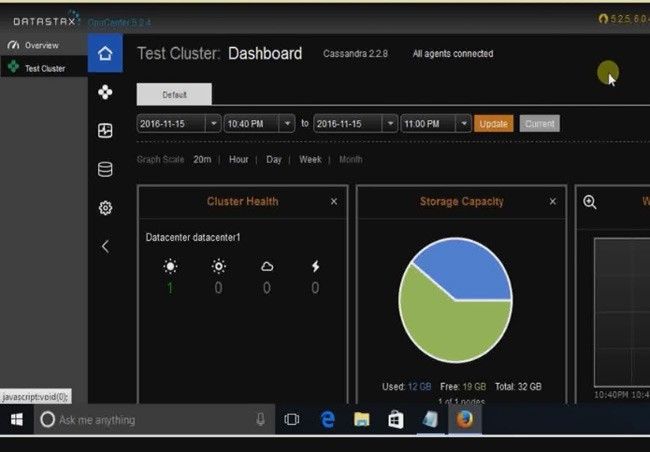
This is my dashboard, okay let’s close it.
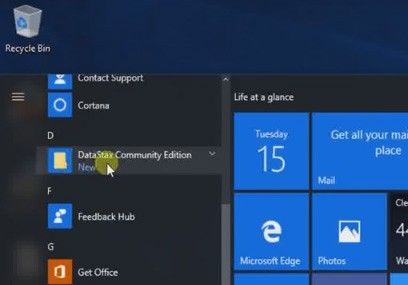
Go to ‘start’ below, just scroll down, as you can able to see the ‘DataStax Community Edition’ folder is present.
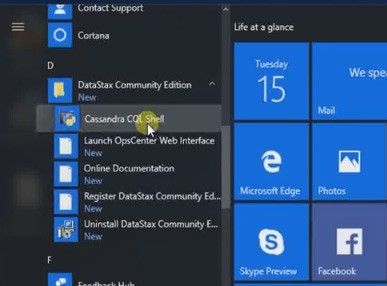
First, click on the folder, then double click on Cassandra Cql Shell or Cassandra Cql Shell.
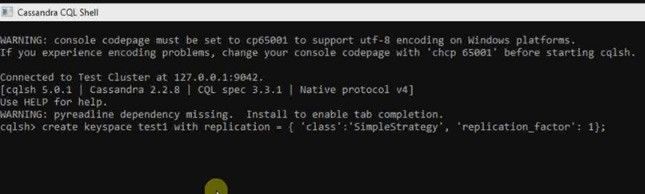
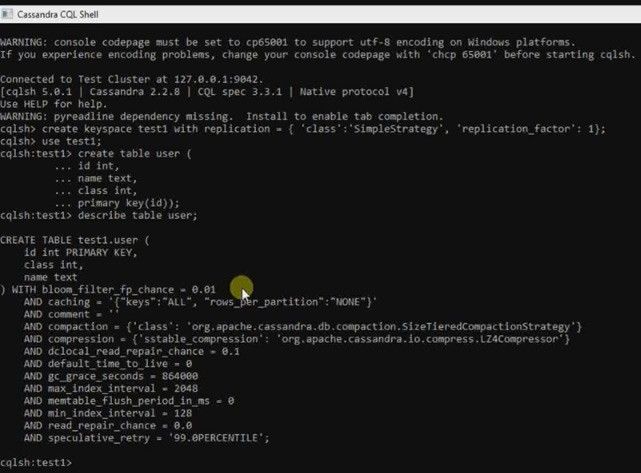
Now, this is my secure command on which I am going to create one keyspace; write “create keyspace”, now keyspace name. So, suppose my keyspace is ‘test1 *space* with replication = {‘class’ : ‘SimpleStrategy’ (This is the class name), (now assign replication factor value) ‘replication_factor’ : 1}; press enter. So, as you can able to see I already created one keyspace, now use command use test1, okay now I am inside the keyspace ‘Test1’.
Now, my final step as you can able to see, that my final step is to create one table user. So, create table user, okay, ID is equal to int, command name *space* text command class int, command primary key (ID)).

It's very simple. So as you can able to see I created my table if you want to describe your table, *spell* describe the table, your table name click to see my table name press enter. As we can able to see the respective table name, which is inside my keyspace ‘Test1’.
So as you can able to see this is so simple to install. So don’t forget to my channel, comment on your views; what do you want to say anything, make your suggestions and also don’t forget to save it.