How To Create Analog And Digital Clocks Android Application
This tutorial is a step by step explanation of how to add analog and a digital clock widget to your android activity and also how to make a small app of these small analog and digital clock widget so that on the basis of button click, we can decide which clock we want to display.
Please follow the steps given below in order to add analog and digital clock widget to your android activity:
Step 1) So just go to the ‘date and time’ category in the palette of the Android activity and there you will see analog and digital clock widgets.
Note: One more type of clock widget called ‘text clock’ will also be. It works almost similar to the digital clock. So if you know how to use digital clock, you will be able to, work with this text clock also.
Step 2) First drag and drop the analog clock widget and digital clock widget.
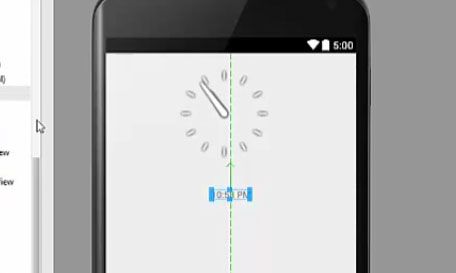
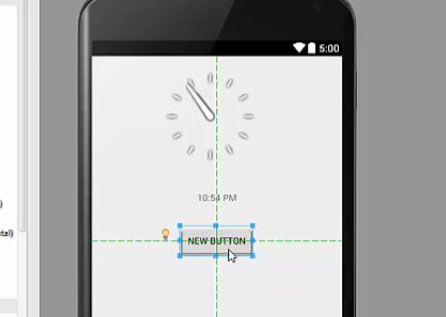
Step 3) Now take a button and this button click will display the widget on alternate button click. Give a name to your button for example ‘swap clock’.
Step 4) Now as all three widgets are here in the android activity go to Java file which is MainActivity.java and add three variables for the button clock, analog clock and digital clock.
public class MainActivity extends ActionBarActivity {
      private static Button buttonSbm;
      private static DigitalClock digital;
     private static AnalogClock analog;

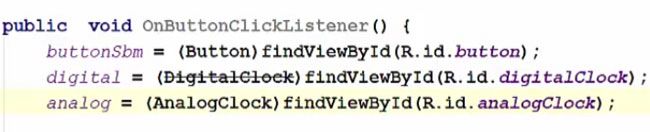
Step 5) After creating these variables now write a method for the button click which can swap these clocks and also cast these three variables.
public void OnButtonClickListener () {
      buttonSbm = (Button) findViewById (R.id.button)
      digital =  (DigitalClock) findViewById (R.id.digitalClock) ;
      analog = (AnalogClock) findViewById (R.id.analogClock) ;
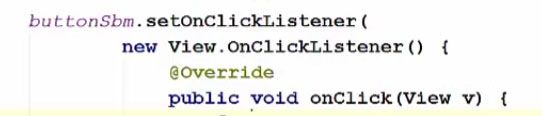
Step 6) Now add the listener to our button variable therefore just take this buttonSbm variable and add set OnClickListener to this button and inside the set OnClickListener we will also set a new OnClick listener.
buttonSbm.setOnClickListener(
        new View.OnClickListener () {
               @Override
               public void onClick(View v) {
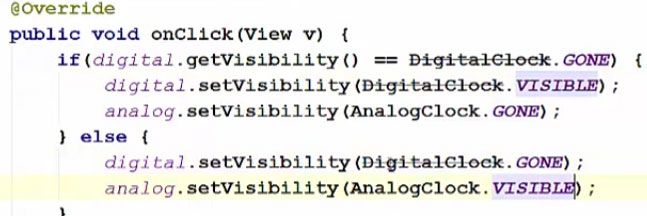
Step 7) Now inside this onClick method, we will check this digital clock. And at the same time, we will also set the visibility of analog clock to Gone.
@Override
public void onClick(View v) {
      if (digital.getVisibility () == DigitalClock.GONE) {
          digital.setVisibility (DigitalClock.VISIBLE) ;
          analog.setVisibility (AnalogClock.GONE);
      } else {
          digital.setVisibility (DigitalClock.GONE) ;
           analog.setVisibility (AnalogClock.VISIBLE);
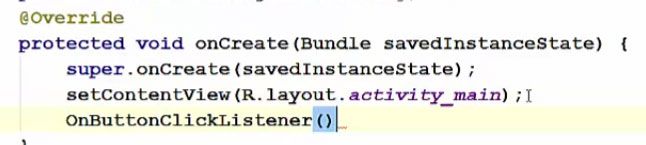
Step 8) Now just call this method inside the OnCreate method and then our program will be ready to run.
@Override
protected void onCreate (Bundle savedInstanceState) {
     super.OnCreate (savedInatanceState);
     setContentView (R.layout.activity_main);
     OnButtonClickListener ()
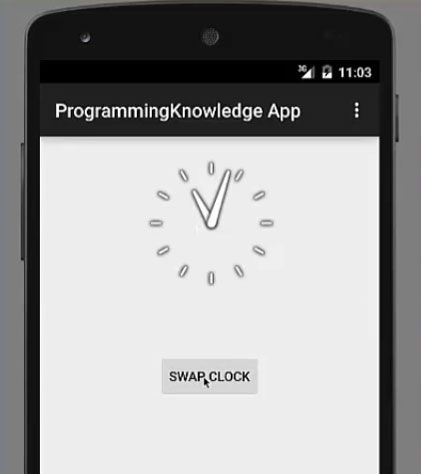
So now our app is running. You can see for the first time, both clocks are visible and they dynamically run so if here if the time changes, in these clocks also changes.
.jpg)
The functionality of the button can also be checked by clicking the ‘swap clock’, the digital clock is not active but the analog clock is active right now. Again on clicking ‘swap clock’ the digital clock will become active and analog clock disappears. So when you click this button, one clock appears and another clock disappears.
Read Next How to Create a Simple Login Application