Screen Painter vs. Menu Painter
Screens and Menus make up the graphical interface of an ABAP/4 application in SAP.
Screen Painter:
- The ABAP/4 Development workbench provides special tool known as the Screen Painter to design and maintain the screen and its elements.
- Screen Painter is a tool that allows the user to creates GUI screens for the transactions
- A Screen is also known as a DynPro (Dynamic Program).
- A Dynpro is a combination of a screen and the associated flow logic
- The Screen Painter is available in two modes. Graphical and Alphanumeric modes
- To use the screen painter enter SE51
- A Screen is made up of different elements like the pushbuttons, radio buttons, checkboxes, labels etc.
Each of these elements are associated with:
Attributes
Describe a screen. Screen attributes include things like a description, a type, and position.
Layout
Refers to the arrangement of elements on a screen.
Field attributes
Describe an element. For example, a particular field accepts only character input.
Flow logic
Describes the relationship between a screen element and its underlying application. Flow logic is a series of instructions.
Menu Painter:
Using the Menu Painter, you can design the interface components. The Menu Painter components are as follows:
Status
Defines the combination of menu bars, menu lists, F-key settings, and functions available to an interface. For example, an Editor application might have two statuses: edit and view. In edit status, the cut function is available and with the view status the cut function is unavailable.
Menu bars
Define functions available to the user. Where the functions appear depend on the dialog. If the dialog is modal, the functions appear at the bottom of the interface as a row of buttons. In the primary window, the functions can appear both as a row of menus and as buttons in a tool bar.
Menu list
Lists the items in a specific menu. For example, an edit menu might contain items like copy, cut, and replace.
F-key settings
Define keyboard keys associated with a particular interface function.
Functions
Define individual functions such as cut, copy, and replace.
Titles
Define window titles for an interface.
Follow the following procedure to go through the process of learning and creating the concept of Screen Painter and Menu painter successfully. But it does not mean that you cannot achieve the same results using another method.
Go to your development class. In our case, we have created a development class called ZTEST. We are going to create our objects under this development class.
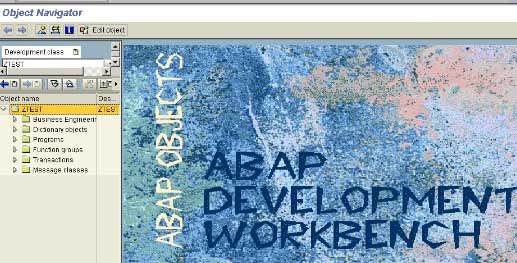
Place the cursor on the development class and click in on Create icon on the application toolbar.
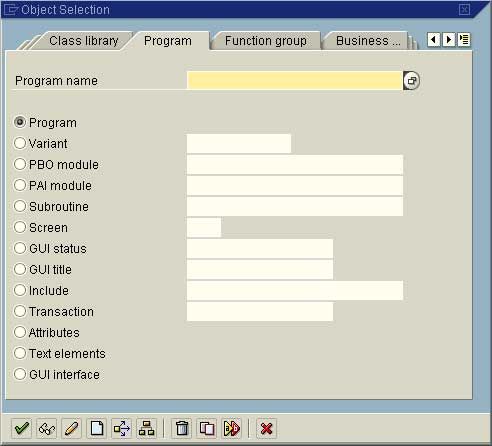
From the Pop up dialog box, select Program Objects Click on the Enter icon.
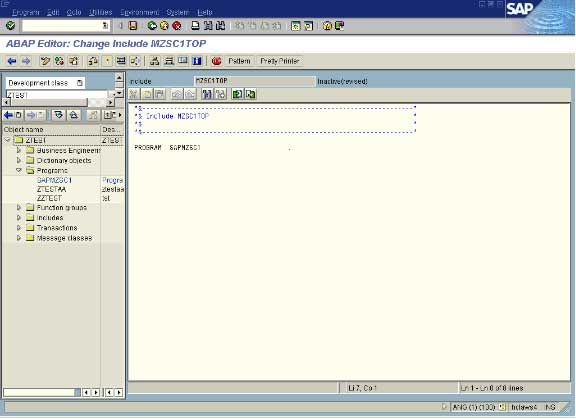
From the popup box enter your program name. Follow the naming convention SAPMZ. In our case, our program name is SAPMZSC1.
Click on the Create icon at the bottom of the screen. You will get the following box, asking you if you want to create your program with an TOP INCL. Program.
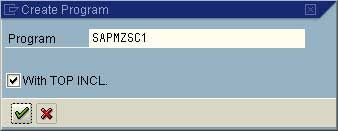
Keep the defaults as it is and click on the Continue icon. The system will prompt you with the TOP INCL. Program name. The naming convention that is followed is MZTOP.
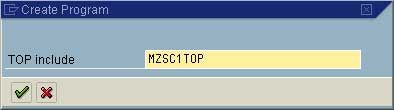
Click on the Continue icon. You are taken to the ABAP/4 program attributes screen.
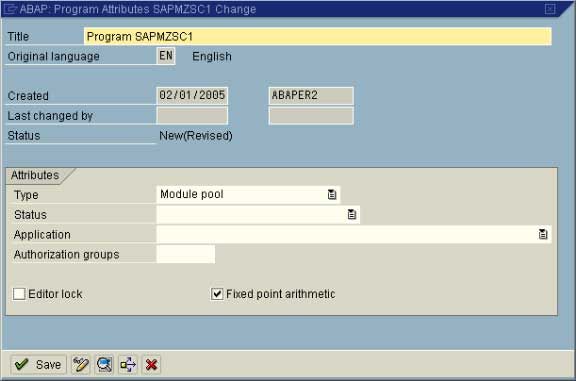
Enter a description for the program and Click on the Save icon to save the attributes. Click on Back icon to come back to your development class initial screen. From the Program list, double click on the program you created.
Next let us associate a transaction code for our report. To create Transaction Code, place the cursor on the program name and click in the Create icon the toolbar.
From the pop dialog box that you get, click the radionbutton Transaction and enter a Four-character transaction code in the adjacent field. And click on the Create icon at the bottom of the screen.
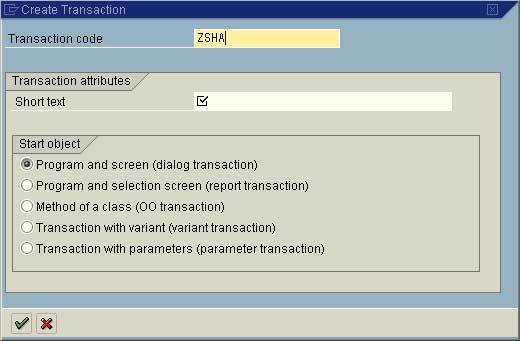
For our example, we ‘ll create a Transaction Code by the name ZSHA. Select the Transaction Type as Dialog Transaction and click on the Continue icon. You will taken to the Create Dialog Transaction screen
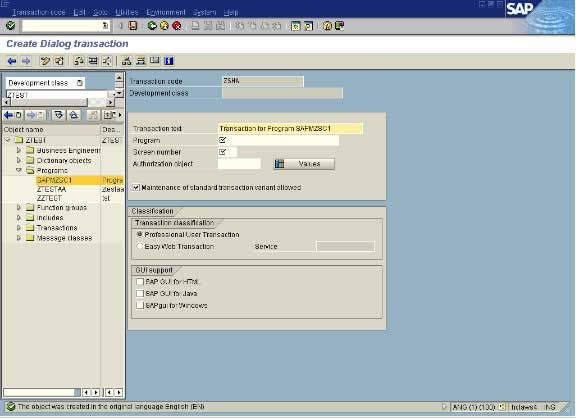
Enter a meaningful description for the Transaction code (eg. ‘Test Transaction Code’), the program name (eg. SAPMZSC1) and the Starting Screen number (eg. 1000) of your dialog transaction. After entering the above inputs, click on the Save icon. Click the Back icon. Now should see the Transaction code created.
Now let us create the screens.
Select the program and click on the Create icon on the toolbar. Click the Screen radionbutton and enter the screen number (eg. 1000). Click on the Create icon at the bottom of the screen. You will taken to Screen Painter: Change Screen Attributes screen.
Enter the following information:
- Give a meaningful description
- Specify the Screen Type (in our case Normal)
- Next Screen number (if you have some more screens in your dialog transaction)
After entering the above, click on Save and the then Generate icon on the toolbar Click on the Back icon. The Screen that you created will be included in the objects list your program.
Now the next step is to create the GUI statuses for the screen(s).
Select your program and place the cursor on it. Click the Create icon on the toolbar. From the Program Objects screen, click the GUI Status radiobutton, and enter a GUI Status name in the adjacent field. Click on the Create icon on the bottom of the screen. In the pop up screen that you get, enter the meaningful GUI Status Short Text and also select the Status Type. After the entering the short text, click on the Continue icon. Now you will get into Maintain Status (i.e. the Menu Painter) screen. Scroll down to ‘Freely Assigned Function Keys’ section.
Here you can assign functionality to some of the function / combination of keys. In our example we have assigned ‘DISP’ – Display, to Fucnction key F5.
After you assign a function to a function key, press the Enter key.
You can also assign an icon to your function keys, goto Extras - Propose icons. Propose icon for our function key is glasses.
Click on the Create Link button. The icon gets associated with our function key ‘DISP’. The icon will be displayed next to the function key.
Similarly, you can add your functionality to the function keys. We will add more later.
Once you define your function keys you can add them to the application toolbar and Standard tool bar as per your requirement.
In our example we will add the functionality ‘DISP’ to both the toolbars as also to the Menu option.
Now Scroll up the Standard Tool Bar and Application Tool bar to specify which all options / functionality, you would like to form as part of your GUI status (in our case GUI1000). For our example, we have included ‘DISP’ on the appliction toolbar. Also we have included the function ‘CANC’ to the application toolbar and ‘SAVE’, ‘BACK’, ‘EXIT’, ‘CANC’ and ‘PRIN’ on the standard toolbar. After each function code, press the Enter key. Let us add the ‘DISP’ functionality to the menu also.
Scroll up to the top of the screen.
Enter the title of the Menu (e.g. GUI1000 Menu Bar). Enter the title for the Menu bar options. We have three Menu Bar options Flight Data, Edit and Goto To add the options to the Menus, double click on each one of them and enter the function key codes that you want to be part of the menus.
In our example, we have included the function code ‘DISP’, that we created as part on the Menu Flight Data.
After you have finished with the task of creating and assigning the function codes, Save and Generate your entries. Press the Back icon to come back to the Development class intial screen. Now you should see the GUI Status that you created as part of the objects list under your program.
Now let us create a GUI Title.
Select your program and click on the Create icon Click on the radiobutton GUI Title and enter GUI Title code in the field adjacent to it. Click on the Create icon. Enter a meaningful title and click on the Save icon on the screen. You will be taken back to the development class initial screen. The GUI Title object should be available as part of your objects list under your program.
Now let us design the screen.
Select the screen number that you created and double click on it. In our case double click on the screen number 1000. Click on the Change icon on the application toolbar. The screen will change to Change mode. Now double click on MODULE STATUS_ (eg. MODULE STATUS_1000).
Note: Do not remove the comments at this point.
The system will prompt to create PBO modules STATUS_1000. Click on ‘Yes’ The system will ask you for creating the PBO module. Do change the defaults.
Click on the Continue icon. You will get a warning box Click on the Continue icon. Change the lines SET PF-STATUS 'xxxxxxxx' and SET TITLEBAR 'xxx', by replacing the ‘xxxxxxxxx’ and ‘xxx’ with your corresponding GUI STATUS and GUI TITLE (In our example, GUI1000 and ZSH) respectively under MODULE STATUS_1000 OUTPUT. Also remove the comment mark ‘*’ from these lines. Check the syntax and then Save the code. You should not have any errors. Click on the Back icon.
Now remove the comment from the line MODULE STATUS_ (eg. MODULE STATUS_1000) Click on Save icon
Now click on Fullscreen button on the application toolbar to enter into the Screen Painter Screen. After you click the button, the screen painter will be launched. If the screen is in the display mode, click on the Change icon to switch to change mode. You can now add the elements to your screen.
You can add elements such as Text Boxes, Push buttons, Radio buttons, fields from the dictionary etc. To add text boxes, push buttons, radio buttons etc., click on the corresponding button on the icons panel on the left side of the screen and drag it on the screen and in the Text Name are, you can enter the name for the object.
For example right now, we have included a Text Box and entered the text ‘SAP IDES INTERNATIONAL AIRLINES’. You can also add fields from the ABAP/4 Dictionary tables. Click on the Dict /Prog fields button on the toolbar. Enter a table name and select the fields from that table to be placed on your screen. These fields will be used to display the data from the table. Press the Enter icon and then drag and place the fields on the screen. We have taken the fields from the table SFLIGHT. You can change the display attributes of each field. For our purpose, only Airline Carrier and Flight Number are going to Input fields and the other fields are going to be used for Display purpose.
Right now all of them are in Input/Output mode. To change the display attribute of the field, select the field and click on the Attribute button on the toolbar. Click on the Program tab under attributes section and uncheck the Input field check box.
Now the field Flgt date becomes a display field. After the setting is done, simply close the attributes window.
Repeat the process for remaining fields. Now the screen would look like as below. Now Save and Generate your work so far. Click on the Back icon to come out of the screen painter screen for the time being. Now you ‘ll add a special field called OK-CODE as part of your field list.
If you get back to the development class initial screen then double click on the Screen number and then Change the screen to Change mode. To add the special fields OK-CODE, click on the Field List button on the application toolbar. Enter the field OK-CODE at the end of the fields list. Save and Generate the entry. Click on the Back icon to come out of the Fields list screen. You will come back to the development class screen. Double-click on the Screen number. If the screen is in Display mode then, change it to Change mode by clicking on the Change icon on the toolbar.
Now double-click on MODULE USER_COMMAND_ (eg. MODULE USER_COMMAND_1000). You will be prompted to create PAI modules USER_COMMAND_ (eg. USER_COMMAND_1000) for the screen. Click on ‘YES’. Keep the defaults and click on the Continue icon. You will get a Warning box. Click on the Continue icon.
You have to write your processing logic / code here now under MODULE USER_COMMAND_ INPUT (eg. MODULE USER_COMMAND_1000 INPUT) We will write the following code, we will retrieve one record at a time for a given input of Flight Connection Id and Flight Number.
Case OK-CODE. WHEN ‘DISP’. CLEAR OK-CODE. SELECT SINGLE * FROM SPFLI WHERE CARRID = SPFLI-CARRID AND CONNID = SPFLI-CONNID. WHEN SPACE. WHEN OTHERS. CLEAR OK-CODE. SET SCREEN 0. LEAVE SCREEN. EndCase.
After you finish writing the code, do a syntax check on it. You will get some error message since you have not completed the data declaration part. You have to do the Data Declaration in the TOP INCLUDE part. Double click on the OK-CODE in your code.
Click on ‘YES’. Click on the Global Data Field since OK-CODE is a global field. Similarly if you want to declare tables, internal tables etc., then click on the respective radiobuttons. Select the appropriate radiobutton and click on the Continue icon. And to do the Data Declarations Save your changes. Click the Back icon to come back to the Edit Program screen. Now once again Save and do a Check on your program. Do this process till you remove all the errors. After you have removed all the errors, Save the code. Click on the Back icon to come out.
Now remove the comment on the line MODULE USER_COMMAND_Save and Generate your program now. Click Back icon to come back to the development class initial screen..
Now let us test the program. Select your program and click on the Test/Execute icon. Select the Direct (the defalut) radiobutton and click on the Continue icon.
Now you get the screen that you designed with the fields, which you had included, in the screen. You also check the Application Toolbar where you will find only the icon, which you had associated with your function code ‘DISP’. You have only one icon there because you had entered only one entry in the Application Toolbar area of your GUI STATUS. Also check the Menu Bars and the Window Title (i.e. the GUI Title).
Now let us enter some data and check. Let us enter for example, Airline Carrier = SQ and Flight Number = 026 and see if the code that we wrote works. After entering the inputs, click on the Display icon on the application toolbar or select Display from the Flight Data menu. If everything is okay then the data for the other fields will be retrieved from the table and displayed.
THIS WAS A SIMPLE USE OF THE SCREEN PAINTER AND MENU PAINTER.