This tutorial is designed to help users successfully use the HANA studio to create various SAP models, packages and Views.
By the end of this tutorial you will learn:
- What does the Quick Launch Pad of the HANA studio look like and the functions it supports.
- How to create the Calculation View for the SAP models?
- How to create the Analytic View for the SAP models?
- How to create an Analytic Privilege?
The first step will be to connect to the HANA system and then to the Hana studio.
After entering the HANA studio, go to the modular perspective with which the following 4 functions can be carried out:
- Creation of different models and packages
- Data provisioning
- Deployment
- Preview
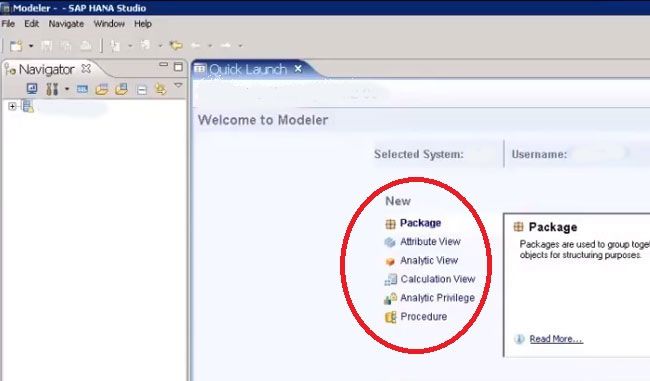
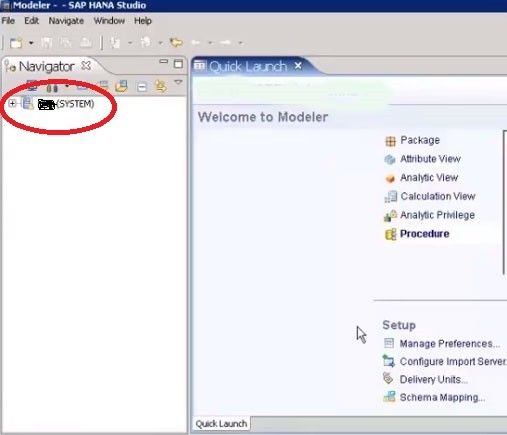
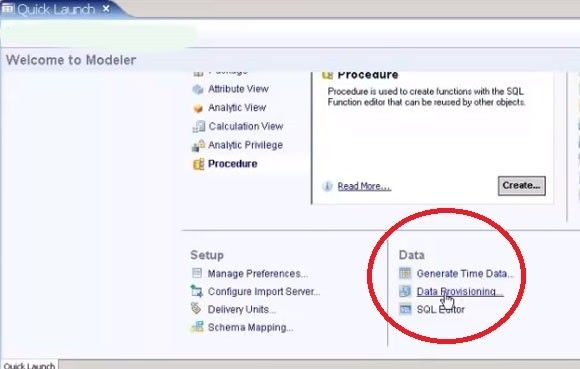
The moment you connect to the HANA Studio, a quick launch pad comes up where you get the following features:
- How to create a package
- Attribute view
- Analytic view
- Calculation view
- Analytic privilege
- Procedures
On further scrolling down you will see how the different setups that are mostly used for data services can be done.
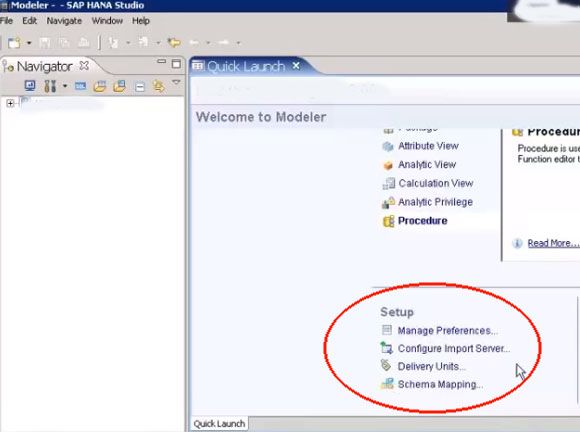
For example: It shows how to manage preferences, how to configure import server, how to define delivery units, how to create schema mapping.
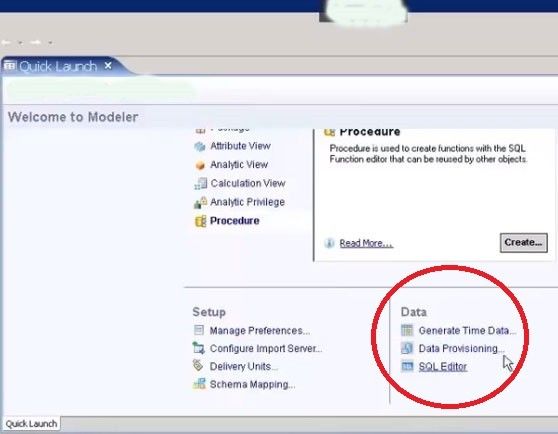
Next comes Data Review where you can carry out the following functions:
- Create Time Dependency Data
- Do Data Provisioning
And most of it is done using SLT.
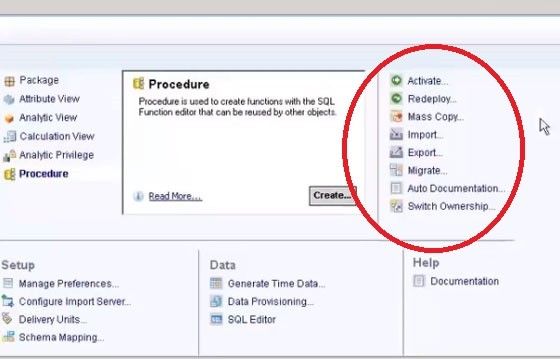
Then at the top of the launch pad you can see the following function keys:
- Activate
- Redeploy
- Mass Copy
- Import
- Export
- Migrate
- Auto Documentation
Therefore, these are the different functions that are available in the Quick Launch View that will help in doing the modelling in an easier way.
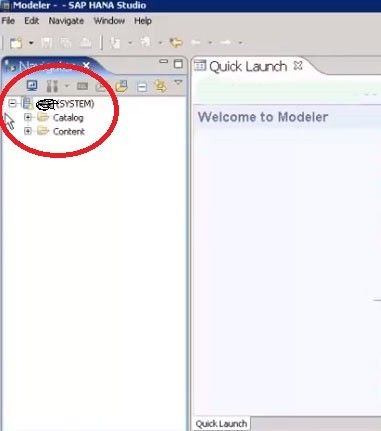
On the left side of the window is a bar which is known as the Information Perspective where you can see the connected HANA systems.
You can even connect multiple HANA systems available in your landscape and manage it from this bar in the left.
For Example:
If it is the XX System that is connected, on expanding, you will see two sub categories;
Catalog and Content
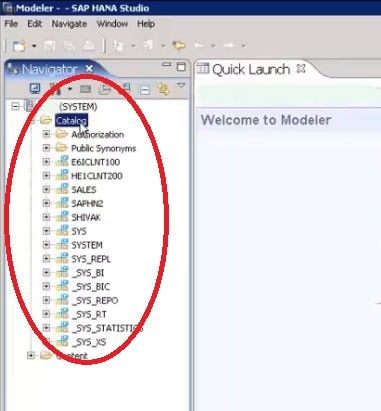
The Catalog section comprises of the database objects. It also has various Authorization objects like Users, Roles, Public Synonyms.
The Key users like SYS_BISYS_BIC, SYS_REPO, SYS_STATISTICS etc. are also under this tab of Public Synonyms in the Catalog section and these form the major schemas. (A Schema is a different component where you can group all your database objects in ne compartment.)
The Content section has the different packages that have been created.
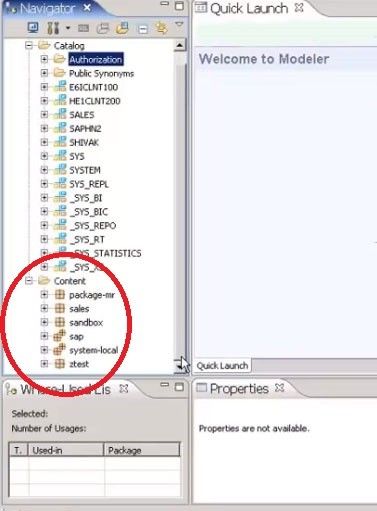
Within the packages there are different types of uses like Attribute view, Analytic view, Calculation View, Analytic Privilege.
Next we will see how the synchronization is achieved using SLT controllers as well as learn what are SLT controllers.
The First step here would be to click on the Data Provisioning tab.
When you click on this Tab you will get to see the source system which is sending the data to SAP HANA.
Here you can also see which schema and which system is connected to the HANA database.
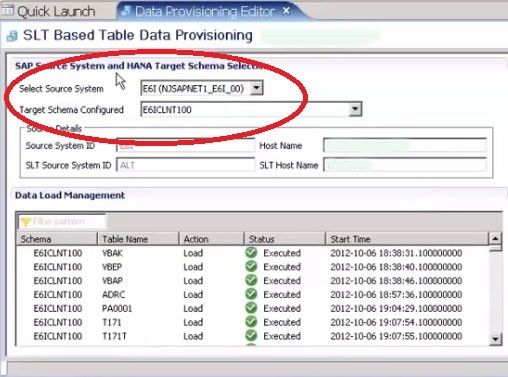
At the bottom of the page you will get to see the schemas that are being replicated, the tables that are getting replicated and their progression status too.
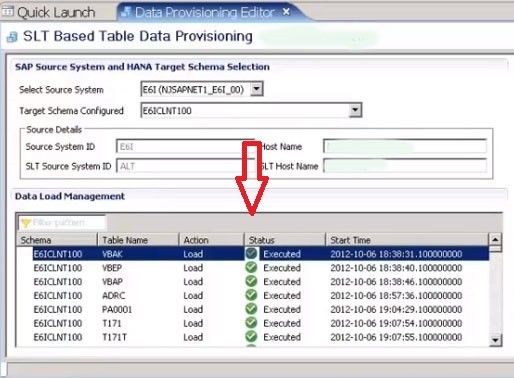
Here, you also get function keys which enable you to load and replicate tables as well as stop, suspend or resume replication of tables.
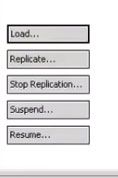
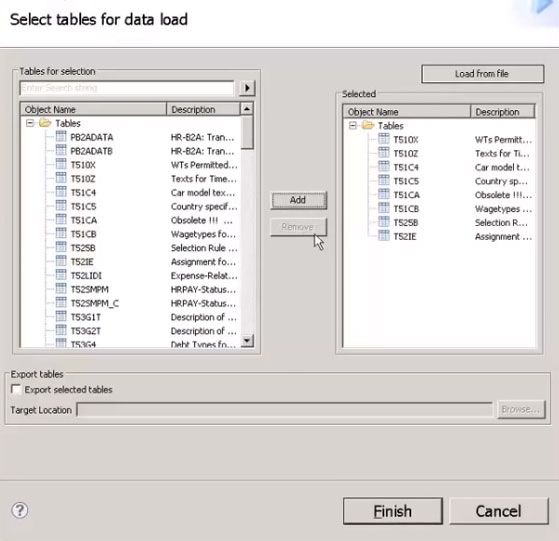
Let’s suppose that we need to load to table. So this is how we will go about it:
- Click on Load (This opens up a list of all the Tables available under the particular schema)
- Now select the Table that you want to replicate.
- After selecting the tables that are not being replicated, click on Add and then click on Finish to begin replication.
Another function that can be carried out using this tool is Defining a New Replication:
Steps for Defining a New Replication:
- Select the Source system
- Select the table that you want to replicate using the filter given in the Data Load Management window.
Now that the components of the Quick Launch Pad and replication scenarios are clear, let’s shift our focus towards building the models.
Building the Models:
The following three different models are available:
1.Attribute View: They are the master data models or the dimension tables in the legacy VW.
.jpg)
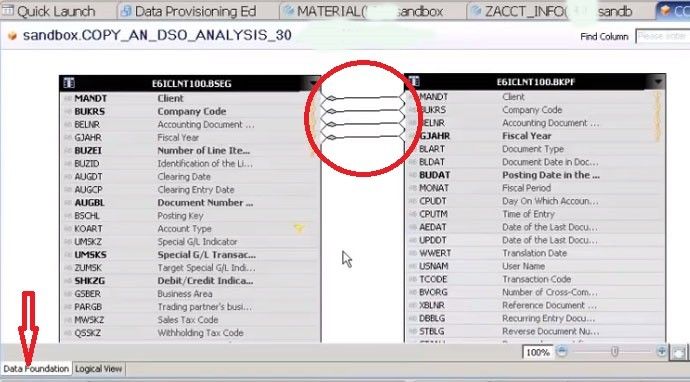
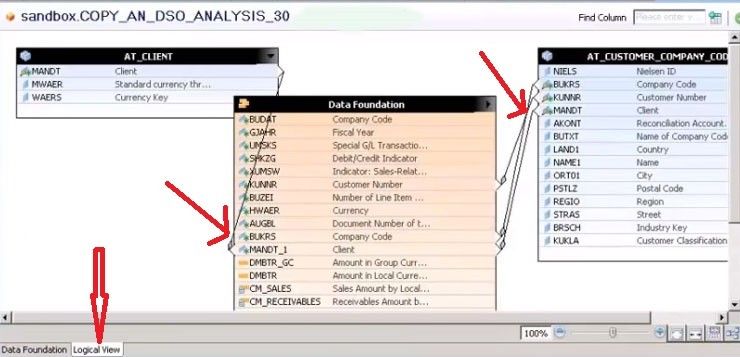
2.Analytic View: They are basically the fact tables and dimension tables. If you click on a particular Analytic view you will see the following:
Under the tab Data Foundation view: Here you get to see columns that are connected.
Under the tab Logical View: Here you get to see how the data foundation tables are connected to the dimension tables.
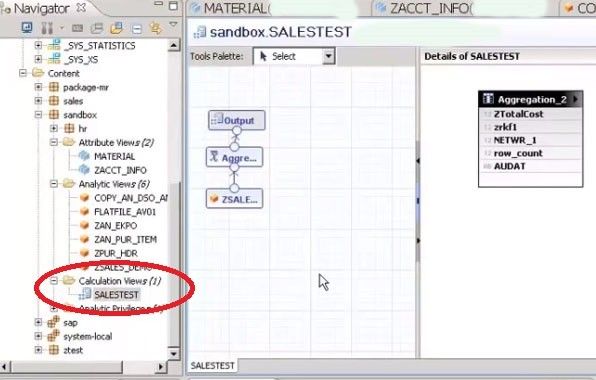
3.Calculation View: You can do all your complex calculations defined in this tab.
The Analytic Privilege is next and it controls access to the analytic views.
Creating an Attribute View:
You can follow the example of 2 previously before creating Attribute Views, one being Material and the other ZACCT_INFO.
In this there are two tables that have been presented with a very simple attribute view with just 2 joints created.
With this you can create Calculated Attribute View as well as Hierarchies Attribute View.
Read Next SAP HANA Tutorial