In this SAP tutorial, the users will learn what is SAP t-code F110 in SAP ERP and step by step procedure to run an Automatic Payment Program in SAP via t-code F110.
What is the Automatic Payment Program (F110)?
The Automatic Payment Program (APP) is a SAP FICO function that automates the processes in accounts payable and receivable. The functionality recognizes invoices that are supposed to be paid based on certain user-defined criteria and then processes them in large numbers.
The F110 is a t-code for automatic payment run in SAP ERP. The Automatic Payment Run system helps the SAP user easily keep track of invoice status. An SAP user can send payment notices to vendors: informing them that payments have been processed.
Advantages of Using Automatic Payment Program
- Efficiency: Automation of payments ensures lesser manual work, making the staff available for other activities.
- Accuracy: By introducing predefined criteria errors typically made during manual data entry are reduced drastically.
- On-Time Payments: APP functionality makes sure that payments are made on time thus creating good relationships with vendors or even getting discounts for early payments.
- Cash Flow Management: It optimizes the cash flow by strategically scheduling the payment according to the user needs
Key Features of the Automatic Payment Program
- Selection Criteria: The APP defines parameters like due date, vendor/customer, and minimum/maximum payment amount to identify invoices for processing.
- Payment Proposal: The system generates a proposal listing invoices that meet the criteria. Users can review and adjust the proposal before finalizing it.
- Payment Execution: Once the proposal is approved, APP creates payment documents and posts them to the general ledger.
- Payment Media Generation: The APP can generate various payment media like electronic transfers or checks, streamlining payment delivery.
Configuration and Use
When configuring and using the Automatic Payment Program, certain configuration steps are needed to be performed. This includes defining parameters such as payment methods and rules for selecting banks using SAP t-codes like FBZP. The actual payment run is then started by using t-code F110; this means that specific steps have to be followed to execute a successful payment run after initiating it.
How to Setup APP?
The steps for configuring the APP are:
- First, set the payment method per country
- The next step is to set the payment method per the company code
- Now setup all company codes
- Next setup paying company code
- Now configure bank determination
- At last assign payment method to vendor account
How to Run Automatic Payment Program?
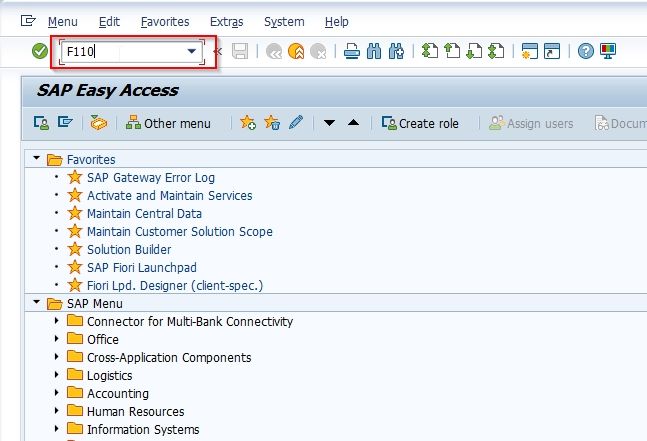
Execute the t-code F110 in SAP Command Field
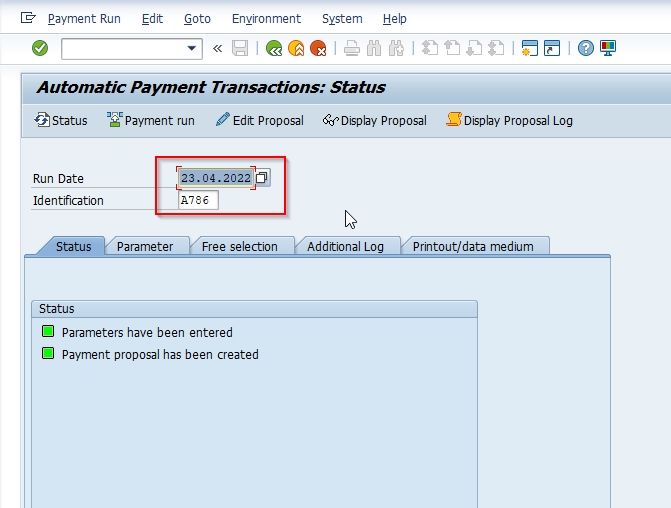
Next on the Automatic Payment Transactions: Status screen enter the following fields;
- Run Date: Enter the date for transaction torun
- Identification: Enter a four-character alphanumeric code that will be used to identify the payment program
Now under the Parameter tab specify the following fields
- Posting Date
- Company code
- Payment method
- Next payment date
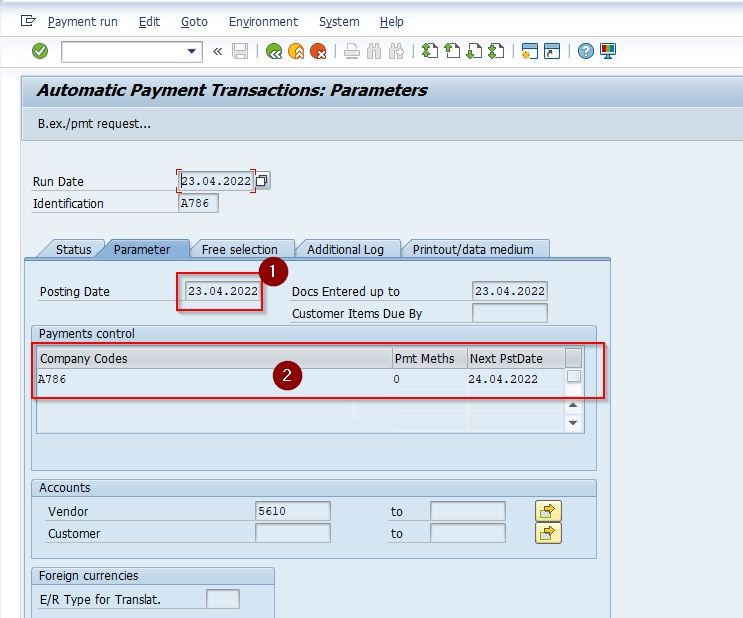
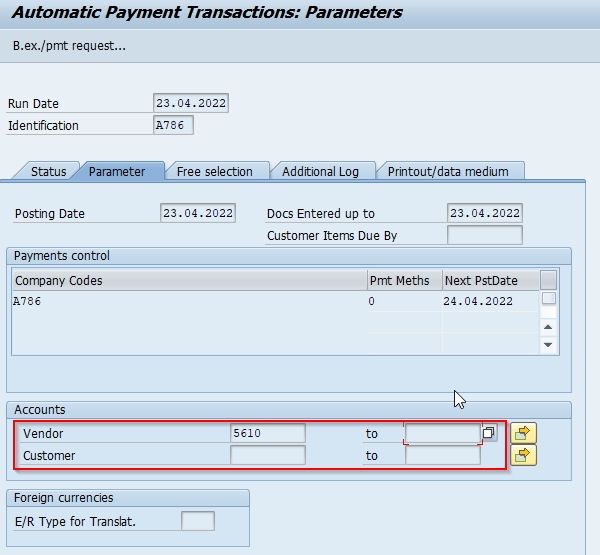
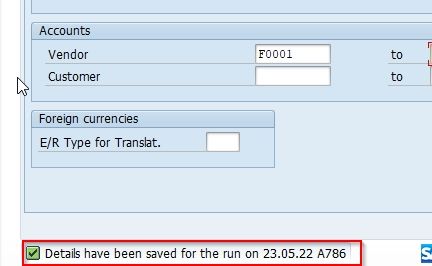
Also, specify the range of vendors that you want to select items for payment.
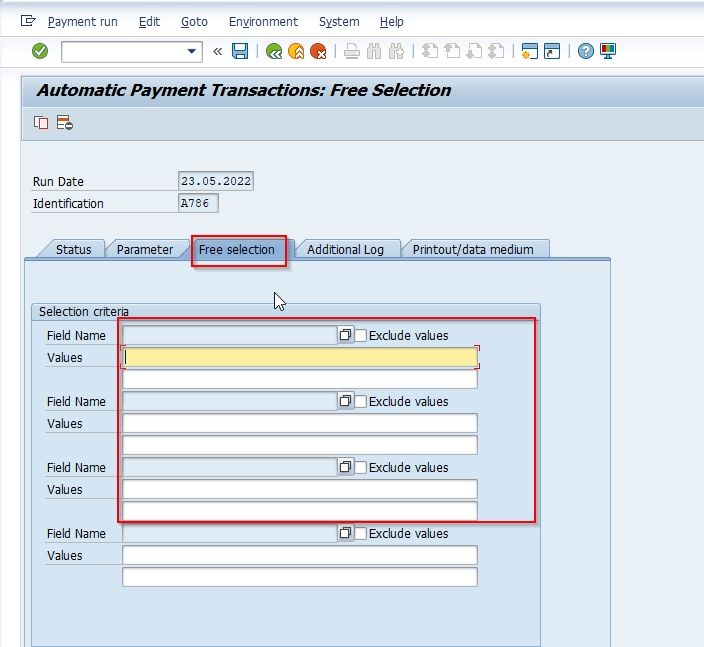
Now in the Free Selection tab, you can select additional filter parameters. This tab is optional and not usually used therefore you can skip this section.
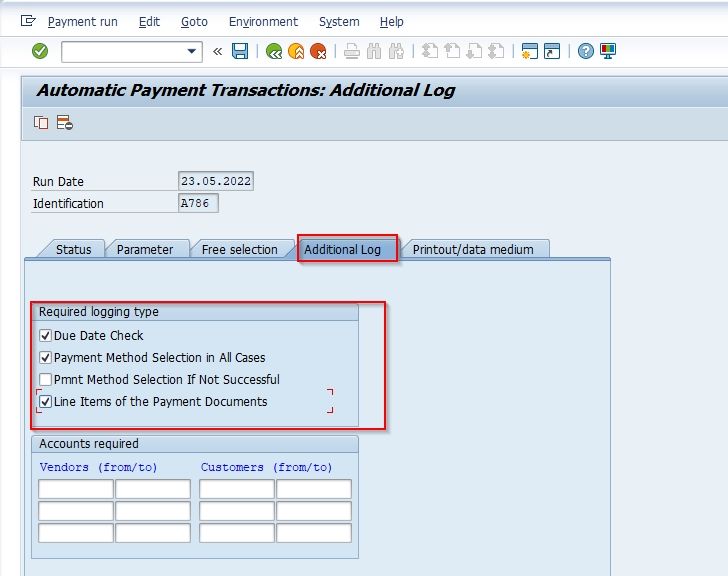
- Now go to the Additional Log section and tick all the checkboxes except for the third one
- Also under the Account required heading enter the range for vendors that you are paying.
Note: These additional log configurations are used when running a payment proposal.
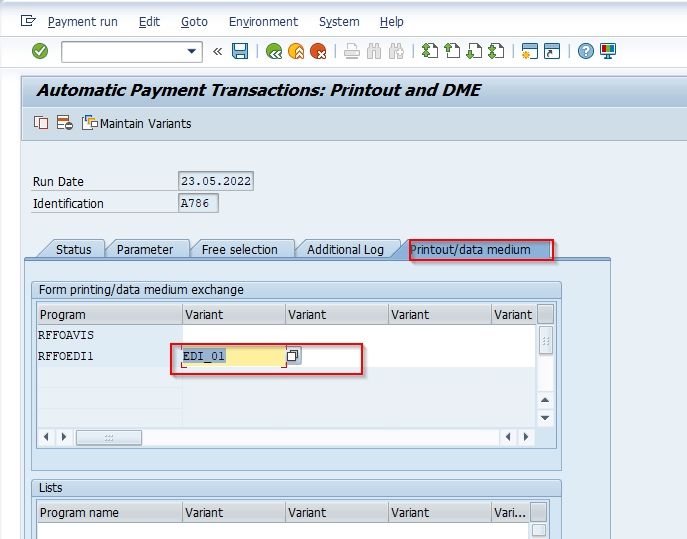
Next, go to the Printout/data medium tab and choose a variant against a program. This variant specifies the format of the checks to be printed.
Click the Save icon to save all the configuration
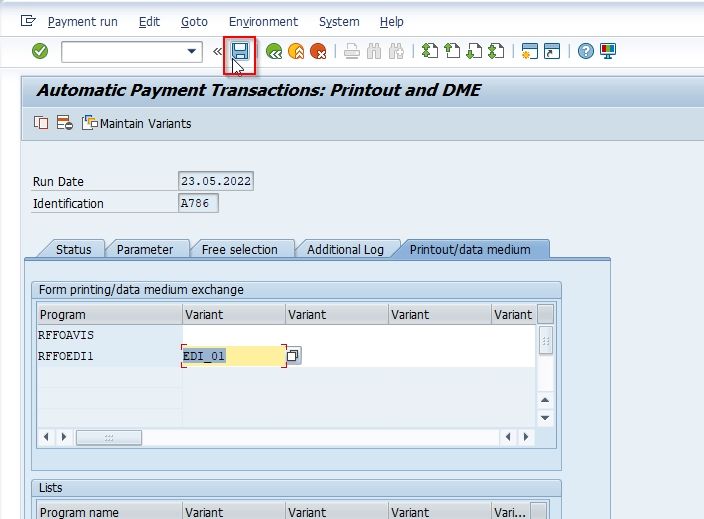
A message Details have been saved will be displayed on your screen.
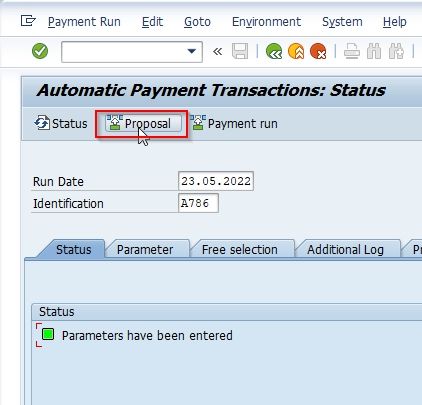
You have successfully completed the first step of the payment program. Now you need to create a proposal run.
To start the proposal run click on the Proposal button as shown in the image below:
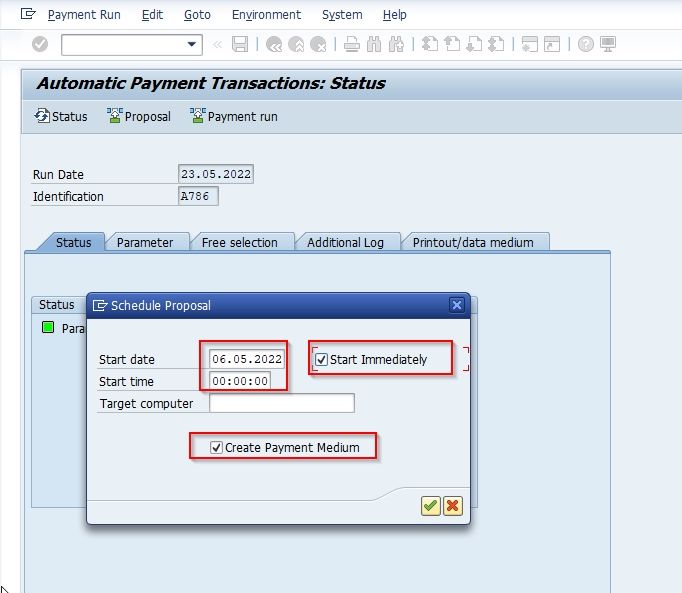
Now the system will ask whether you want to create it immediately or you want to schedule it for a time in the future.
Enter the Start Date and Start time to schedule the payment or check the Start Immediately box to run it immediately.
Note: Also tick the checkbox Create Payment Medium.
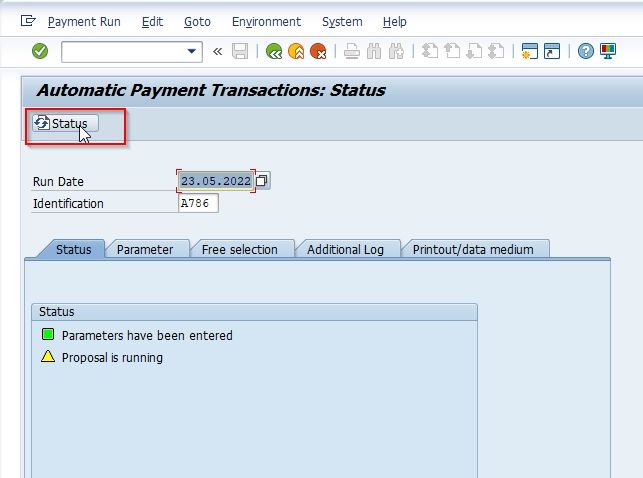
The user will notice an additional status saying that a Proposal is running on the Status tab ass shown in the image below.
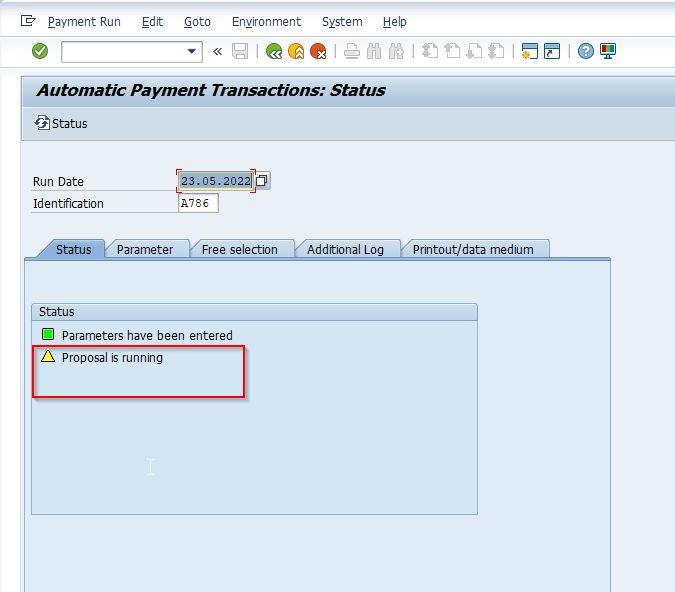
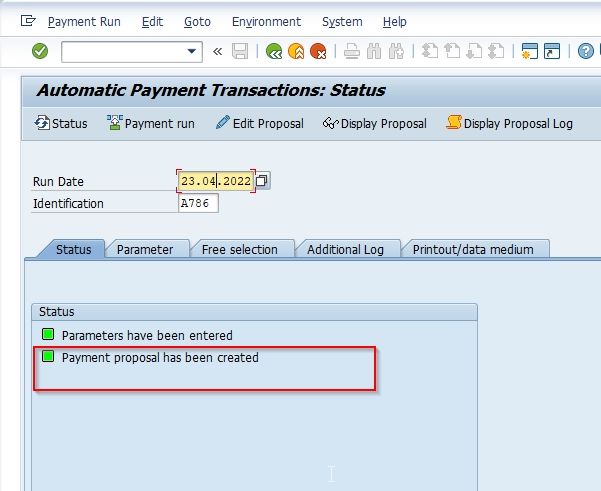
In order to change the status to green click on the Status button
The user has now successfully completed the second step of the payment program
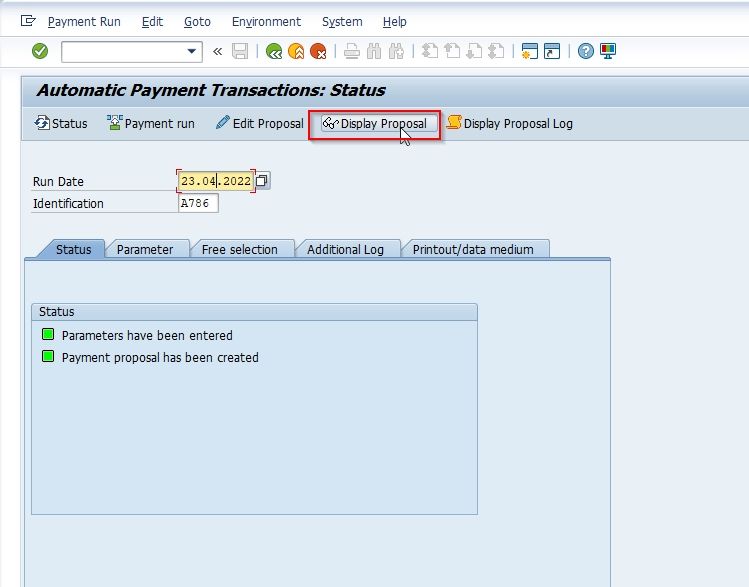
To view the proposal that has been created, click on the Display Proposal icon as shown below.
You will see the list of all the vendors that you have included in the payment proposal. The vendor with a red indicator has been blocked by the system.
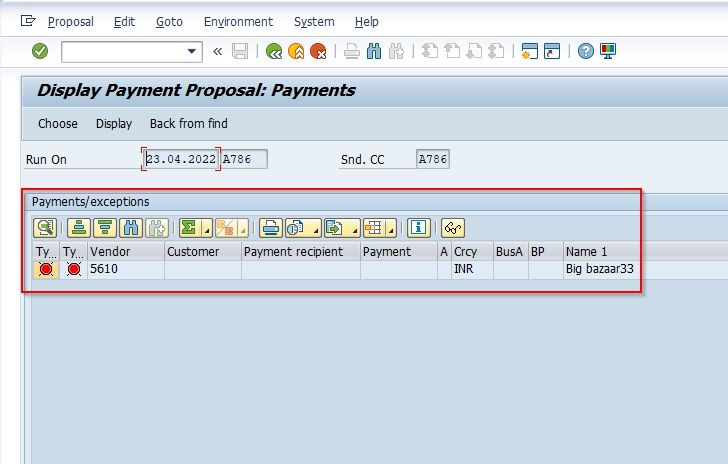
Next, to see all the line items picked for a vendor double click on the vendor number.
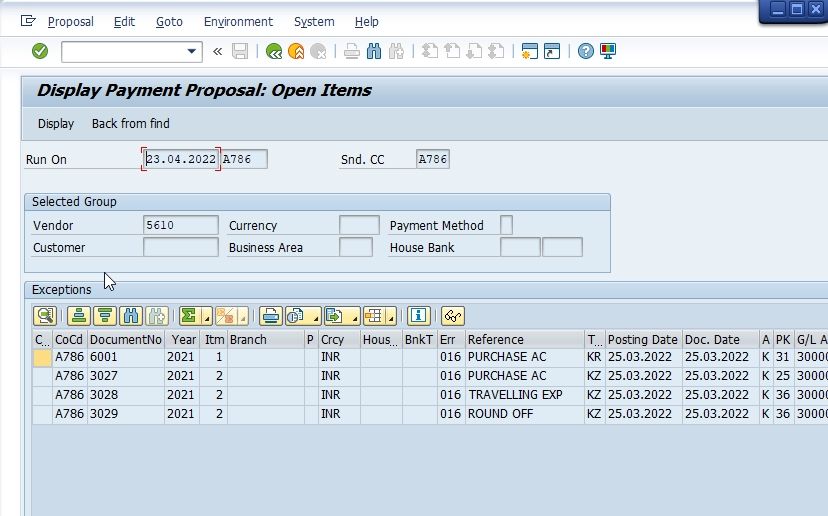
In order to check why an item is in red, double click on the item. The system shows the reason why an item is not going to be paid and is red.
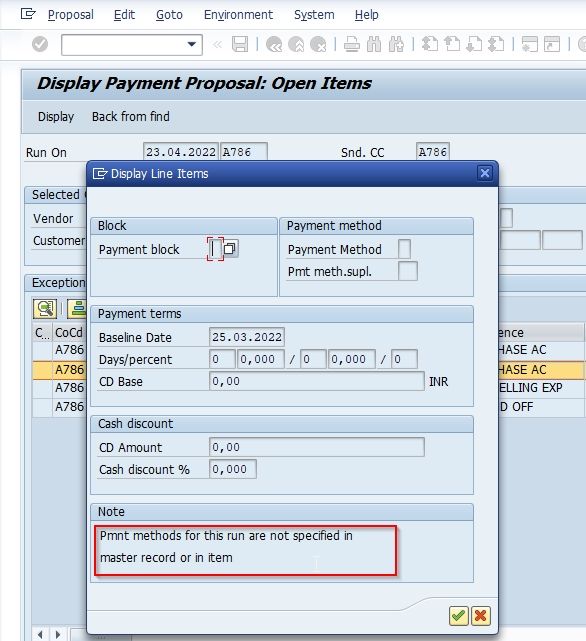
Resolve the issue.
Once the issue is resolved click the Payment Run button to start the payment run as shown in the image below.
.jpg)
Now schedule the payment run to start later or start it immediately as done in the case of proposal run
.jpg)
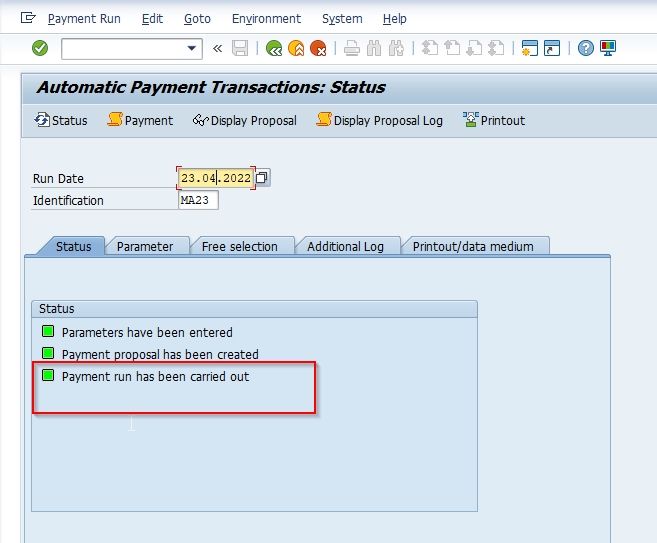
Once you press the Enter button, the payment run will be started and a new status will be added to the status bar. Click the Status botton to make the status green.
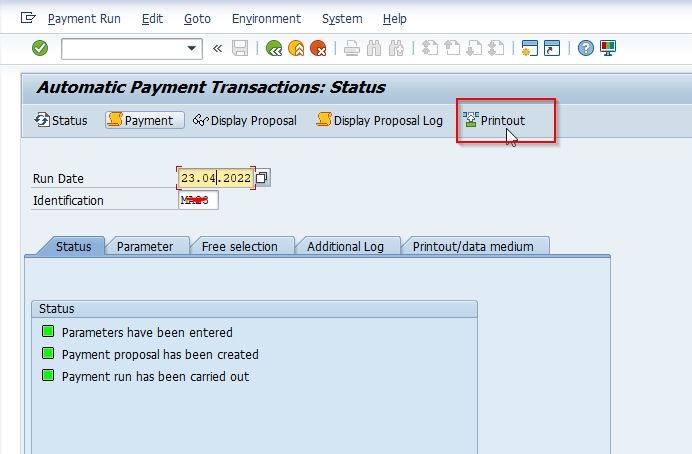
The posting order has been generated and completed. Now the user can view paid items and the items put in the exception list. To do that click on the Payment button as shown image below.
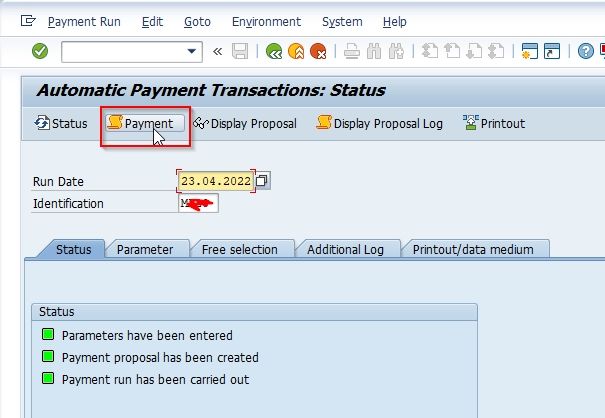
Now you will see all the items that have been paid
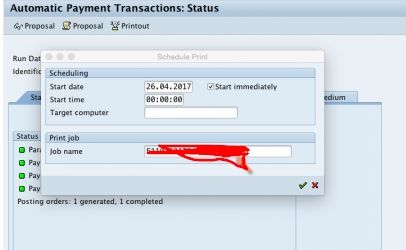
Next to print, click on the Printout button as shown below in the image.
Now select immediately or schedule to print.
Note: Remove the question mark at the end of the job name and replace it with the identification code for your payment program.
You have successfully run an Automatic Payment Program in SAP via t-code F110.